Buying an M1101 Military Trailer
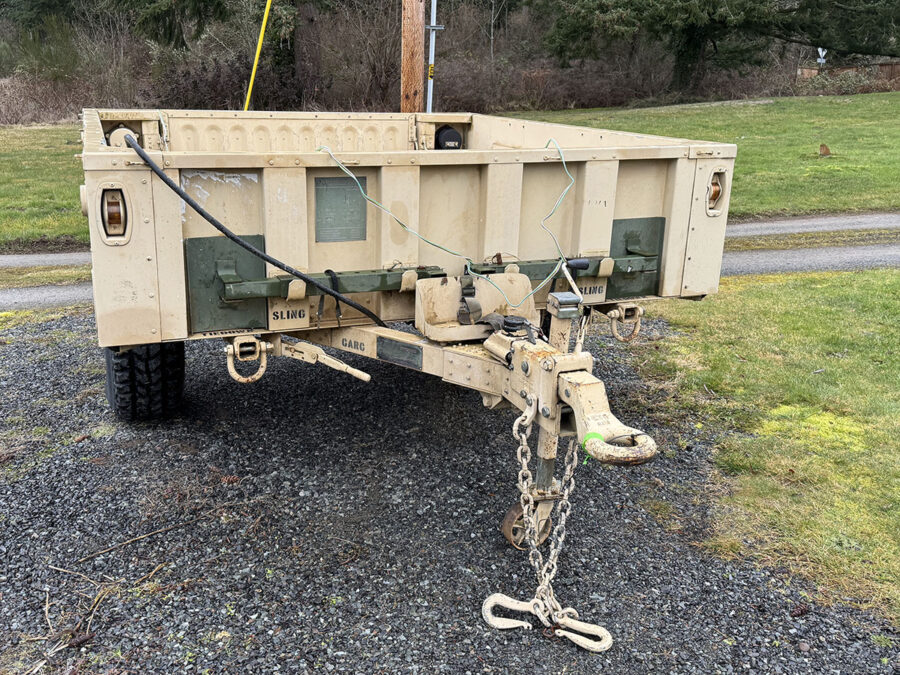
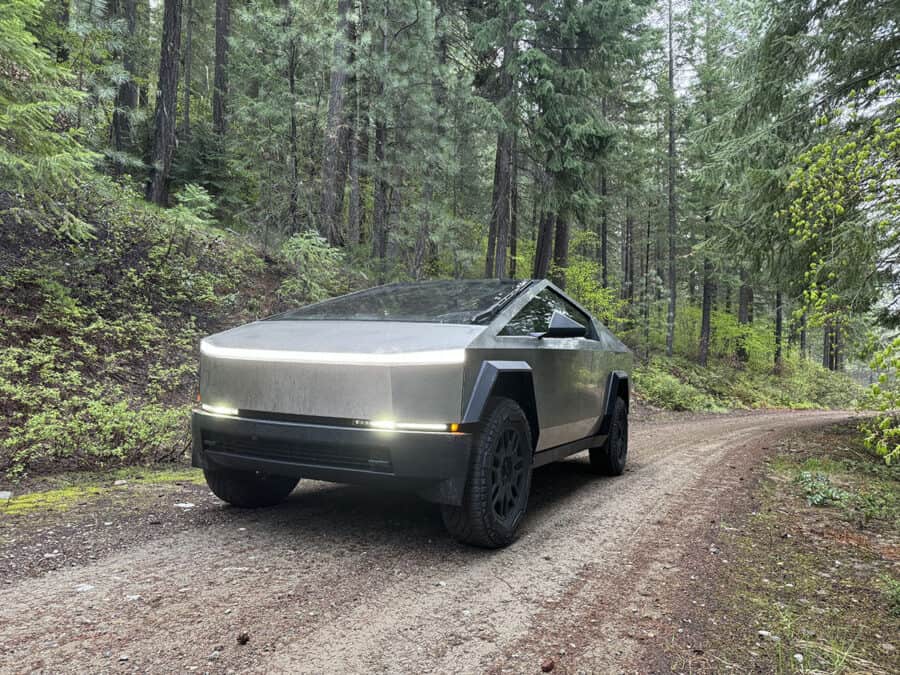
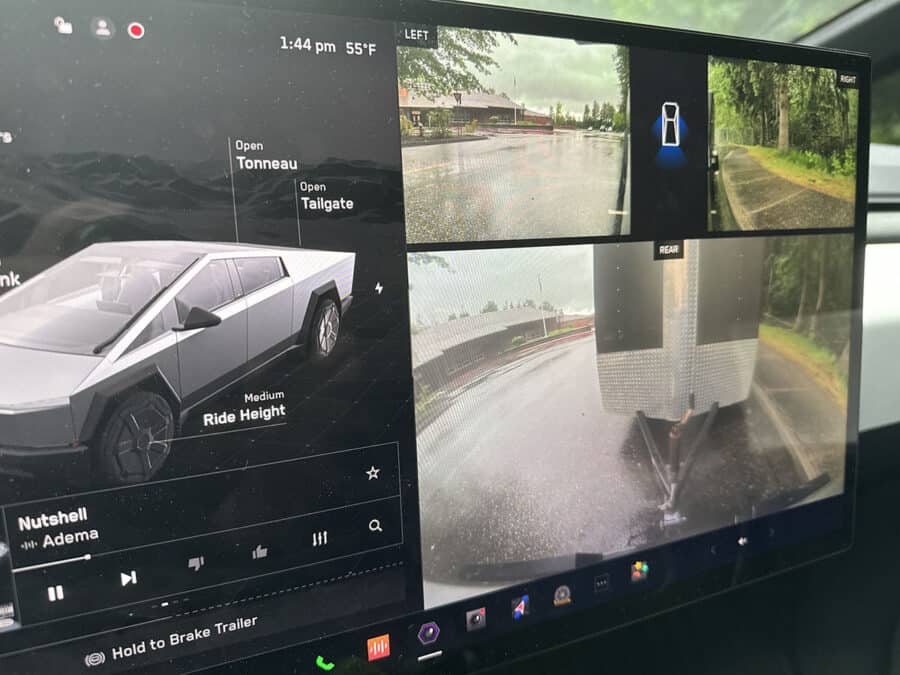
I just picked up my own M1101 from an auction in Oregon. I’ve been looking for one of these trailers for about 4-5 months, but unfortunately, most of them tend to be up for military auction in states like Colorado, Texas, Pennsylvania, and Florida. I missed out on the first one that popped up in Oregon, and when a second became available, I ended up increasing my budget—more than I initially wanted to pay. However, it was still cheaper than what I was finding on other sites such as Craigslist. I also received quotes to have one shipped out of Colorado to Washington state, but those were coming in at $1,300+, quite a bit more than I was willing to pay for shipping. Picking up my M1101 from Auction Most of the trip to get the trailer included temperatures in the low to mid-20s, never ideal for driving an EV, let alone while towing a trailer and also going through mountain passes with elevation climbs. I ended up charging 6 different times on the trip, 4 of which were on the way back. Despite the challenges, the journey was worth it, and I’m excited to share more about this versatile trailer and its potential for civilian use. A Brief History of the M1101 (and M1102) The M1101 trailer was developed as part of the military’s modernization efforts to provide a durable and highly mobile transport solution. Designed to be towed behind the Humvee (HMMWV), it features an aluminum body, independent torsion suspension, and a high ground clearance. These features make it ideal for rugged terrain, allowing it to traverse areas that standard civilian trailers may struggle with. The M1101 has a maximum payload of 2,740 lbs and an empty weight of around 1,460 lbs, making it both lightweight and capable. The M1101 military trailer, originally designed for the U.S. military, has become an increasingly popular choice for civilians looking to build capable off-road and overlanding setups. With its robust construction, high payload capacity, and versatility, the M1101 provides a solid foundation for a variety of outdoor applications. Whether it’s for hauling gear, setting up a mobile campsite, or supporting off-grid adventures, this military-grade trailer is proving its worth in the civilian world. Where to Buy Military Trailers If you’re looking to buy a military trailer at auction, one of the most common places in the United States is going to be govplanet.com. There will also be some of the more common marketplaces for private party sales such as Craigslist, FaceBook MarketPlace, etc. Sites like Trailer Trader may also have postings from time to time. I’ve used Listshopper which pulls results from multiple sites, but at least for these trailers, they primarily tend to be Craigstlist results. M1102 The trailer also comes in an M1102 variant. The consensus online appears to be that they are in fact identical except for the data plate. The M1101 and M1102 are designed for specific Humvee’s, and based on those configurations, some Humvee’s had a higher towing capacity. The data plate merely states which trailer (and load capacity) can be used with a give Humvee. Both models are sold at military surplus auctions. Civilian Uses and Overlanding Conversions Many outdoor enthusiasts and overlanding fans have embraced the M1101 as the base for their adventure trailers. Its large cargo area and high durability make it ideal for customization. Some of the most common civilian uses and modifications include: Rooftop Tent and Rack Systems Many owners install custom rack systems to support rooftop tents, providing an elevated sleeping area away from ground moisture and wildlife. These setups often include annexes for additional covered living space. Solar and Off-Grid Power Solutions Since overlanding often involves extended stays in remote locations, solar panel setups are a popular modification. Mounted either on the trailer itself or on an adjustable rack, these solar setups provide power for refrigerators, lighting, and charging electronic devices. Cooking and Storage Solutions M1101 conversions often include slide-out kitchen setups with propane stoves, storage drawers, and fold-down workspaces. This transforms the trailer into a fully functional base camp for extended trips. Pressurized Water Systems Some owners incorporate water storage tanks with pressurized systems, allowing for showers, dishwashing, and other conveniences while off the grid. These setups often include filtration systems to make water safe for drinking. Challenges and Modifications for Civilian Use While the M1101 is a fantastic trailer, converting it for civilian use does come with a few challenges. 24V to 12V Lighting Conversion Since the M1101 was designed for military vehicles, it comes equipped with a 24-volt electrical system. Most civilian vehicles operate on a 12-volt system. Therefore, most use-cases, the trailer’s stock lighting needs to be replaced or adapted. Many owners swap out the military lights for standard 12V LED lights or use voltage converters to integrate the trailer’s system with their tow vehicle. Height Considerations Another issue with the M1101 is its height. Designed to sit level behind a high-clearance Humvee, the trailer is often much taller than civilian tow vehicles. This can lead to issues with tongue height and towing stability. Many owners modify the trailer by fabricating a drop hitch (either keeping the lunette ring or going to a ball setup), using a raised hitch, and/or swapping out the 37-inch military tires for smaller off-road tires, or even going to other means to lower trailer to a more manageable height. After hooking up, there’s clearly a substantial forward rake with my setup. I ordered a 6″ raised hitch for now and also plan to go down to 35″ tires to match the Cybertruck. Conclusion The M1101 military trailer is a rugged, durable, and highly adaptable platform for overlanding and off-road adventures. While it requires some modifications for civilian use, its ability to handle rough terrain and support extensive customization makes it a favorite among outdoor enthusiasts. Whether it’s for camping or simply hauling gear, the M1101 provides a military-grade solution for any adventure. Step 1 of buying the trailer and
Buying an M1101 Military Trailer Read More »