I Turned a 55-Gallon Oil Drum and Cable Spool Into an Industrial Table
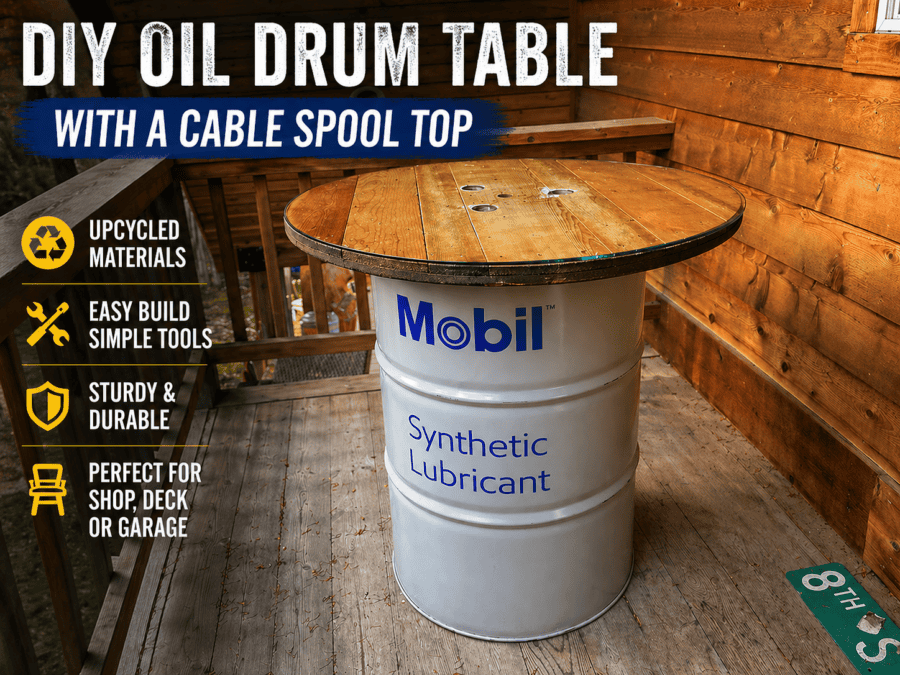
In this project, I built a DIY oil drum table using a reclaimed 55-gallon Mobil barrel and a wooden cable spool. What started as a couple of scrap pieces turned into a solid industrial-style table that works great for a deck, shop, or garage. Combining a cable spool table top with a steel drum base creates a unique piece of upcycled barrel furniture that’s both durable and functional. If you’ve ever thought about building a 55 gallon drum table or tackling a barrel table DIY project, this is a simple place to start. The Finished Table Here’s the finished table after mounting the cable spool top to the 55-gallon oil drum. For this build, I used a Mobil synthetic lubricant drum, which adds to the industrial look. Instead of repainting it, I kept the original finish to preserve that authentic feel. The wood cable spool top pairs nicely with the barrel, and the round glass piece on top gives the table a smooth, finished surface while protecting the wood underneath. Materials Used How I Built a DIY Oil Drum Table Disassembling the Cable Spool The cable spool I picked up had three square-shaped nuts holding the bolts in place. After removing those nuts, the spool completely disassembled, making it easy to separate the top piece that would be used as the tabletop. Measuring and Centering the Barrel Next, I measured the diameter of both the barrel and the spool top to figure out the correct positioning. Once I had the center point, I flipped the spool top over and drew a circle on the underside to mark where the barrel would sit. This made it much easier to align everything correctly before drilling. Marking and Drilling the Barrel Using the existing holes in the spool, I marked three hole locations onto the barrel. After marking those positions, I drilled through the barrel to create mounting points. Because drilling metal can create sparks and heat, it’s important to make sure the barrel is completely clean and free of any oil residue before doing this step. Installing Threaded Inserts To secure the tabletop, I installed threaded nut inserts directly into the barrel. This allowed the bolts to thread into the barrel without needing access to the inside, making the assembly much cleaner and easier. Mounting the Cable Spool Table Top With the inserts installed, I used three 3-inch stainless steel ¼-20 bolts to secure the spool top to the barrel. Once tightened down, the oil drum table felt very solid with no wobble. Using a steel drum as the base gives this industrial table DIY project a lot of stability compared to lighter builds. Adding the Glass Top The cable spool already came with a round glass top, which I placed over the wood surface. This gives the cable spool table a smoother finish while protecting the wood from wear. Finishing the Industrial Barrel Table At this stage, the 55 gallon drum table was complete and ready to use. The spool had already been stained when I bought it, but I may sand it down and apply a fresh coat of Varathane in the future. I also plan to spray a clear coat onto the barrel to preserve the original finish and prevent rust while keeping the industrial look intact. Why Cable Spools and Oil Drums Work So Well Cable spools are great for DIY furniture because they already provide a solid, round tabletop made from thick wood. Pairing one with a steel drum creates a strong base, making this type of upcycled barrel furniture both sturdy and unique. What Should I Build With My Next Barrel? I still have one more 55-gallon drum and haven’t decided what to build with it yet. Some ideas I’m considering: If you have ideas for projects using a 55-gallon drum, leave them in the comments below.
I Turned a 55-Gallon Oil Drum and Cable Spool Into an Industrial Table Read More »