When you’re decking out your mountain cabin, it’s natural to want something that captures the essence of the outdoors and your adventurous spirit. If you’re looking for an unconventional and cost-effective way to make your deck stand out, consider using snow skis as deck balusters. This creative approach combines rustic aesthetics with a touch of adventure without breaking the bank. In this blog post, we’ll guide you through the process of repurposing snow skis as deck balusters and explain how this option can save you money compared to traditional balusters.
Enclosing Our Deck
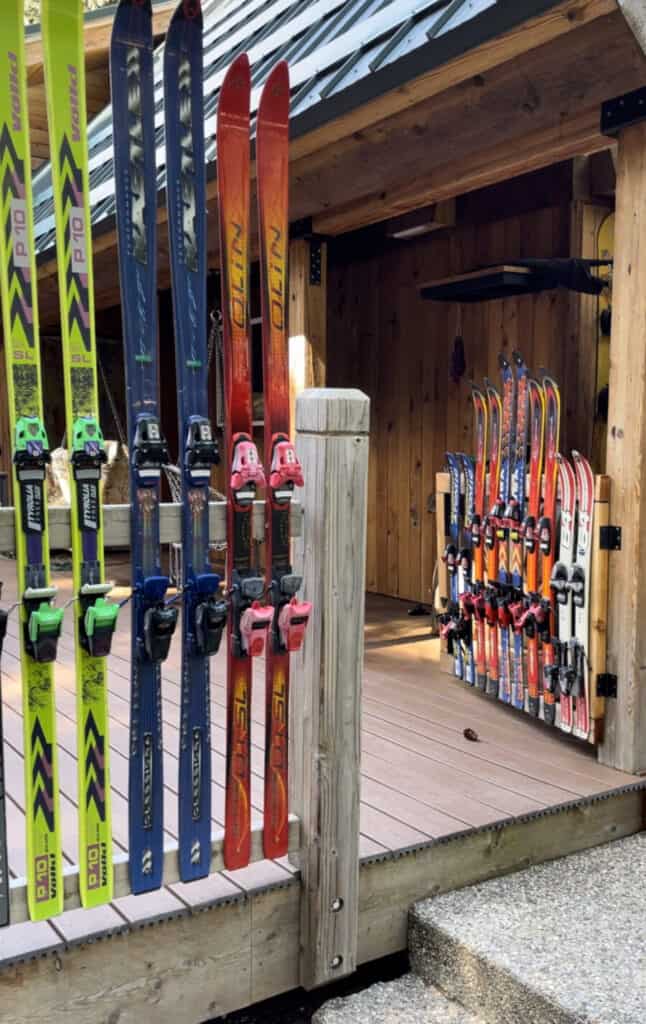
My wife wanted to fully enclose the deck at our cabin so that we could have our dogs there too without worry of them running off. The previous owner built a large, 900sf deck, but it wasn’t fully enclosed. With how expensive wood has gotten, I chose to go with a more creative approach by upcycling old snow skis that might wife picked up. We were able to get some of the skis for free at our neighborhood “free” day where neighbors put items they no longer want at the end of the driveway. She also found several pairs at Goodwill for only $1-2 when they had the clearance sales.
Why Snow Skis?
Using snow skis as deck balusters is a brilliant idea that brings a touch of winter magic to your mountain cabin year-round. Here’s why this approach is not only unique but also budget-friendly:
- Unique Aesthetic: Snow skis add a distinctive and eye-catching element to your deck, making it a conversation starter and giving your outdoor space a one-of-a-kind look.
- Recycling and Repurposing: This eco-friendly approach breathes new life into old or unused skis, preventing them from ending up in landfills. It’s a great way to contribute to sustainability.
- Cost-Effective: With the current price of around $4 for a mere 42″ cedar 2×2, going with used skis that were free or only $1-2 per pair is a significantly cheaper option. You can achieve a stunning deck makeover without breaking the bank.
Materials and Tools Needed
Before you get started, gather the following materials and tools:
- Snow skis (wooden or metal-reinforced)
- Horizontal cedar 2×4’s
- Exterior wood screws
- Drill
- Screwdriver or preferably an impact driver
- Measuring tape
- Saw (for cutting the cedar 2×4’s if needed)
Installation Steps
Follow these installation steps for your budget-friendly ski balusters:
- Measure and Cut Cedar 2×4’s: Begin by measuring the height of your deck railing and cutting the cedar 2×4’s to the appropriate length for your balusters. Keep in mind that by using used skis, you’re already saving money compared to traditional balusters.
- Attach the Skis: Position the skis vertically between the cedar 2×4’s, ensuring they are evenly spaced. Use exterior wood screws to secure the skis to the cedar 2×4’s. Some fiberglass skis are metal reinforced. In this case, you’ll need to pre-drill them.
- Finishing Touches: After attaching the skis, give them a thorough inspection to ensure they are securely in place.
- Maintenance: To maintain the beauty of your ski balusters, periodically inspect them for any loose screws or signs of wear. Depending on your location and climate, you may want to apply a protective sealant to the skis to prolong their lifespan. I’ll be looking to add a UV sealant to help prevent fading to ours.
Conclusion
Repurposing snow skis as deck balusters is not only a unique design choice but also a budget-friendly one. At the current price of cedar 2x2s, choosing used skis that were free or only $1-2 per pair is a much cheaper option that allows you to achieve a stunning deck makeover without breaking the bank. So, embrace the charm of ski-tastic deck balusters, save some money, and enjoy the outdoors in style!