A Winter Wonderland Adventure Right Out Our Door: The Unique Sledding Platform at Our Cabin
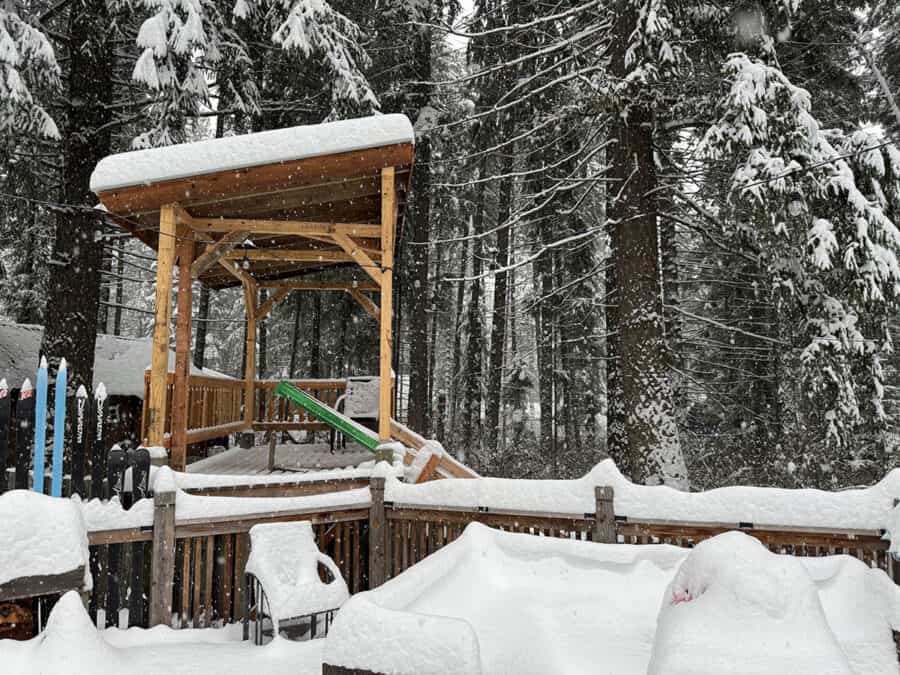
The previous owner of our cabin built a fairly unique sledding platform just off of the deck. Our cabin is located East of the Cascade Mountains in Washington state where we receive approximately 89″ of snow every year. The platform stands about 7 feet off the ground, fun winter activities for our family and friends when enough snow hits and we’re not out on the snowmobiling trails. Innovative Sledding Platform Design At its core, it boasts a unique design feature that makes it a true standout: a tilting “staging area.” This ingenious addition adds an extra layer of convenience to the sledding experience. Rather than trying to get the sled (and yourself) onto the slide, it tilts down to make it easy for the rider to get read. When a sledder’s weight shifts forward, the staging area tilts downward, propelling them down the slide and into a world of snowy adventure. Keeping the Snow in Place The use of 2×4’s in the slide not only keeps the snow packed but also prevents it from sliding down with the rider. This design choice, however, comes with its quirks, such as the tendency to accumulate pine needles throughout the year. It can also collect rain water. To combat this, a single drainage hole was drilled in each section, allowing most of the rain water to drain away (assuming the hole isn’t blocked by pine needles). I’ll have to work for ways to improve this later. Safety First (Well, Next After 2 Years) While exhilarating, the initial version of the platform raised some safety concerns for our family. We had worries about the absence of railings both on the slide, however, my wife later decided she wanted railings added to the platform itself. DIY Pallet Repurposing To address these concerns, I decided to repurpose some pallets for the build. We were able to get some 12 foot long pallets that used 4×4’s for the lower structure. I was able to re-use these to build up the framing to support some 2×4’s to mount railing balusters. This addition not only enhanced safety, but will also added a rustic charm to the structure. Current State and Future Plans Here’s a short video showing the first phase of the sledding platform and how the “staging area” functions: I still need to buy some cedar and cut additional balusters. The balusters I used came from the railing of one of the lofts, but it wasn’t enough. We may also consider adding a second slide later as well. I’m also going to build a roof, which we’ll cover next… Keeping the Snow Off (Adding a Roof) Our 13 year-old daughter suggested another addition: a roof above the platform to reduce the snow accumulation. Secondly, it would protect the platform from the elements, extending its usability throughout the year, our 7 year-old is already calling the structure her clubhouse. I’m trying to see if I can install the roof before the weather turns too cold, we’ll see how things go as I have other projects still on the list as well. UPDATE: I did get the roof built just before the weather turned too cold and wintery. I’ll update this section more soon. Here’s the railing balusters finished up: Conclusion: Our cabin’s sledding platform is a true testament to the creativity and craftsmanship of its previous owner. With its unique design, ongoing improvements, it’s a staple of our winter adventures, especially for our kids. As we eagerly anticipate the coming winter, we look forward to sled-filled days and nights under the stars with this incredibly fun sledding platform that has brought joy and excitement to our cabin. I’ll add more pictures and videos when we get our first decent snow accumulation of the season!