
The SylvanSport Go is a revolutionary pop-up camper that combines the convenience of a compact trailer with the functionality of a comfortable living space. Whether you’re a seasoned camper or new to the outdoor adventure scene, setting up your SylvanSport Go camping tent can be a breeze with the right knowledge and a few helpful tips. The entire setup should take about 10-15 minutes. It’s been said if it takes you longer than this, you’re doing something wrong. In this article, we will walk you through the step-by-step process of setting up your camping tent on the SylvanSport Go, ensuring a stress-free camping experience.
Note: I’ll be adding pictures to this post over the next couple of days and may split this into multiple posts to improve page download speed..
How to Raise the SylvanSport GO Tent Pod
- You’ll want to make sure to detach the GO from your vehicle and level front to back using the dolly jack.
- Next, level left and right using stabilizer jacks (BAL leveler may be necessary terrain is very unlevel). The jacks slide inward, then can be tilted down and into position.


- Now, remove the 4 pins to release the equipment rack.


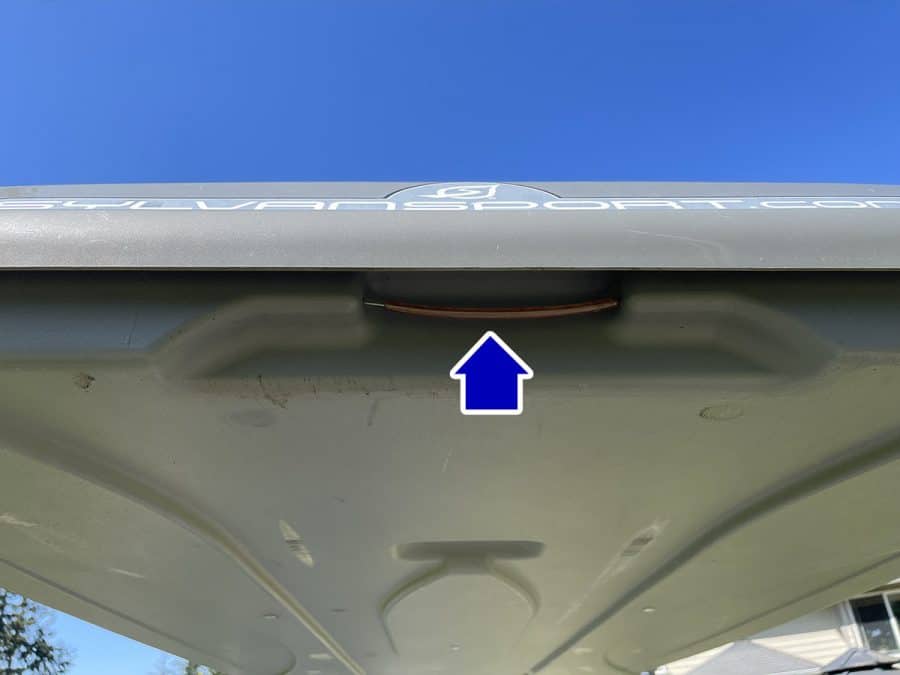
- Raise the equipment rack/tent pod with the crank handle. The crank handle is located on the underside of your storage pod lid.


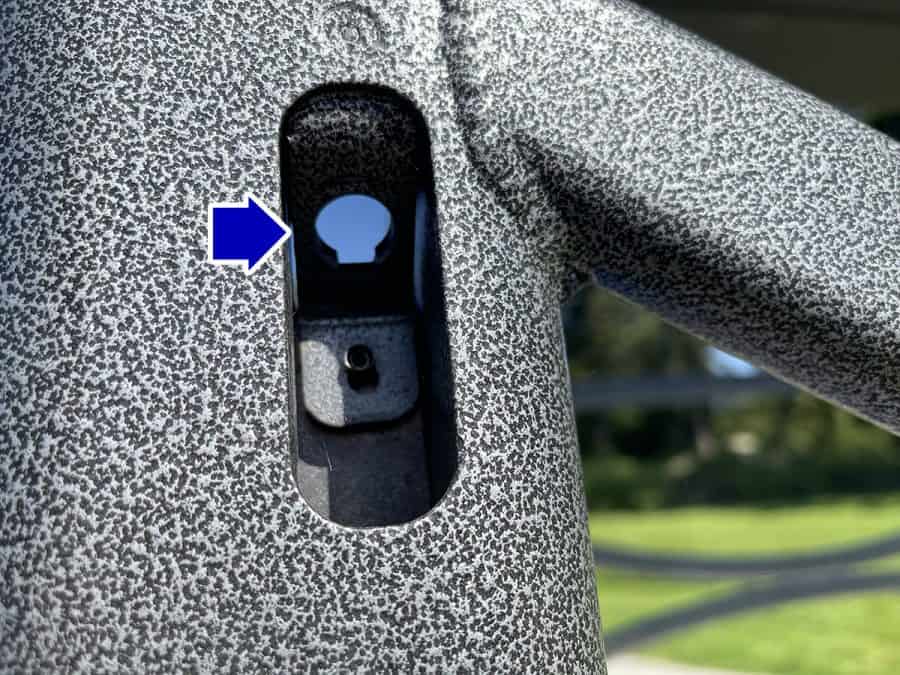
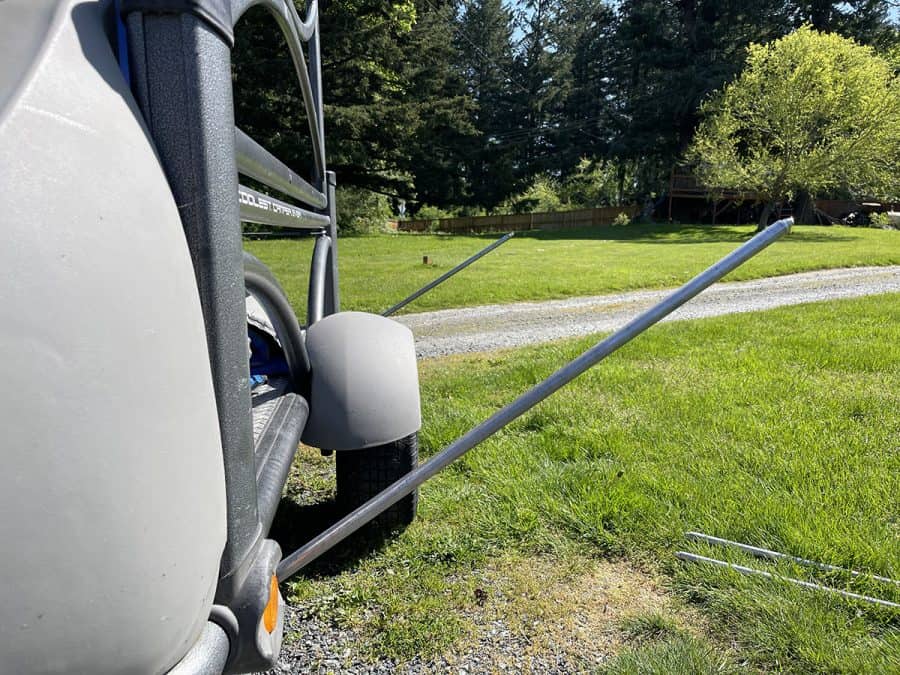
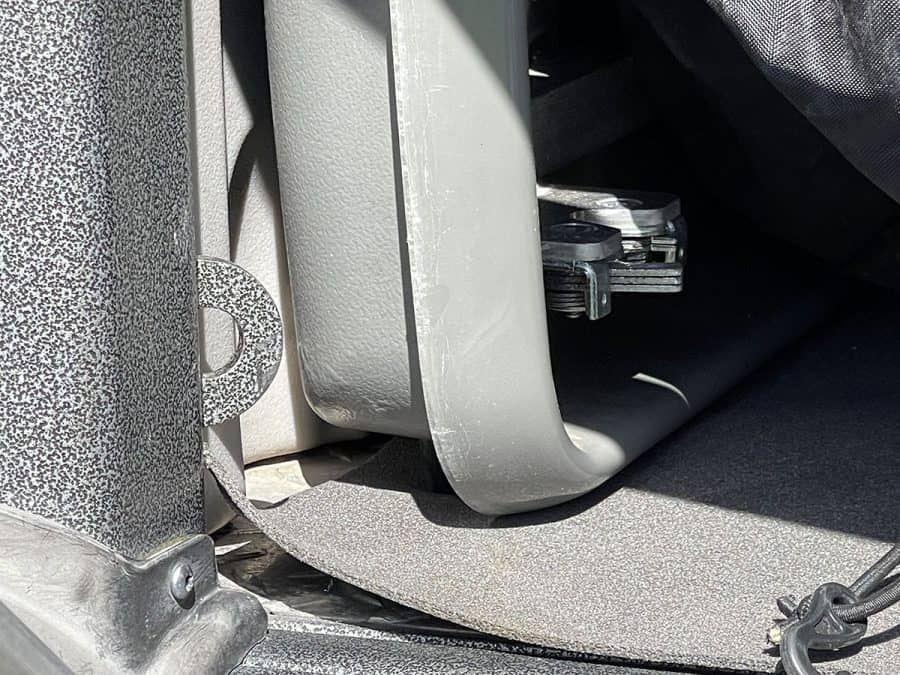
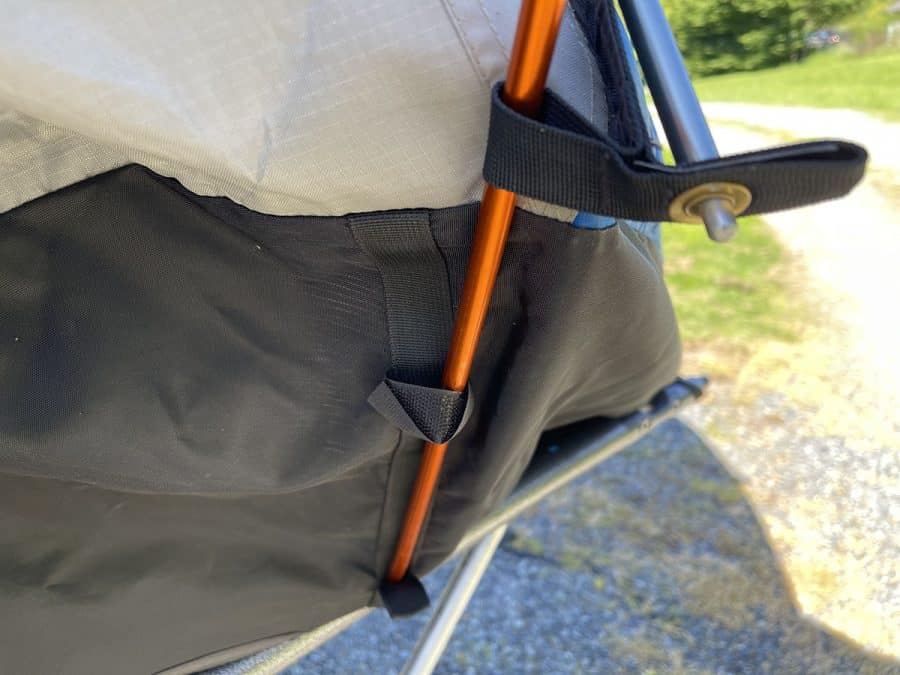
- Insert the 4 bed support poles into place. You’ll find “keyholes” like these where they mount (see picture below). These are located on the bed platform and lower frame.
- Remove the velcro straps around the front and back of the bed platforms.
- Grab the bed platform by the center weld, raise up and over the pins and insert the support poles into the platform. Twist them a half turn to ensure they are locked into place. Repeat on the other side.
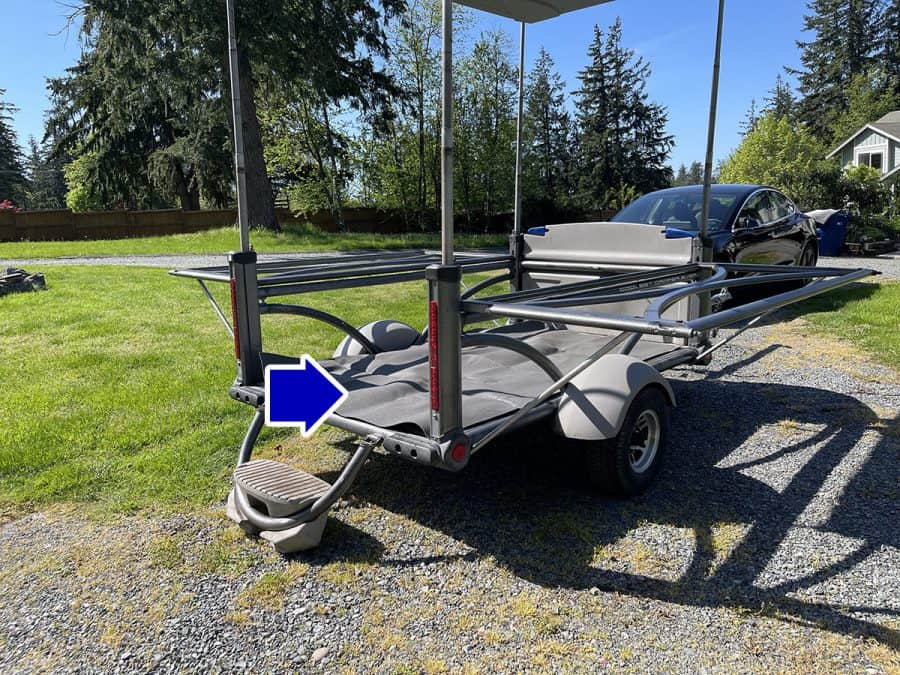
- Lower the step assembly/tag holder to convert into an entry step
How to Setup the SylvanSport GO Tent
- Once you completed the trailer setup, you’re ready to setup the tent. Place the Picnic Pad/Deck Cushion on the diamond plate deck. I’ve admittedly forgotten to do this before, it’s a lot easier to put it in place now before the rest of the tent is assembled and you find the pad at the bottom of your storage pod. Note to self, try to keep this toward the top of the storage pod.
- Next, you’ll open the bottom of the tent pod by pulling the cable release handle.
- Push the bottom of the tent pod all the way back until it is resting against the back of the storage box.
- Turn the crank handle counter-clockwise about 1 revolution to lower the rack (just enough to lock the back wall in place).
- Pull the 4 black nylon loops of the tent over the corner pins of the bed platforms.
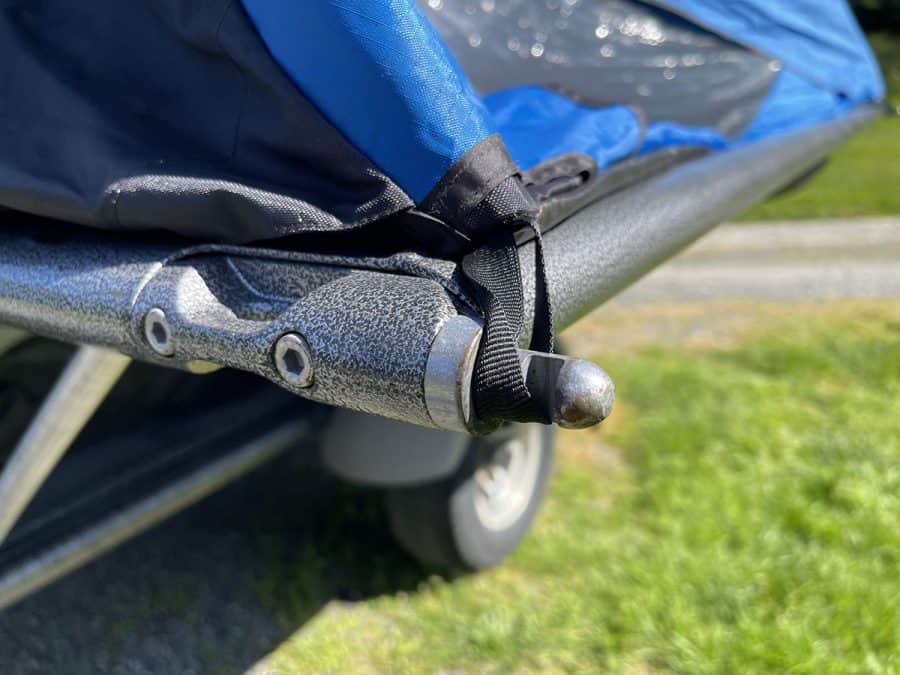
- Attach all of the plastic hooks to the GO frame to secure the tent. These will connect to the underside channel of the trailer frame.

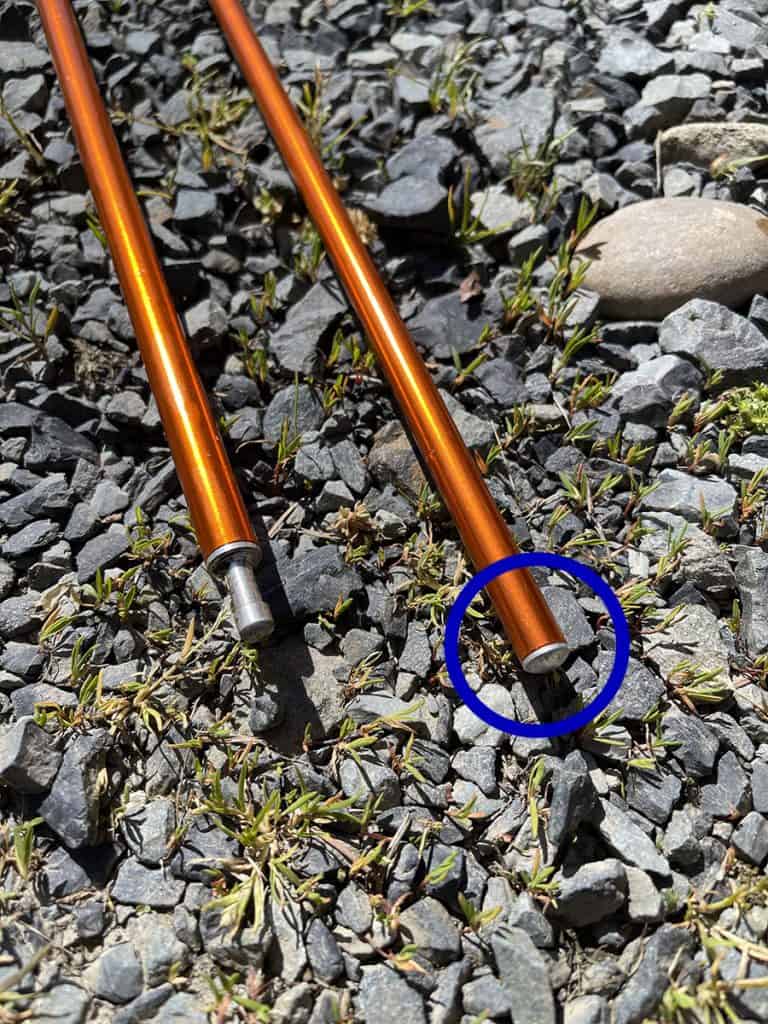
- Insert the 2 grey tent poles through the pole sleeves on both sides of the GO and insert the tips in the grommets.
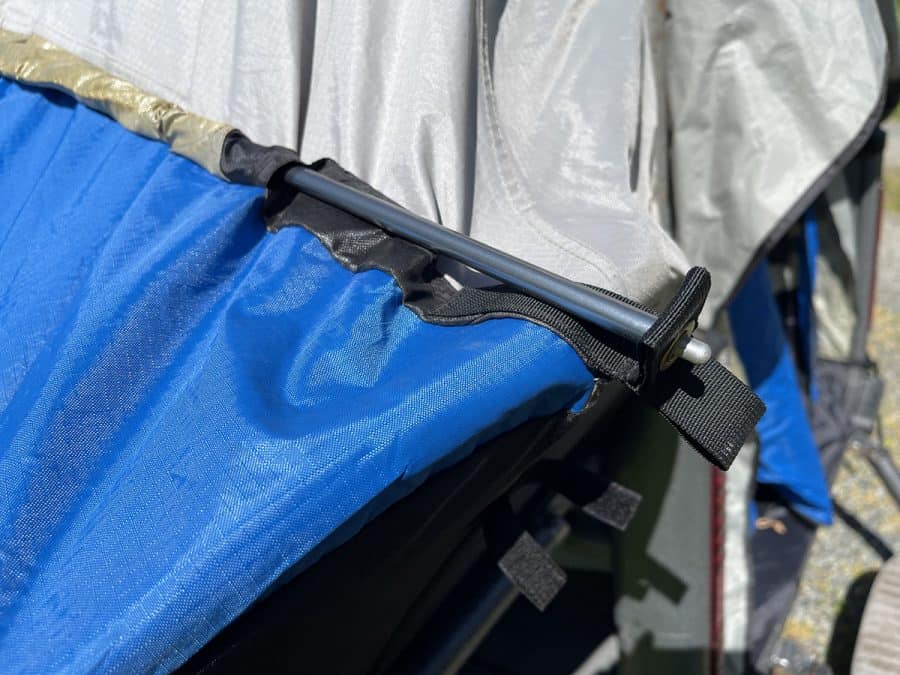
- Insert the 1 orange vestibule pole through the sleeve over the door and insert the tips into the holes in the bed platform.
How to Setup the Inside of the SylvanSport GO Tent
- Remove the 2 bed panels from the bungee on the back wall and place the ends in the sleeves on both sides of the GO to create a solid surface on the bed platforms.
- Unzip the ceiling panel, pull down the 2 green sleeping pads, open both valves on each pad, and place on the bed platforms, allowing them to self inflate. Close the valves after fully inflated.
- Unlatch the clasp on the 2 white table panels, push up to raise them off the pin, flip the bar out of th way, and lower towards the back wall.
- If creating a table setup, unlatch the top and remove 1 table panel, relatching the second panel.
- Raise the 2nd panel back into the ceiling area, relatch, and zip the ceiling panel closed.
- Remove the black knob on the back wall.
- Attach one of the black ratchet straps to the nylon loop on at the top of the back wall with the ratchet mechanism near this end.
- Place one end of the table panel where the knob sits and attach the other end to the hook of the ratchet strap.
- Secure the table panel to the wall with the black knob, only tightening one or two turns.
- Level table panel with ratchet
How to Pack Up the SylvanSport GO Tent
● Follow the steps in reverse order to pack up the GO.
Conclusion
Setting up your camping tent on the SylvanSport Go can be a straightforward and enjoyable experience when following these step-by-step instructions. Remember to take your time and pay attention to details such as stake placement, tent tension, and guy line adjustment to ensure a secure and comfortable camping experience. The SylvanSport Go’s innovative design and user-friendly features make it an ideal choice for outdoor enthusiasts seeking convenience and flexibility during their camping adventures. So, gather your gear, embrace the great outdoors, and embark on unforgettable camping experiences with your SylvanSport Go. Happy camping!