
Initially we were planning to build a custom treehouse. During this time, my wife came across a play set that was marked down at Costco. Ultimately we decided to purchase this, but modify just a couple areas in order to mount it onto a platform on the tree. This is the outcome of our playset to treehouse project.
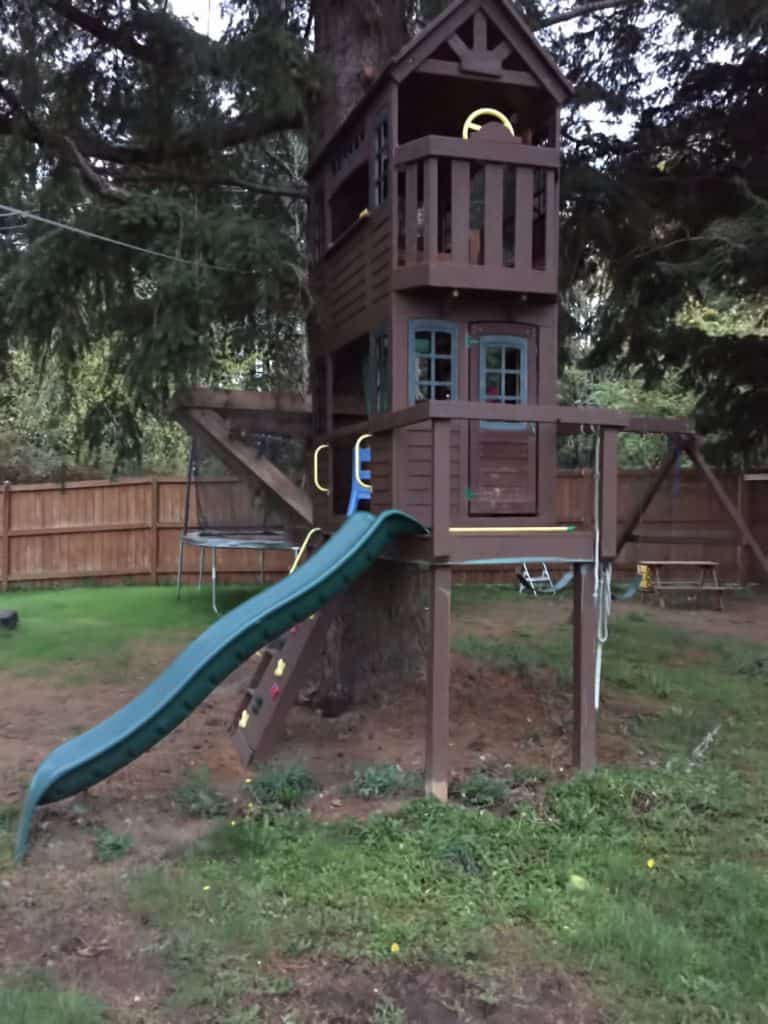
I wanted to get this post up before I start one on the new treehouse that went in this same location. This is another view of the treehouse before it was taken down. A larger, full custom build went up in it’s place.
I know I may get some flack for calling this a treehouse since it uses two posts for support. Going into the ground, but let’s run with it.
What I Started With
This isn’t the exact same playset I started with. They seem to change a bit year to year, at least what is available in store at Costco. What we got though was made by the same company, Cedar Summit by KidKraft.

Assembly and Alterations
To start off with, I assembled the playset almost per the instruction, with just a few changes. To make assembly easier, we stuck to building it on the ground. I figured with enough people we could lift it onto a platform that was to be built later.
I determined the height of the treehouse platform by measuring from the base up to the second floor. The reason for this was that I wanted to maintain the original height of the slide. The plan was to mount the slide at the front, so this measurement determined the height of the end of the platform. There is a slight slope to our property in this area.
For the swing set area, I mounted this 90 degrees off from the house structure (similar to the original design). However, rather than mounting to the house, I used lag screws to mount it into the tree.
Additional Strength and Safety
A deck railing and additional structural pieces were also added. Since this was a 2-story playset, I ended up running 2×4’s at the second story level and tied them into the tree with lag bolts.
Pros and Cons
Going with a pre-manufactured playset to treehouse versus custom built. These are some of the pluses and negatives of going this route, at least in my opinion. It’s clearly an apples and oranges comparison in several ways, particularly since this is an open air design. It’s also difficult to build a structure with the thinner material usually found in these playsets, a minimum of 2×4’s and 2×6’s would be much stronger.
Pros
- If you have limited tools for a typical framing project, this can the amount of tools you need.
- Build a treehouse with less skills. If you’ve never built a structure such as this, it might be a bit daunting. Not only do you have to come up with a design, but also spend the time researching how to get through the initially framing, but also the finishing work.
- Some of the components such as slides and swings can be pricey. While I don’t have the exact numbers, I feel this did save us money if we had built a custom open-air fort and bought similar slides and swings.
Cons
- These playhouses are typically fairly small. Our daughter who this was originally built for was wanting a larger treehouse by the time she was probably around 7 years old. She got 3 fairly solid years of use out of it.
Would I Do It Again?
While I initially wanted to go the custom route, first going with a playset to treehouse setup allowed us to involve our daughter in a larger treehouse. She was able to work on ideas and we were also able to make sure the treehouse is something she would use. I know a few others who have built treehouses for the kids only to find they stop playing with them after a few weeks.
More of Our Articles on Treehouses
We will be publishing an overview of a new 12’x12′ treehouse build that went in place of this one.
Other posts: