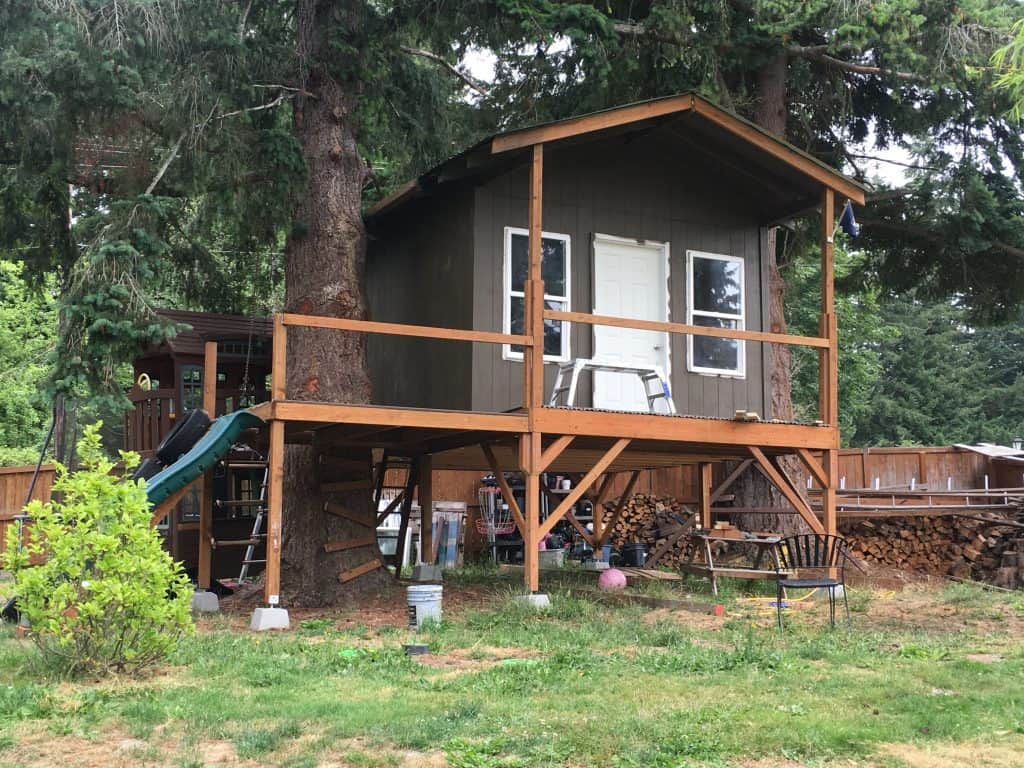
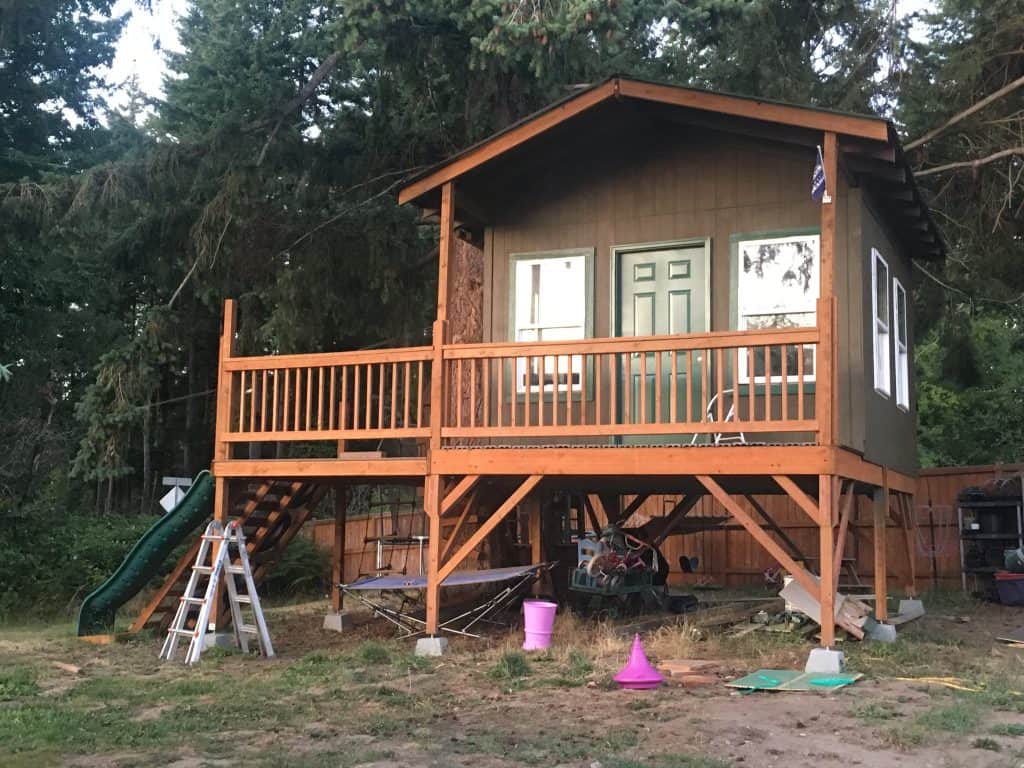
In this article I’ll provide an overview of the build process I took for a 12’x12′ single story, custom treehouse. The treehouse was built on a 12’x16′ platform to provide a 4′ walkway and also had an expanded deck area. The treehouse itself is 12’x12′.
When it comes to tree houses, each build including location are unique. It will likely come with it’s own challenge and features. Basic carpentry, safety considerations, and problem solving all come into play.
Safety Considerations
Definitely take time for considering safety, not only for the finished result, but the construction phase as well. I won’t go into to many details, but be sure to plan and think through everything.
The higher the elevation, the greater the fall hazard. The difference between a platform that is 6-8 feet off the ground is substantial compared to one that is 12-14 feet is a much higher risk. It also creates new challenges getting material into position as well as yourself.
Permitting?
Depending on where you live, you may have city or county permitting that needs to take place or an HOA to deal with. Be sure to always check your own specific situation before building, whether it’s a custom treehouse or anything else.
Location, Location, Location
In real estate they talk about location, location, location. This is certainly applies to a custom treehouse as well. Initially I was looking to build in another location, but after researching the type of tree where I was planning to build, I realized that was not a good long term decision. The tree was either an alder or cottonwood, and I read where these are prone to snapping.
Start with a Plan!
A few Google searches gave some design ideas for the treehouse. After kicking some ideas around, we sketched out the plan for what we would build for ours. While some people prefer to wing it, at least having some idea of the overall look and design helps me to better plan out the build and try to start a budget.
Tools I Used
Some of the primary tools used were:
- Miter saw
- Circular saw
- Impact driver
- Chalk line
- Levels
- Pneumatic nailer
- Brad nailer
- Variable metal cutting shears
- Saw horse
- Caulking Gun
- Ladders
- Hammers
- Portable air compressor
- Paint sprayer
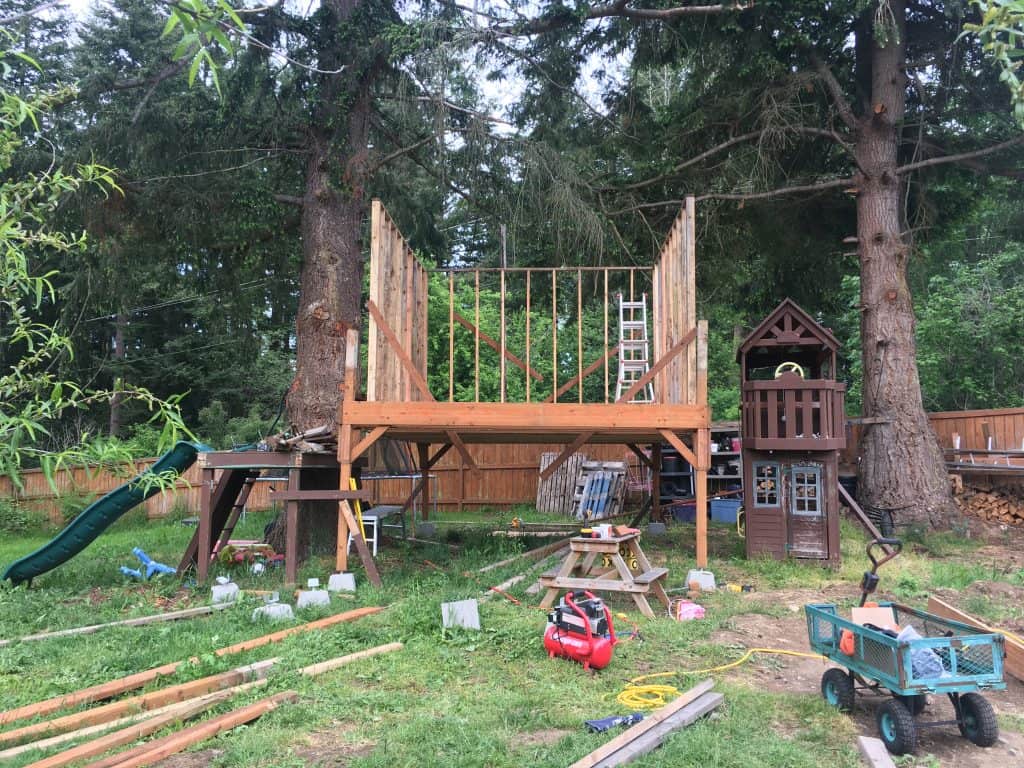
Starting with the Platform
The platform/foundation of a treehouse is critical. You want to ensure it is perfectly level and in the case a treehouse, that it can support the structure you’re planning to build. The size we settled on uses a 12’x16′ platform for a 12’x12′ house structure with 4′ porch area. To the left you can see our old playset to treehouse platform and slide with the playset moved off to the side. This will be getting a new tree location in the near future.
Re-Used Materials
The 2×4’s that were used for the wall framing came from my neighbor. He built temporary scaffolding for a balcony project and had no further use for the 2×4’s and some other miscellaneous wood. He also had several used windows from a customer’s house in which they had him replace the windows. They’re all double-pane glass, but were replaced on the original owners home because the seals were bad. For a treehouse, they should work just fine – not to mention help lower the overall project cost.

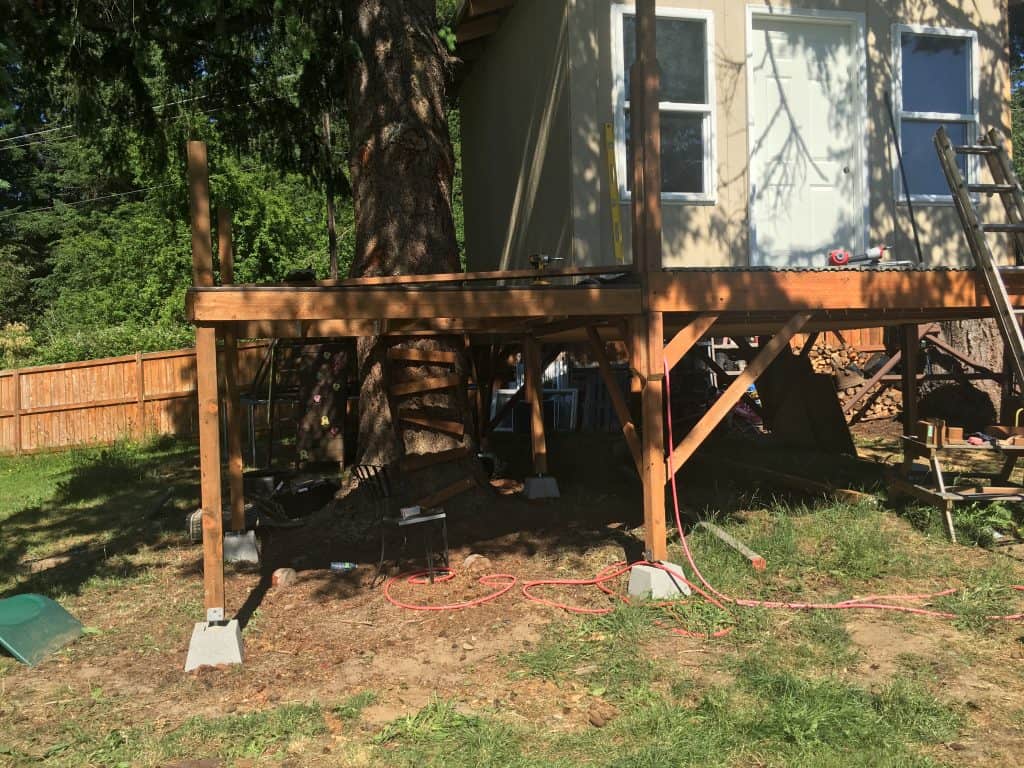
Pier Blocks
Rather than digging holes into the ground and setting them in concrete, I opted to go with pier blocks. With enough knee bracing on the posts everything turned out quite sturdy.
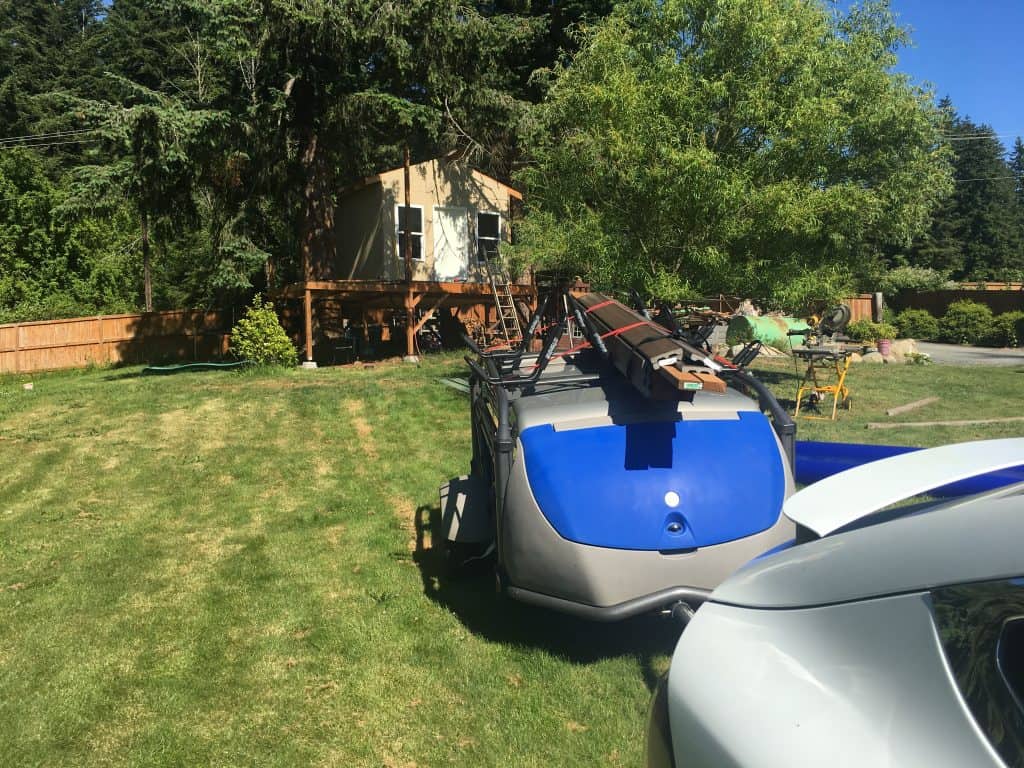
Expanded Deck
I barely had the treehouse “dried in” and the wife already wanted a deck extension. This deck area is 8’x8′.
Decking
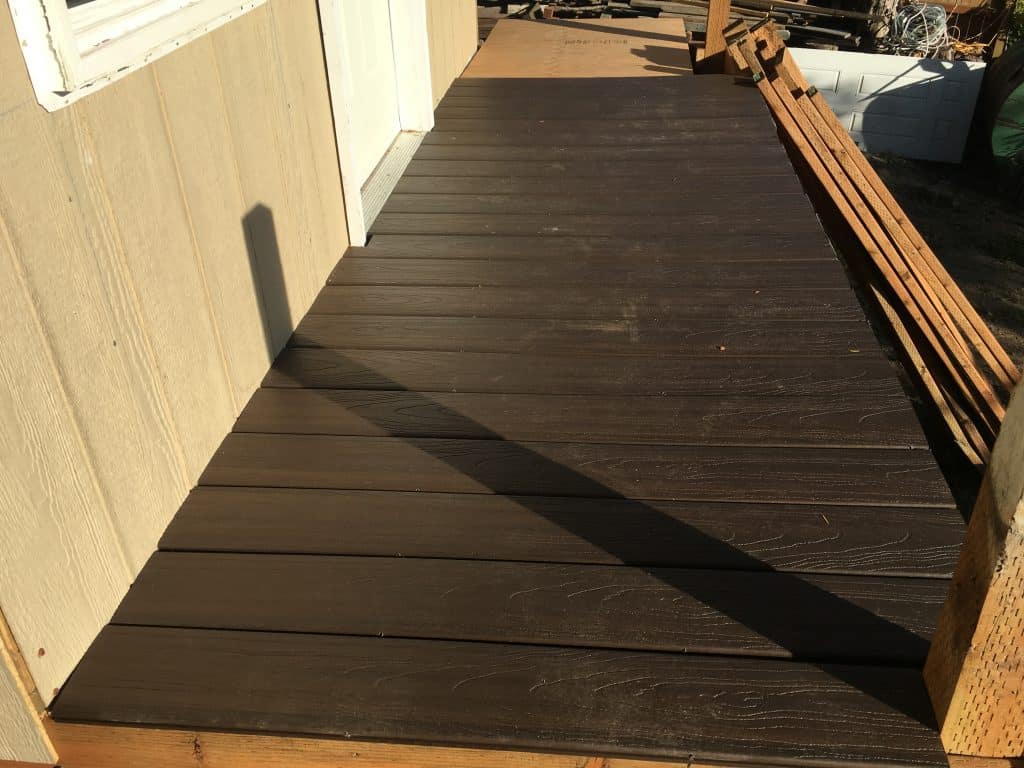
I was planning to re-use our decking from the porch area of our house, but after pulling it up I quickly realized it had seen better days. Once every 1-2 years I applied a fresh coat of stain to the topside. However, the bottom side showed signs of weathering.
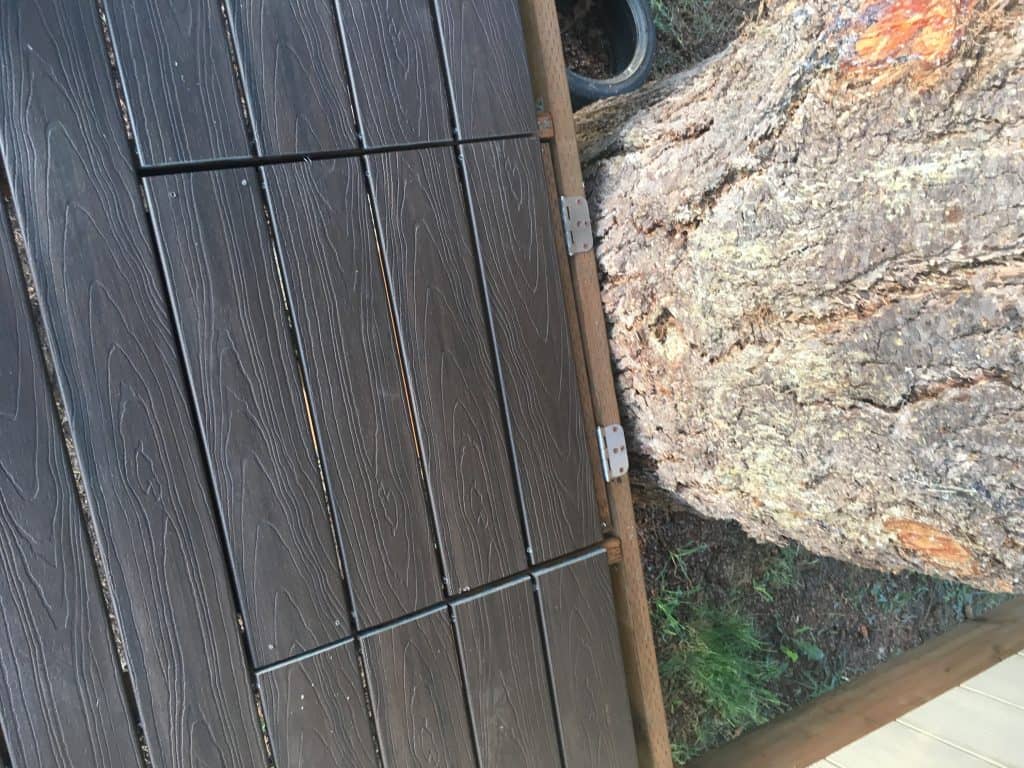
Going with a Deckorators Tropics Hana Brown composite deck board for our house porch, this was extended to the treehouse. Certainly additional cost, although no need to re-stain the surface every couple years. That’s certainly the biggest advantage for me.
The composite decking can be cut with a miter saw. For a cleaner install, I chose a hidden screw system.
Trex is perhaps the best known composite decking material. It certainly comes in at a higher price tag. Deckorators (which I went with) and Timbertech were a couple other brands our local hardware store carried or could order.
Trapdoor
I didn’t want to reduce the floorspace of the treehouse, so I opted to install a trapdoor on the deck area.
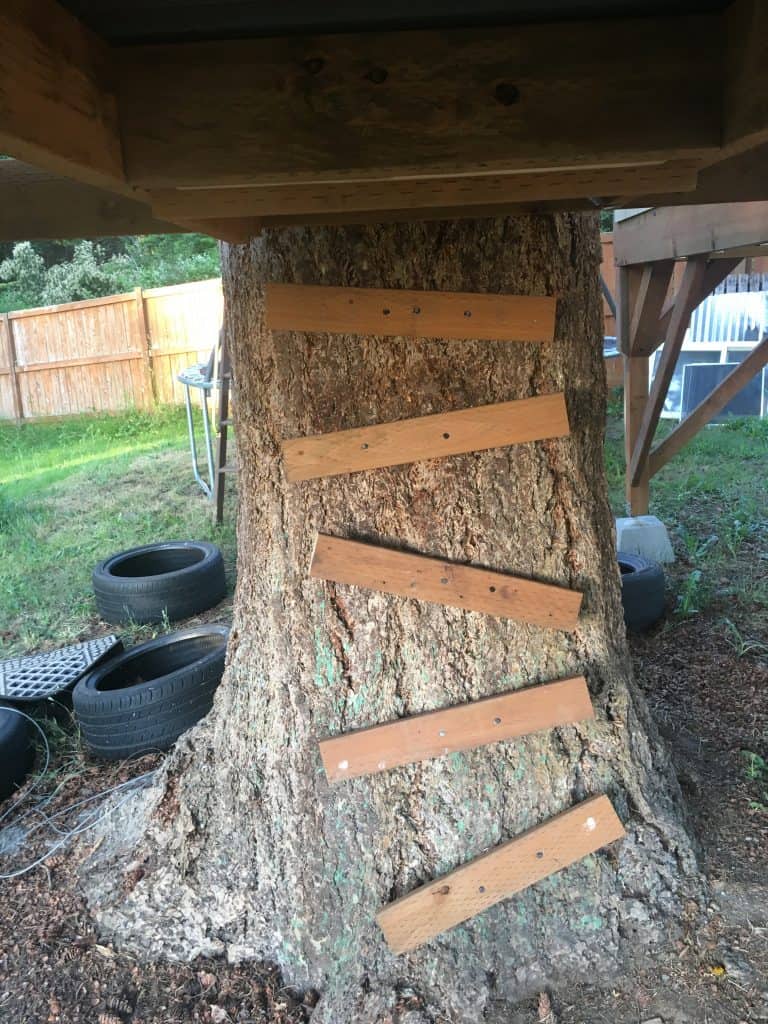
Looking down through the trapdoor…

No level required! I wanted to go with a more whimsical feel for the ladder leading up to the trapdoor, so random spacing and angles were used. Multiple 6″ lag screws were used to keep them in place.
First Coat of Paint!
This paint was a marked down return we found at our local hardware store. It looks brown in the photos, but it has a slight green color to it.
Trim work including paint completed. For the door and trim, I color matched the dark green of the roof.
Electricity
I already had power going up my driveway, so I was able to use some direct burial wiring to take into the treehouse. There are two power outlets in the wall, a ceiling fan with light, and porch light.
Interior
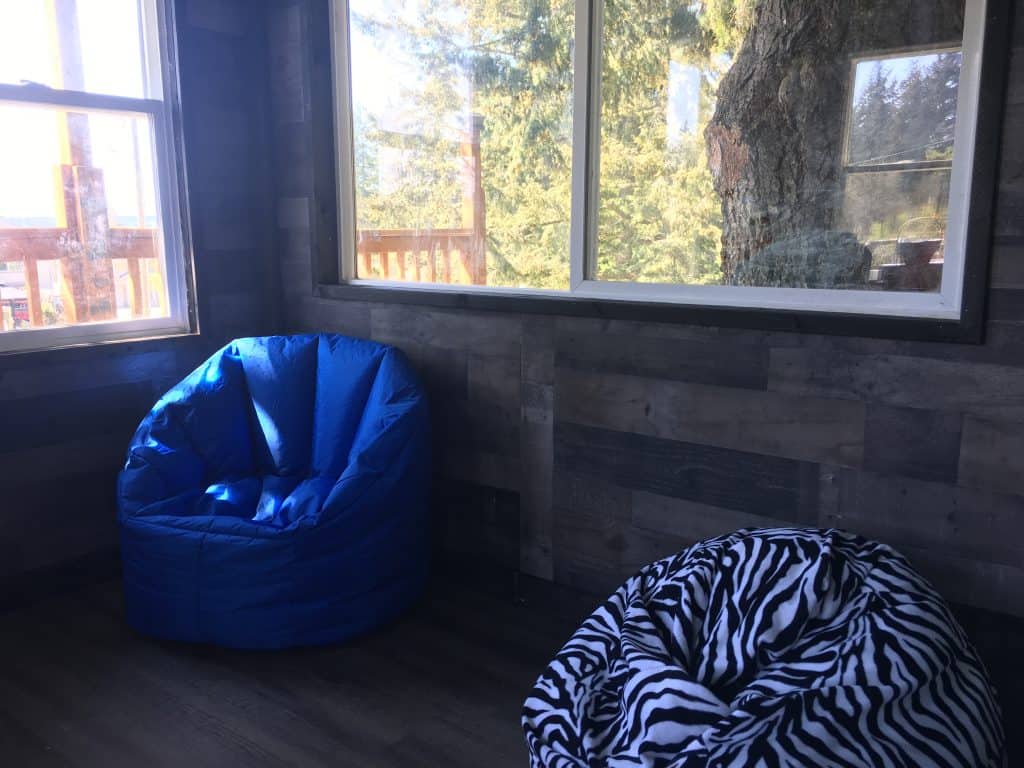
For the interior flooring, I opted for a waterproof vinyl plank flooring from our local Costco. It’s the Golden Arowana Sandalwood, you can find it on Costco’s website here, assuming it remains in their inventory. Costco tends to cycle through products fairly often. This floor has a 1mm foam pad already attached to the underside, so there’s no need for an underlayment. It’s considered a “floating floor”, so no gluing either, just set into place.
For the walls, I decided to use some batted insulation and an MDF wall panelling. The underside of the floor has yet to insulated, that may happen later if we start using the treehouse more during the colder months. I still need to figure out what I’m going to do for the ceiling and upper triangulated portion of the front and back wall. I may just go with drywall or a wood paneling.
Future Custom Treehouse Plans
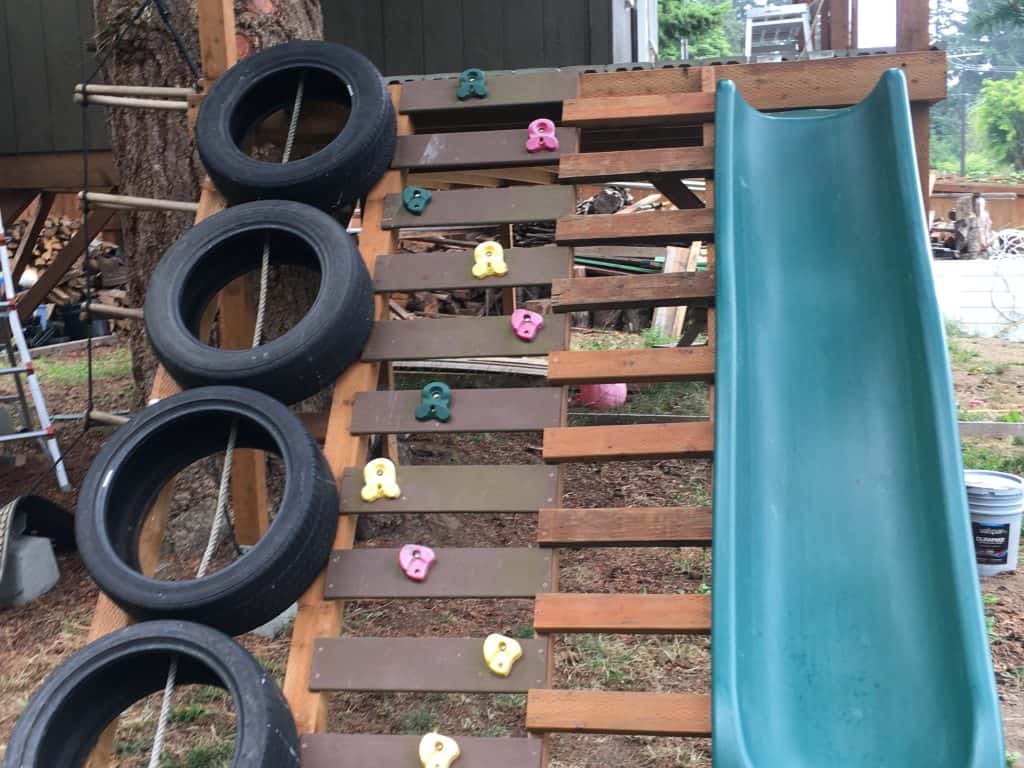
Either later this year or next, I plan to add a more traditional set of stairs off to the side. Our previous “playset treehouse” will likely be relocated to the adjacent tree. Considerations for a suspension bridge connecting the two are on the radar.
Current State
And that sums up the current progress on our custom treehouse with post beam support. We’ll like add a few more things to it over time, but for now, I’m at a stopping point. The kids have also had requests for beds and a bathroom. While beds (or sleeping bags) might be something I consider, there will not be any water ran out here for plumbing.