Automotive

Finding Used SylvanSport Go Trailers For Sale Near Me: Adventure on a Budget!

used sylvansport go

Embarking on outdoor adventures is a thrilling way to explore the world around us. For those seeking versatility, durability, and innovation in their camping experience, the SylvanSport Go trailer is a remarkable choice. Designed to blend the convenience of a camper and the utility of a gear-hauling trailer, the SylvanSport Go offers a unique camping experience. However, buying a brand-new trailer isn’t always feasible for everyone. Used options can be far more budget friendly. Fortunately, there are platforms like Listhopper and other online classifieds to find used SylvanSport Go trailers, ensuring you can still fulfill your wanderlust without breaking the bank. In this article, we’ll explore how you can utilize these platforms to find the perfect used SylvanSport Go trailer for your adventures. We’ll also cover what you can expect to pay when buying a used SylvanSpoprt Go trailer. Where to Find Used SylvanSport GO Trailers Listhopper The used SylvanSport GO we purchased was on Craigslist for a city in Oregon, but I wasn’t searching on Craigslist when we found it. I used Listhopper which is similar to Indeed.com which pulls job listings from several different websites, but for classifieds. How to Use Listhopper Listhopper is free and you simply need to enter what you’re searching for. By default however, the search is set to “Craiglist”, so be sure to select the “Search All” option all the way to the right, or which ever classifieds you want to search. You can also use the “Filter Cities” to refine the search to your area. RV Trader The next site I’ve found the most SylvanSport GO’s listed is RV Trader. IRV Trader: RV Trader specializes in connecting buyers and sellers of new and used RVs, making it a valuable resource for finding pre-owned SylvanSport Go trailers. Its advanced search options allow you to narrow down listings based on various criteria. More SylvanSport for Sale Online Attend RV shows and dealer auctions: In addition to online platforms, attending RV shows and dealer auctions can provide an opportunity to find used SylvanSport Go trailers. These events often showcase a variety of recreational vehicles, including pre-owned models. Participating in such events allows you to physically inspect the trailers, ask questions, and potentially negotiate the price directly with sellers. SylvanSport In-Person RV Events Occassionally SylvanSport GO trailers might be featured at RV events. Attending RV shows can be an excellent opportunity to find great deals on a wide range of recreational vehicles, including the SylvanSport Go trailers. These shows bring together multiple dealers and sellers in one location, creating a competitive environment that can lead to attractive pricing and special offers. How Much Are Used SylvanSport GO Camping Trailers? We bought our SylvanSport GO used for $3800, I’ve seen one slightly lower at $3500 once. However, on average, I’ve seen many for sale between $5000-7500. New ones with several accessories are often listed for $10K or higher. A few factors will go into the value of SylvanSport GO: Here’s a couple posts I came across at the time of publishing: Conclusion Embarking on adventures with a SylvanSport Go trailer opens up a world of possibilities for outdoor enthusiasts. While purchasing a brand-new trailer may not always fit within your budget, platforms like Listhopper and other online marketplaces offer a practical and convenient way to find used SylvanSport Go trailers. By utilizing these platforms and exploring local events, you can discover the perfect trailer that meets your needs, allowing you to embark on thrilling adventures while making the most of your resources. So, go ahead and unleash your wanderlust – the open road awaits! Looking for more information on the SylvanSport GO trailer? Be sure check out our SylvanSport GO Review.

Finding Used SylvanSport Go Trailers For Sale Near Me: Adventure on a Budget! Read More »

Simplified Guide: Setting Up Your Camping Tent on the SylvanSport Go

SylvanSport Go Camper Tent Setup

The SylvanSport Go is a revolutionary pop-up camper that combines the convenience of a compact trailer with the functionality of a comfortable living space. Whether you’re a seasoned camper or new to the outdoor adventure scene, setting up your SylvanSport Go camping tent can be a breeze with the right knowledge and a few helpful tips. The entire setup should take about 10-15 minutes. It’s been said if it takes you longer than this, you’re doing something wrong. In this article, we will walk you through the step-by-step process of setting up your camping tent on the SylvanSport Go, ensuring a stress-free camping experience. Note: I’ll be adding pictures to this post over the next couple of days and may split this into multiple posts to improve page download speed.. How to Raise the SylvanSport GO Tent Pod How to Setup the SylvanSport GO Tent How to Setup the Inside of the SylvanSport GO Tent How to Pack Up the SylvanSport GO Tent ● Follow the steps in reverse order to pack up the GO. Conclusion Setting up your camping tent on the SylvanSport Go can be a straightforward and enjoyable experience when following these step-by-step instructions. Remember to take your time and pay attention to details such as stake placement, tent tension, and guy line adjustment to ensure a secure and comfortable camping experience. The SylvanSport Go’s innovative design and user-friendly features make it an ideal choice for outdoor enthusiasts seeking convenience and flexibility during their camping adventures. So, gather your gear, embrace the great outdoors, and embark on unforgettable camping experiences with your SylvanSport Go. Happy camping!

Simplified Guide: Setting Up Your Camping Tent on the SylvanSport Go Read More »

A Beginner’s Guide to Towing the SylvanSport Go

Towing tips for your SylvanSport GO Camping Trailer

Towing the SylvanSport GO can be a fun and exciting way to explore the great outdoors. However, if you’ve never towed anything before, it can also be a bit daunting. Especially backing up. This beginner’s guide will provide you with all the basic information you need to tow the SylvanSport GO safely and confidently. By following these tips, you’ll be well on your way to towing the SylvanSport GO like a pro. Remember to take it slow, be cautious, and have fun exploring the great outdoors! If you haven’t already, be sure to check out our Review of the SylvanSport GO camping trailer. Also, be sure to review the Operation Manual from SylvanSport that came with your GO trailer. If you don’t have the manual, a copy can be purchased directly from SylvanSport.

A Beginner’s Guide to Towing the SylvanSport Go Read More »

What Can You Haul in a SylvanSport Go Trailer? – 20 Ton Log Splitter

sylvansport hauling mode

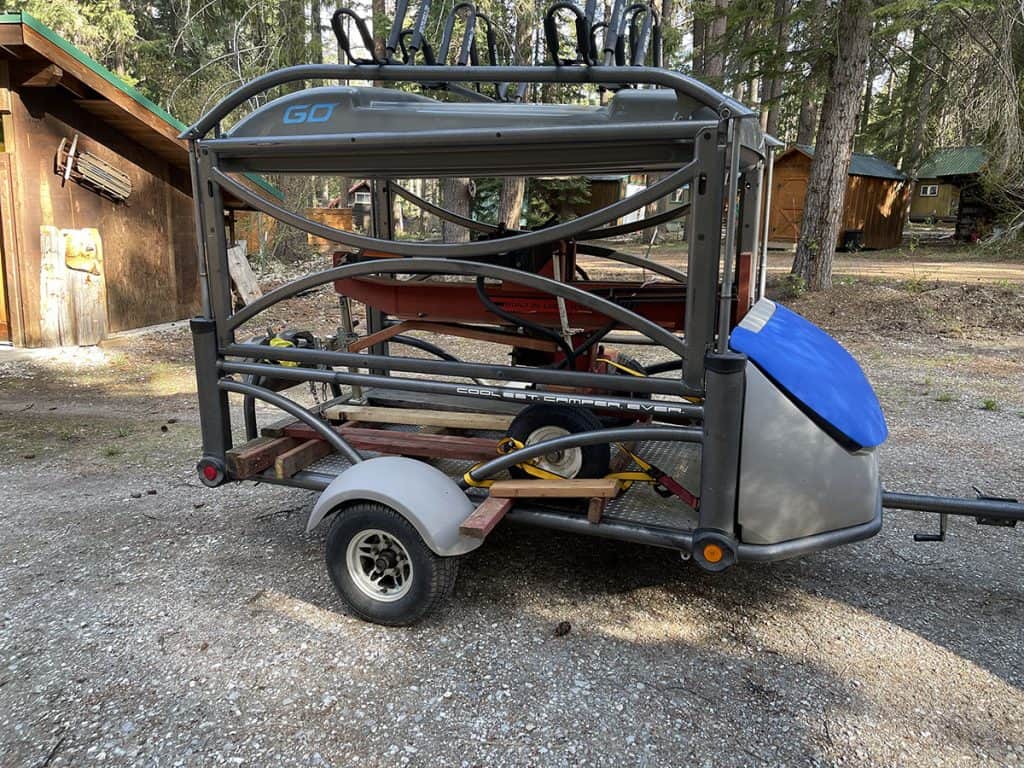
When it comes to trailers, versatility can make all difference. Whether you’re hauling camping gear, bikes, other equipment, or go camping, the right trailer can make the trip smoother and more enjoyable. And when it comes to versatility and convenience, few trailers can match the SylvanSport Go. We tend to get quite a few reactions from our trailer, not just because of it’s unique design, but also because of how we use it. The SylvanSport Go is a lightweight, compact trailer that can be towed by most vehicles. It weighs only 840 pounds, which makes it easy to maneuver. The trailer’s unique design allows it to be used for a wide range of activities, from camping and kayaking to hauling appliances and furniture. What Can You Haul with a SylvanSport Go? How About a 20 Ton Log Splitter?!?! With it’s tilt function, the SylvanSport Go is an excellent choice for hauling dirt bikes, ATV’s, or riding lawnmowers. I’ve used ours to haul a riding lawnmower and now I can add an old 20-ton log splitter to the list. My neighbor who recently moved across the state was given an older log splitter by his dad who had upgraded. When my neighbor moved, he offered to give the log splitter to me. We don’t have much use for the splitter at our house, but we do use a wood-burning stove at our cabin fairly often. So once the weather through the mountain pass improved, I wanted to get it moved. That same neighbor is still borrowing my enclosed cargo trailer, so I decided I’d use the SylvanSport Go. While the log splitter is designed to be towed behind a vehicle, I didn’t trust towing it on the highway for the distance I had to go. I had to replace one tire on the log splitter because it had a split, and the remaining tire didn’t look much better, although the bead at least was continuing to hold air. Loading the Log Splitter onto the SylvanSport Go I was able to load the splitter onto the trailer myself, but it did take some time – and probably wasn’t the best of ideas. I used the tilt function of the trailer and pushed the splitter up to it backwards. With the use of tie down straps, I slowly was able to get the splitter winched up onto the trailer while also using wheel chocks along the way. Once enough of the weight was near the axle of the SylvanSport Go, I was able to slowly tilt the trailer back to it’s normal position. Scrap Wood Shipping Crate for the Log Splitter With the log splitter being a fairly large footprint in the SylvanSport Go, I didn’t want to take any chances of having tie down straps loosen up while I was driving. So, I opted to build a make shift shipping crate (or containment) out of scrap wood to make sure it wouldn’t move at all while I was hauling it over 100 miles to our cabin. Here’s some photos of my “shipping crate”. Various pieces were wedged into the structure of the trailer to prevent it from moving. Summary One of the things that makes the SylvanSport Go trailer so versatile is its ability to be customized for specific hauling needs. The trailer can be configured with a range of accessories, including bike racks, cargo boxes. You can also remove the upper section that stores the tent if you need to hauler taller items such as a refrigerator. Be sure to check out my full review of the SylvanSport Go.

What Can You Haul in a SylvanSport Go Trailer? – 20 Ton Log Splitter Read More »

Tesla Battery Technology: Improvements and Innovations

tesla 4680 battery cell production

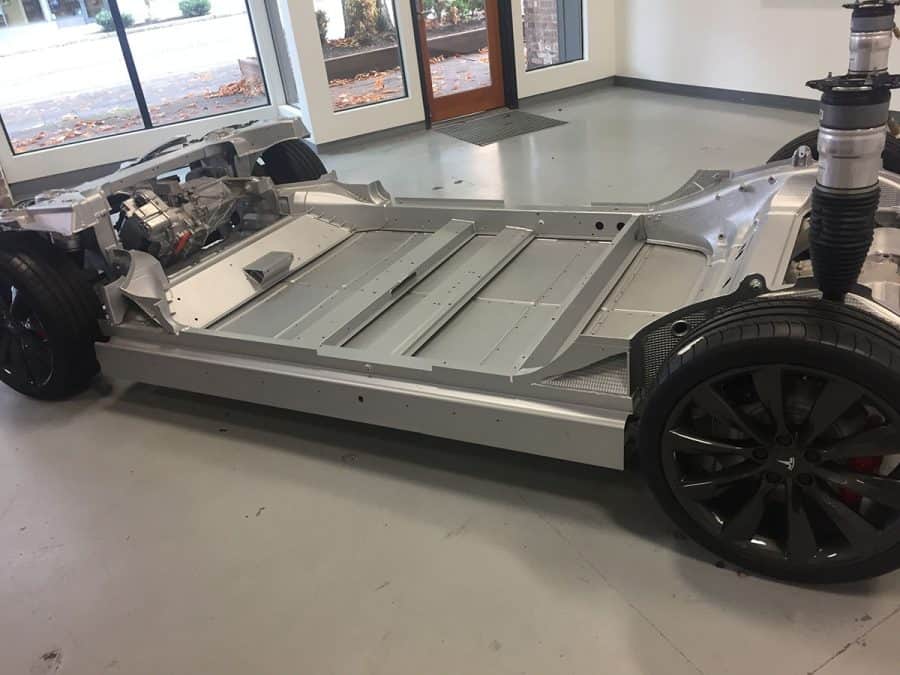
Tesla has been a pioneer in the field of electric cars, and its battery technology is one of the main reasons for its success. Tesla’s battery technology has gone through significant improvements and innovations over the years, which have made their electric cars more efficient, affordable, and accessible to a wider range of customers. This article will delve into the key improvements and innovations in Tesla’s battery technology, exploring how they have transformed the electric car industry. The Beginning of Tesla’s Battery Technology Tesla’s battery technology can be traced back to its first electric car, the Tesla Roadster, which was introduced in 2008. The Roadster was powered by a 53 kWh battery pack that consisted of over 6,800 individual lithium-ion battery cells. This battery pack provided a range of up to 245 miles on a single charge, making it the first electric car to offer a range comparable to a gas-powered vehicle. The battery technology used in the Roadster was relatively basic compared to today’s technology. However, it provided a solid foundation for Tesla to build upon and improve in the coming years. Innovations in Battery Chemistry One of the most significant improvements in Tesla’s battery technology has been in the chemistry of its batteries. Tesla has invested heavily in developing new battery chemistries that offer higher energy density, longer life, and faster charging times. One of Tesla’s latest battery innovations is the 4680 cell, which the company unveiled in September 2020. The 4680 cell is larger than previous Tesla battery cells, with a diameter of 46 mm and a length of 80 mm, hence the name. The larger size of the 4680 cell allows for greater energy density, which means that a smaller number of cells are required to achieve the same range. The 4680 cell is also designed to be more efficient than previous Tesla battery cells, with a new tabless design that eliminates the need for a metal tab to connect each cell. This tabless design reduces the resistance within the cell, which allows for faster charging times and better thermal management. Another recent innovation in Tesla’s battery chemistry is the use of a silicon anode. Silicon has a higher energy density than the graphite anodes traditionally used in lithium-ion batteries, which means that a battery with a silicon anode can hold more energy in the same size battery pack. However, silicon anodes are known to be less durable than graphite anodes, as they tend to swell and shrink during the charge and discharge cycles of the battery. Tesla has developed a new method of applying a coating to the silicon anode that reduces swelling and improves durability, while still maintaining the higher energy density. Improvements in Battery Manufacturing Tesla has also made significant improvements in the manufacturing of its batteries, which have allowed the company to produce batteries at a lower cost and with greater efficiency. One of the key improvements in battery manufacturing has been the development of a “Gigafactory” in Nevada, which is one of the largest battery factories in the world. The Gigafactory is designed to produce battery cells at a massive scale, with a goal of producing 100 GWh of batteries per year. The Gigafactory uses advanced automation and robotics to streamline the manufacturing process, reducing costs and increasing efficiency. Tesla has also developed new manufacturing processes that allow for the production of larger battery cells, such as the 4680 cell, at a faster rate. Another innovation in battery manufacturing is the use of a dry electrode coating process, which eliminates the need for solvents and reduces the amount of energy required to produce a battery. This dry electrode coating process has the potential to reduce battery production costs by up to 50%. Improvements in Battery Performance Tesla has also made significant improvements in the performance of its batteries, which have enabled its electric cars to travel farther and faster on a single charge. One of the key improvements in battery performance has been in the energy density of the batteries. Tesla has been able to increase the energy density of its batteries through the use of new battery chemistries, such as the silicon anode, and through improvements in battery manufacturing. This increased energy density has allowed Tesla to increase the range of its electric cars, with the latest Model S Long Range Plus having a range of up to 405 miles on a single charge. The increased energy density has also allowed Tesla to improve the acceleration and top speed of its electric cars, with the latest Model S Plaid being able to go from 0 to 60 mph in under 1.98 seconds and reaching a top speed of 200 mph. Another improvement in battery performance has been in the charging speed of Tesla’s electric cars. Tesla has developed a network of Superchargers that allow its electric cars to be charged quickly, with up to 200 kW of charging power available at some locations. This means that a Tesla can be charged up to 80% in as little as 40 minutes. Tesla has also developed a new charging standard, called the V3 Supercharger, which allows its electric cars to be charged even faster. The V3 Supercharger is capable of providing up to 250 kW of charging power, which means that a Tesla can be charged up to 75 miles of range in just 5 minutes. Innovations in Battery Recycling As the number of electric cars on the road increases, so does the need for battery recycling. Tesla has been working on developing a closed-loop battery recycling system that aims to reduce the environmental impact of its batteries. The closed-loop recycling system involves recycling old batteries to create new batteries, which reduces the need for new materials and minimizes waste. Tesla has developed a process that allows for the recovery of over 80% of the materials in a battery, including lithium, nickel, cobalt, and aluminum. Tesla has also developed a new battery pack design that allows for easier disassembly and recycling

Tesla Battery Technology: Improvements and Innovations Read More »

SylvanSport Go Review – The Coolest Camper Ever

sylvansport go camping trailer

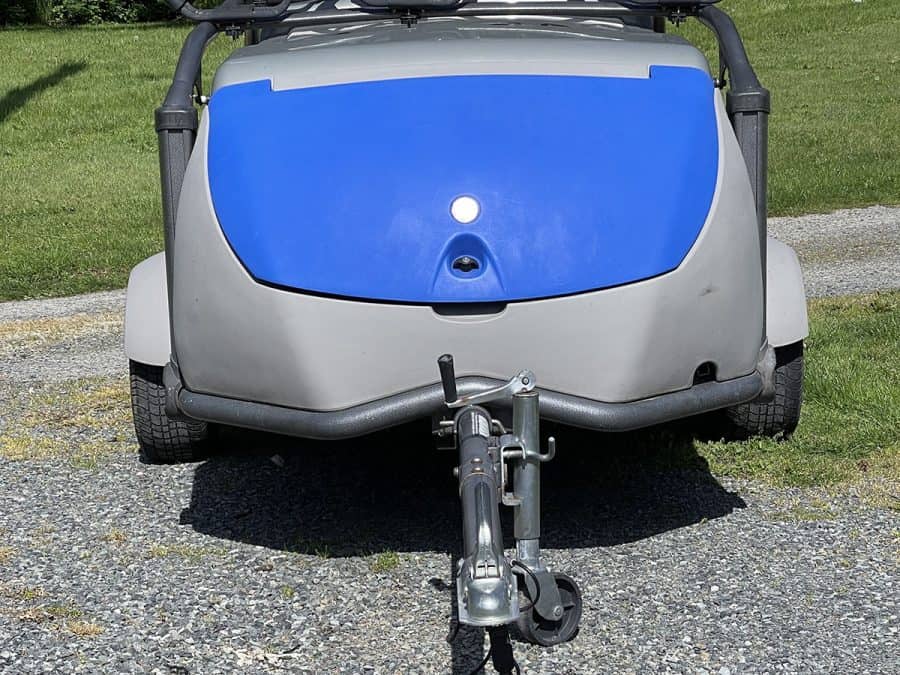
The SylvanSport Go trailer is a game-changer in the world of camping and outdoor recreation. National Geographic once dubbed it the Coolest Camper Ever. It is a lightweight and versatile trailer that can be towed by most vehicles, including many electric vehicles. We bought ours used over 5 years ago and continue to get varied use out of it fairly regularly. From hauling dirt bikes and kayaks to camping. The Go trailer has won numerous awards for its multi-functional design, lightweight construction, and aerodynamic shape. In this article, we will explore the features and benefits of the SylvanSport Go trailer and why it is an excellent choice for those who love to get out and explore the great outdoors. Read on to learn about it’s specifications and our personal experience with it. Multi-functional Capability One of the standout features of the SylvanSport Go trailer is its multi-functional capability. The trailer is designed to serve as both a camper and a gear hauler. It has a unique modular design that allows you to configure the trailer in a variety of ways, depending on your needs. The Go trailer can be set up as a camping trailer, complete with a tent and a comfortable sleeping area. The tent is made of high-quality ripstop nylon, and it is designed to be breathable and waterproof, so you can stay dry and comfortable in all kinds of weather. In addition to its camping capabilities, the Go trailer can also be used as a gear hauler. The trailer has a cargo area that can be used to transport bikes, kayaks, camping gear, and more. The cargo area has tie-down points and adjustable crossbars, so you can secure your gear safely and securely. The Go trailer also has a removable tongue, which makes it easy to store when not in use. Here’s just some of the uses you can use a SylvanSport Go for: Lightweight Design The SylvanSport Go trailer is one of the lightest trailers on the market, weighing in at just 840 pounds. Its lightweight design makes it easy to tow with most vehicles, including electric cars. This is a significant advantage for those who own electric vehicles, as towing a heavy trailer can drastically reduce the range of an electric car. You can also check out my post on towing a Sylvansport with a Tesla Model X. The Go trailer is made of high-quality materials, including aluminum and composite panels. These materials are lightweight yet durable, so you can be sure that your trailer will last for years to come. The trailer’s lightweight design also makes it easy to maneuver, even in tight spaces. This is particularly useful when camping in remote locations where space is limited. Aerodynamics The SylvanSport Go trailer is designed with aerodynamics in mind. Its sleek shape and low profile reduce wind resistance, which makes it easier to tow and improves fuel efficiency. This is particularly important for electric cars, as towing a trailer can significantly reduce their range. The Go trailer’s aerodynamic design ensures that you can travel further on a single charge, allowing you to explore more of the great outdoors without having to worry about running out of power. The Go trailer also has a low center of gravity, which makes it more stable on the road. This is particularly important when towing a trailer, as an unstable trailer can be dangerous and difficult to control. The Go trailer’s low center of gravity ensures that it stays firmly planted on the road, even when traveling at high speeds or in windy conditions. Other Features In addition to its multi-functional capability, lightweight design, and aerodynamics, the SylvanSport Go trailer has a range of other features that make it an excellent choice for outdoor enthusiasts. These include: Conclusion The SylvanSport Go trailer is a versatile and innovative trailer that is perfect for outdoor enthusiasts. Its multi-functional capability, lightweight design, and aerodynamics make it an ideal choice for those who love to explore the great outdoors. The Go trailer can be used as a camper or a gear hauler, and it can be towed by most vehicles, including electric cars. Its compact design, customizable features, and eco-friendly design make it a popular choice for those who want to enjoy the outdoors while minimizing their impact on the environment. Overall, the SylvanSport Go trailer is an excellent investment for anyone who loves to get out and explore the world around them.

SylvanSport Go Review – The Coolest Camper Ever Read More »

How Expensive is it to Maintain a Tesla?

Whether it is to try to reduce their carbon footprint or the stylish looks of a Tesla, people all over the country have started to buy them. This begs the question, are they economical enough to offset the price of the car? Also, how expensive is it to maintain one? Tesla cars, since they are electronic, require less maintenance per year than gas vehicles, which reduces the overall cost of owning one. For those who purchase a Tesla, the average yearly maintenance cost is under $500 per year, depending on exactly how old the vehicle is and what it requires. The true cost varies based on your specific Tesla and its needs. For instance, if you have a new Tesla, like with any new vehicle, it requires less maintenance overall. However, while everyone has some idea of what a gas car needs when it comes to maintenance, not everyone knows what an electric car needs, so read on to find out. General Maintenance Tesla vehicles are unique because they are electric and do not require some of the same maintenance as a normal gas motor car. For instance, oil changes, fuel filters, and exhaust systems do not exist on these vehicles, which lowers the yearly maintenance costs significantly compared to a regular car. If you are curious about what needs to be maintained and how often, Tesla lists their recommended maintenance on their website as: Recommended Maintenance Recommended Intervals Cabin Air Filter Every Two Years HEPA Filter Every Three Years Tire Rotation, Balance, Alignment Every 6,250 Miles Brake Fluid Test Test Every Two Years Air Conditioning Service Varies on Model Winter Care Brake System Cleaned and Lubricated Every Year Cabin Air Filter Like a traditional vehicle, the cabin air filter for the Tesla works to take any pollen, dust, or other debris before it enters the cabin of the vehicle. Over time, these filters tend to get full and wear out, causing a blockage. As a result, Tesla recommends that the cabin air filter be changed out every two years to prevent any overall decrease in performance of your vehicle. The cost of the filter varies depending on which model Tesla you own. Remember that Tesla recommends replacing these filters every two years. Whether you replace them more or less often is up to you. Tesla leaves the option up to the owner to determine the need for following the recommended guidelines. In most cases, Tesla does not make it a condition of maintaining the warranty on the vehicle. However, if you have an extended warranty on your vehicle, refusal to get the recommended services completed may cause you to have issues with the extended warranty. HEPA Air Filter Tesla decided in 2016 to add a High-Efficiency Particulate Air Filter (HEPA) in their vehicles to further reduce the chances of pollutants from entering or remaining inside a vehicle. The HEPA filter design that Tesla uses is based, according to them, on the ones used in hospitals and clean rooms throughout the nation. The HEPA air filter is only present in the Model S, Model 3, and Model Y and is available to be added as an upgrade to Model X. The prices differ depending on the vehicle: Tesla recommends replacing the HEPA filter every three years to ensure proper function. As stated above, this is a recommendation and does not mean that you need to do it. However, if you decide not to, as with any other recommended maintenance, if you have an extended warranty, coverage could be reduced if you do not. Tesla touts that their HEPA system cleans out any pollution that may enter the vehicle, making it safer in higher polluted areas. Additionally, Tesla claims that the HEPA system also cleans the air outside of the vehicle. Tire Rotation, Balance, Alignment Tire maintenance is routine on any vehicle, regardless of whether it has a traditional motor or is electric. However, Tesla only recommends that the tires on their vehicles be rotated, balanced, and aligned every 6,250 miles on average. Of course, you should adjust this based upon the terrain of the area you live in and how you drive your vehicle. For example, if you live in an area with potholes, the odds are that you will have to have this performed more often. The average cost of rotating, balancing, and aligning tires on any vehicle will cost anywhere from $35 to $150, depending on exactly what you are getting done and where you have the service performed. Tesla recommends that you complete these services at one of their authorized Tire Centers. However, you can have these services done at any tire company. Brake Fluid Test The brake fluid in any vehicle degrades over time, and that remains the same for Tesla vehicles. However, instead of recommending that you change brake fluid at certain intervals, Tesla recommends that the fluid be checked for contaminants every two years to determine if it needs to be changed. You can have the check done by taking the vehicle to a Tesla Service Center or any brake shop that has the capability of checking the fluid. Additionally, there are products out there that enable you to check the fluid yourself for any breakdown or contaminants. Items to check the brake fluid, like test strips, can be purchased from Amazon. Prices range from around $20 up to about $90 for those who want to do the job themselves. Keep in mind that if you decide to do it yourself, you also need to check the fluid in the brake caliper to ensure the same reading. If you choose to have the job done at a business, know that the cost will be anywhere from $70 to $150, depending on where you get the work done. Performing this service is necessary to ensure that the fluid is sufficient to allow for proper braking. Air Conditioning Service Tesla recommends that you get the air conditioning serviced every few years, depending on the model.

How Expensive is it to Maintain a Tesla? Read More »

How to Remove a Trailer Wheel That Doesn’t Have Lugs

How to remove wheels without lug nuts

My neighbor who was moving to the other side of the state had a tow-behind 20-ton log splitter he no longer had any use for and offered to give it to me. The tires were fairly old, and the beads on one were no longer sealed to the wheel. To get the the tire replaced, I first had to remove the wheel from the axle, but quickly noticed the wheel did not have any lug nuts. Trailer wheels that don’t have lug nuts are held in place by an axle nut and wheel bearings. This design is common in many types of trailers, including boat trailers, horse trailers, and utility trailers. The axle nut holds the wheel and hub assembly onto the axle, while the wheel bearings allow the assembly to rotate smoothly around the axle. To ensure proper operation and safety, it’s essential to maintain and inspect the wheel bearings regularly. A damaged or worn bearing can cause the wheel to wobble or even detach from the axle while in use, leading to a dangerous situation on the road. By understanding how trailer wheels are held in place without lug nuts, trailer owners can keep their equipment in good working condition and enjoy trouble-free towing. Read on as we go step by step on how to remove a trailer wheel that doesn’t use lug nuts. Steps to Remove a Trailer Wheel That Has No Lug Nuts Step 1: Park the Trailer on a Level Surface The first step is to park the trailer on a level surface. This will prevent the trailer from moving while you remove the wheel. Ensure that the trailer is in a stable position to avoid any accidents during the process. Step 2: Block the Other Wheel(s) Blocking the other wheels of the trailer is essential to prevent any movement. Use blocks or chocks to secure the trailer wheels in place. This will ensure that the trailer remains stable while you work on removing the wheel. Step 3: Remove the Hub Grease Cap The next step is to remove the hub cap. The hub cap is usually located in the center of the wheel. You can use a flat-head screwdriver or a pry bar to remove it. Insert the screwdriver or pry bar under the hub cap and pry it off gently. You likely won’t get it off in one attempt and will need to work your way around the cap in multiple locations. Be careful not to damage the hub cap during this process. Step 4: Remove the Cotter Pin The cotter pin is a small pin that secures the axle nut in place. Remove the cotter pin by straightening the ends and pulling it out. If the cotter pin is rusted, you may need to use pliers or a small screwdriver to remove it, or cut it out with a pair of diagonal colors or similar. Step 5: Loosen the Axle Nut Once you have removed the hub cap, you can access the axle nut. Loosen the axle nut by turning it counterclockwise. You can use a socket wrench or an adjustable wrench for this task. Be sure to loosen the nut only, do not remove it completely at this point. Step 6: Remove the Washer and Wheel Bearing The washer and wheel bearing is usually located behind the axle nut. Remove it carefully, ensuring that it doesn’t get lost. Keep the washer in a safe place along with the axle nut. They should slide right out. Step 7: Remove the Wheel With the axle nut and washer removed, you can now remove the wheel. You may need to wiggle the wheel back and forth to loosen it from the hub. Once the wheel is loose, pull it off the hub and set it aside. Step 8: Inspect the Wheel and Hub Before installing a new wheel or re-installing the old one, inspect the wheel and hub for any damage. Look for signs of wear, such as cracks or dents, and ensure that the hub is clean and free of debris. This would be a good time to re-pack the bearings and hub with grease, or even replace with new wheel bearings. Step 9: Install the Wheel To install the new or old wheel, reverse the steps above. Insert the wheel onto the hub and wiggle it back and forth to ensure a snug fit. Replace the washer and axle nut and tighten the nut until it’s snug. Be sure not to over-tighten the nut, as this can cause damage to the hub. Step 10: Secure the Axle Nut Once the axle nut is tight, secure it in place by inserting a new cotter pin. Bend the ends of the pin to ensure that it’s secure. It’s always best to use a new cotter pin since the one you just removed has been previously bent and could be prone to breaking. Step 11: Replace the Hub Grease Cap Finally, replace the hub cap by gently tapping it into place. Use a rubber mallet or a block of wood to ensure that the hub cap is secure and flush with the wheel. If the hub cap has any damage, you may need to replace it. Step 12: Remove the Wheel Blocks Once you have installed the wheel and secured everything, you can remove the wheel blocks. Be sure to remove the blocks carefully and avoid any sudden movements that may cause the trailer to shift. Summary In conclusion, removing a wheel from a log splitter tow behind trailer that doesn’t have lug nuts can be a daunting task, but by following these steps, you can do it safely and easily. Remember to always work on a level surface, block the other wheels, and inspect the wheel and hub before installing a new or old wheel. And most importantly, be patient and take your time to ensure that everything is secure before you start using your log splitter trailer again.

How to Remove a Trailer Wheel That Doesn’t Have Lugs Read More »

How Much Does it Cost to Charge a Tesla Model 3?

As the world shifts towards cleaner, greener energy sources, electric vehicles have become increasingly popular. Tesla, the leader in electric vehicle production, has made great strides in the industry with the production of the Tesla Model 3. This car is not only environmentally friendly, but also efficient and stylish, making it a popular choice for car enthusiasts. One of the major concerns of potential electric vehicle owners is the cost of charging their cars. In this article, we will examine the cost of charging a Tesla Model 3 at home and at Tesla Supercharging stations. Home Charging Cost for Tesla Model 3 The cost of charging a Tesla Model 3 at home depends on several factors, including the cost of electricity in your area, the capacity of your charger, and how often you use it. According to Tesla, the Model 3 Long Range version has a battery capacity of 75 kWh, which can provide a range of up to 358 miles on a single charge. However, most Model 3 owners opt for the Standard Range Plus version, which has a battery capacity of 50 kWh and a range of up to 263 miles. Assuming an average cost of $0.12 per kWh of electricity, charging a Tesla Model 3 Standard Range Plus from empty to full at home would cost about $6. This is based on the assumption that the battery is completely empty, and the charging efficiency is 100%. In reality, charging efficiency may vary depending on various factors such as ambient temperature, the charging rate, and the condition of the battery. Another factor to consider when charging a Tesla at home is the capacity of your charger. The Model 3 comes with a standard onboard charger that can handle up to 11.5 kW of power, which translates to roughly 44 miles of range per hour of charging. However, Tesla also offers a High Power Wall Connector, which can provide up to 48 amps of charging power and can fully charge a Model 3 in as little as 7.5 hours. The cost of installing a High Power Wall Connector varies depending on your location and the complexity of the installation. In general, the cost of installation can range from $500 to $1,500. If you need a substation or panel upgrade, it will add more to the cost. A longer run of wire from your panel will also have a larger cost. Are you okay with conduit being visible on the outside of your wall? If not, having a wall re-drywalled also adds more cost. Supercharging Cost for Tesla Model 3 While home charging is convenient and cost-effective, there are times when you may need to charge your Tesla Model 3 on the go. Tesla Supercharging stations are designed to provide fast and convenient charging for Tesla vehicles on long road trips or when you’re away from home. Superchargers are located along major highways and in urban areas, and they can provide up to 170 miles of range in about 30 minutes of charging. The cost of charging at a Tesla Supercharging station varies depending on your location and the time of day. In some locations, the cost is calculated on a per-kWh basis, while in others, it is calculated based on the time you spend charging. In general, the cost of charging at a Tesla Supercharging station is higher than the cost of charging at home, but it is still reasonable compared to the cost of gasoline. As of 2021, the average cost of Supercharging is around $0.28 per kWh. This means that charging a Model 3 Standard Range Plus from empty to full at a Supercharging station would cost approximately $14. However, the cost may vary depending on your location, time of day, and the number of Supercharging stations in the area. It’s always a good idea to check the Tesla Supercharger app or website for the most up-to-date pricing information before embarking on a long road trip. One thing to keep in mind when using a Supercharging station is that the charging speed may decrease as your battery fills up. This is because the charging speed is highest when the battery is at a lower state of charge and slows down as it approaches full capacity. Therefore, it’s recommended to charge your Tesla Model 3 at a Supercharging station only when necessary and not rely on it as your primary charging source. It’s also worth noting that Tesla offers a Supercharger network credit program that provides free Supercharging to new Tesla owners. The credit amount and duration vary depending on the promotion and the model of the Tesla vehicle. So, if you’re a new Tesla owner, it’s worth checking if you’re eligible for this program. Factors that Affect Charging Costs There are several factors that can affect the cost of charging a Tesla Model 3 at home or at a Supercharging station. These factors include: Conclusion The cost of charging a Tesla Model 3 at home or at a Supercharging station depends on several factors, including the cost of electricity in your area, the capacity of your charger, and how often you use it. In general, home charging is more cost-effective than using a Supercharging station, but Supercharging is convenient for long road trips or when you’re away from home. Tesla also offers a Supercharger network credit program that provides free Supercharging to new Tesla owners. However, it’s important to keep in mind that the cost of charging can vary depending on several factors, including electricity rates, charging speed, battery capacity, ambient temperature, and charging frequency. By considering these factors and planning your charging schedule accordingly, you can reduce the cost of charging your Tesla Model 3 and enjoy the many benefits of owning an electric vehicle.

How Much Does it Cost to Charge a Tesla Model 3? Read More »