
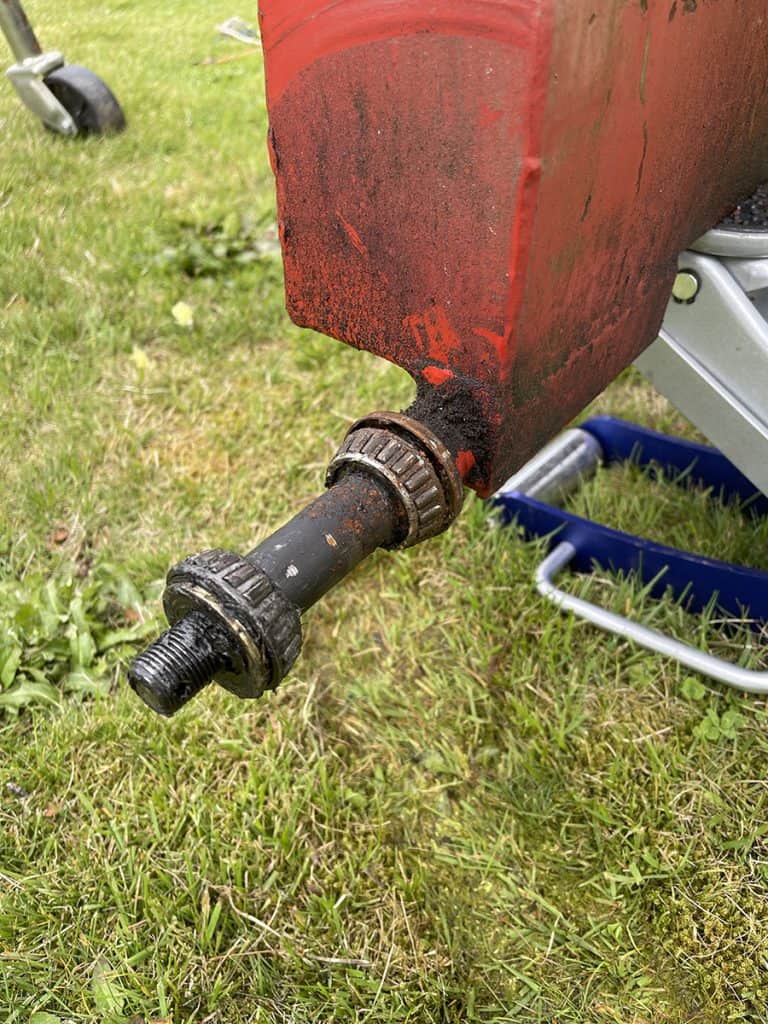
My neighbor who was moving to the other side of the state had a tow-behind 20-ton log splitter he no longer had any use for and offered to give it to me. The tires were fairly old, and the beads on one were no longer sealed to the wheel. To get the the tire replaced, I first had to remove the wheel from the axle, but quickly noticed the wheel did not have any lug nuts.
Trailer wheels that don’t have lug nuts are held in place by an axle nut and wheel bearings. This design is common in many types of trailers, including boat trailers, horse trailers, and utility trailers. The axle nut holds the wheel and hub assembly onto the axle, while the wheel bearings allow the assembly to rotate smoothly around the axle. To ensure proper operation and safety, it’s essential to maintain and inspect the wheel bearings regularly. A damaged or worn bearing can cause the wheel to wobble or even detach from the axle while in use, leading to a dangerous situation on the road. By understanding how trailer wheels are held in place without lug nuts, trailer owners can keep their equipment in good working condition and enjoy trouble-free towing. Read on as we go step by step on how to remove a trailer wheel that doesn’t use lug nuts.
Steps to Remove a Trailer Wheel That Has No Lug Nuts
Step 1: Park the Trailer on a Level Surface
The first step is to park the trailer on a level surface. This will prevent the trailer from moving while you remove the wheel. Ensure that the trailer is in a stable position to avoid any accidents during the process.
Step 2: Block the Other Wheel(s)
Blocking the other wheels of the trailer is essential to prevent any movement. Use blocks or chocks to secure the trailer wheels in place. This will ensure that the trailer remains stable while you work on removing the wheel.
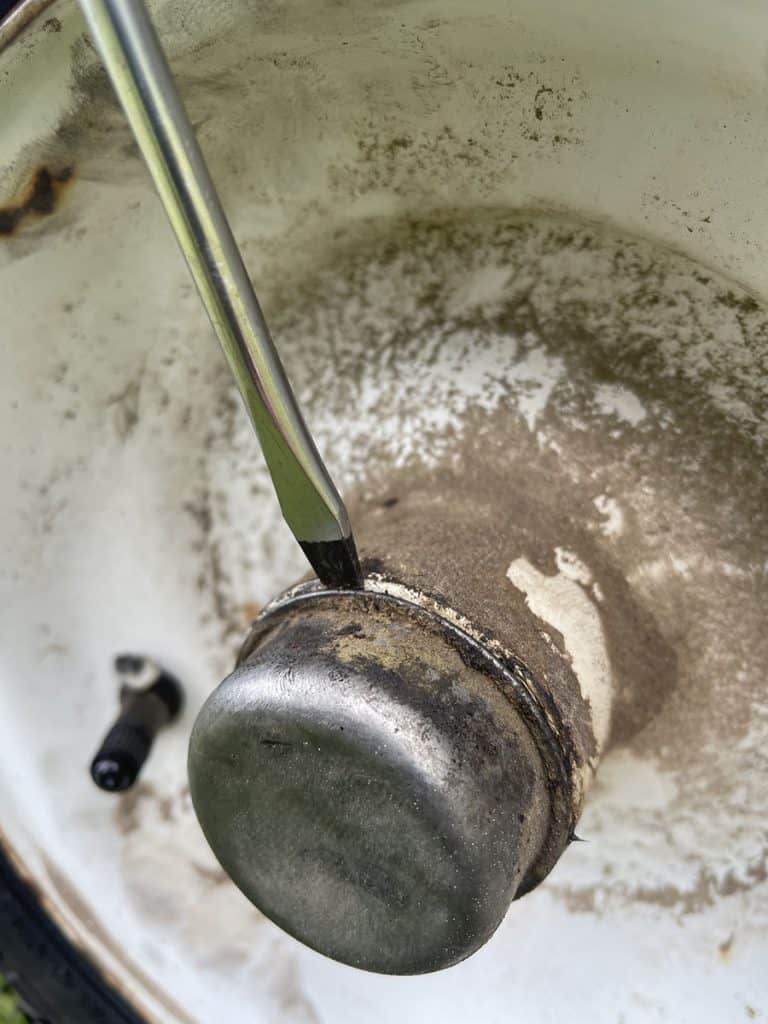
Step 3: Remove the Hub Grease Cap
The next step is to remove the hub cap. The hub cap is usually located in the center of the wheel. You can use a flat-head screwdriver or a pry bar to remove it. Insert the screwdriver or pry bar under the hub cap and pry it off gently. You likely won’t get it off in one attempt and will need to work your way around the cap in multiple locations. Be careful not to damage the hub cap during this process.
Step 4: Remove the Cotter Pin
The cotter pin is a small pin that secures the axle nut in place. Remove the cotter pin by straightening the ends and pulling it out. If the cotter pin is rusted, you may need to use pliers or a small screwdriver to remove it, or cut it out with a pair of diagonal colors or similar.

Step 5: Loosen the Axle Nut
Once you have removed the hub cap, you can access the axle nut. Loosen the axle nut by turning it counterclockwise. You can use a socket wrench or an adjustable wrench for this task. Be sure to loosen the nut only, do not remove it completely at this point.
Step 6: Remove the Washer and Wheel Bearing
The washer and wheel bearing is usually located behind the axle nut. Remove it carefully, ensuring that it doesn’t get lost. Keep the washer in a safe place along with the axle nut. They should slide right out.
Step 7: Remove the Wheel
With the axle nut and washer removed, you can now remove the wheel. You may need to wiggle the wheel back and forth to loosen it from the hub. Once the wheel is loose, pull it off the hub and set it aside.
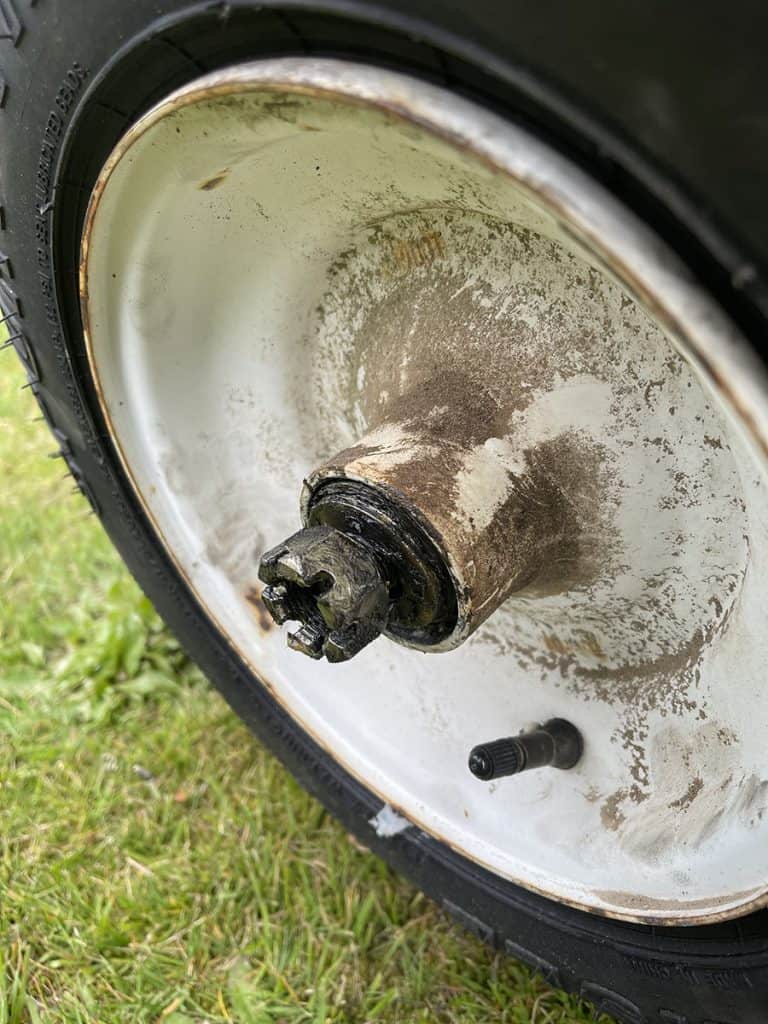
Step 8: Inspect the Wheel and Hub
Before installing a new wheel or re-installing the old one, inspect the wheel and hub for any damage. Look for signs of wear, such as cracks or dents, and ensure that the hub is clean and free of debris. This would be a good time to re-pack the bearings and hub with grease, or even replace with new wheel bearings.
Step 9: Install the Wheel
To install the new or old wheel, reverse the steps above. Insert the wheel onto the hub and wiggle it back and forth to ensure a snug fit. Replace the washer and axle nut and tighten the nut until it’s snug. Be sure not to over-tighten the nut, as this can cause damage to the hub.
Step 10: Secure the Axle Nut
Once the axle nut is tight, secure it in place by inserting a new cotter pin. Bend the ends of the pin to ensure that it’s secure. It’s always best to use a new cotter pin since the one you just removed has been previously bent and could be prone to breaking.

Step 11: Replace the Hub Grease Cap
Finally, replace the hub cap by gently tapping it into place. Use a rubber mallet or a block of wood to ensure that the hub cap is secure and flush with the wheel. If the hub cap has any damage, you may need to replace it.
Step 12: Remove the Wheel Blocks
Once you have installed the wheel and secured everything, you can remove the wheel blocks. Be sure to remove the blocks carefully and avoid any sudden movements that may cause the trailer to shift.
Summary
In conclusion, removing a wheel from a log splitter tow behind trailer that doesn’t have lug nuts can be a daunting task, but by following these steps, you can do it safely and easily. Remember to always work on a level surface, block the other wheels, and inspect the wheel and hub before installing a new or old wheel. And most importantly, be patient and take your time to ensure that everything is secure before you start using your log splitter trailer again.