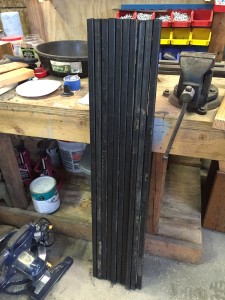
In this article I discuss how I built a custom sliding, diy steel gate with square tubing. With some help and tips from a friend of mind, this was my first major welding project.
Custom DIY Steel Gates – The 52-incher
Updated 1/15/16 (Locking Latch Installed)
After receiving a quote from the fence installers and not feeling warm and fuzzy with the price or options, we opted to go the DIY steel gate route. These custom DIY steel gates will be used for our backyard, and won’t be considered “driveway entry” gates. You can read about our Fence for Life Concrete fence review if you haven’t already seen it. One option offered to us were plastic gates along with some pre-built metal gates, but both seemed a bit overpriced. I was also concerned with possible UV damage on the plastic gate over time. A slope for one of our gate locations also had me concerned about the pre-built route.
2 Gates To Build
The Project: I’m actually going to be building two separate, custom DIY steel gates. One is for a 16 foot wide opening and the other is a smaller, 4 foot opening. For the 4 foot wide opening, the gate itself will be 52″ wide. I’m going with a fairly basic design, keeping the custom DIY steel gates simple, with a focus on function over form. While there’s plenty of pre-made decorative wrought iron gate pieces that we could weld in, the goal on this project was to keep both the design, construction, and cost as minimal as possible.
Material
All of our steel was purchased from a local steel supplier. A friend of mine has also used OnlineMetals >.I had to help one of the guys load it up, so it’s a good idea to bring a pair of gloves if you run into a similar situation. This metal will typically have a heavy layer of oil on it to help prevent it from getting any surface rust. It also helps in dirtying up your hands which you may not want to get inside of your vehicle.
Design Considerations
The four foot wide gate is already in progress. Custom DIY steel gates design considerations:
Sliding or Hinged?
Built from 1/8″ thick steel, it will be fairly heavy, we’ll have to decide if hinges are a practical option or if we’re better off going with a sliding mechanism. – UPDATE: Because of weight, this will be made into a sliding gate.
Keeping an Escape Artist In
This isn’t so much a security fence/gate as the intention is to keep our Siberian Husky from getting out. The slots are spaced out 4″ apart with an adequate height from keeping her from being able jump over or get any traction to climb out.
Durability
Long-lasting. While this might need some repainting over time and other maintenance, I want the gate itself to last quite a long time. Part of that included the decision to go with thicker, heavier duty metal. With that came an increase in both weight and cost.


Primed and Ready for Paint
The gate has now been primed and a few coats of flat black will go on soon after some wet sanding and cooperation with the weather (steady rain lately). I sprayed this outside with a rattle can primer/sealer and used an old table cloth to cover my rolling workbench since I didn’t have saw horses available.
Hardware to make this a sliding gate is currently on order (the rollers have arrived), but they rest of my parts should be arriving next week.
New pics to come, but this was taken at “high noon”, sorry for the harsh lighting and shadows. The gate is installed and sliding, just need to figure out what type of clasp I want to use to call this one done.

Latch is now installed with a 4″ angle aluminum filler, the original fence installation was offset for some reason, I didn’t notice it until months later.

Fencing the Gates Were Used In
The gates were custom built for concrete fencing we recently had installed. For more information on our fencing and a review, check out the link below!


