Fabrication

How to Use a Metal Lathe for Beginners

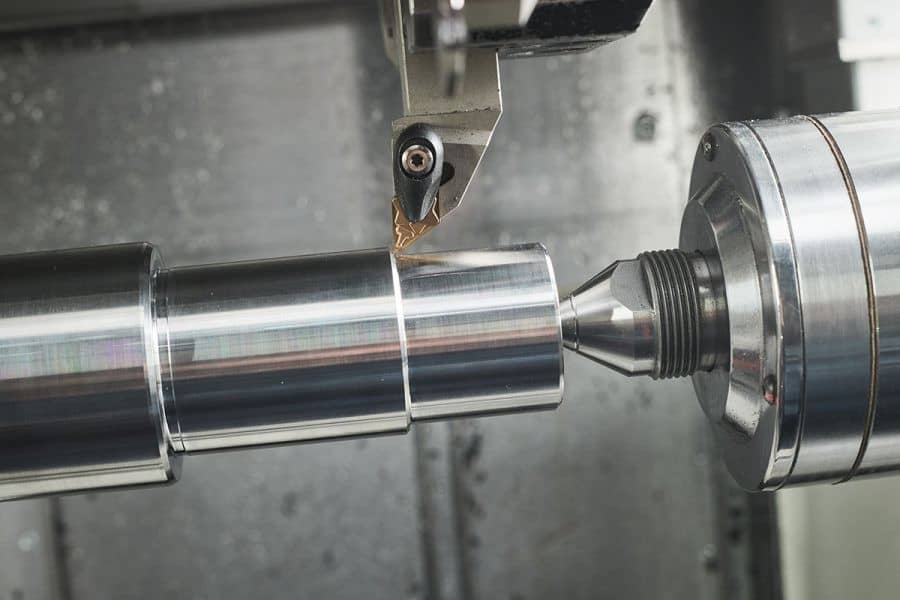
If you’re interested in machining, a metal lathe is an essential tool that you should learn to use. It’s a versatile machine that can be used to create a wide range of parts and pieces, from simple pins to complex engine components. However, if you’re new to machining, using a metal lathe can seem intimidating. In this article, we’ll walk you through the basics of how to use a metal lathe for beginners. Safety First Before we dive into the details of how to use a metal lathe, let’s start with the most important aspect: safety. A metal lathe is a powerful machine that can cause serious injury if not used properly. Here are some safety tips to keep in mind: Getting Started Now that you know the basics of how to stay safe while using a metal lathe, let’s dive into the details of how to use one. Advanced Techniques Once you’ve mastered the basics of how to use a metal lathe, there are a variety of advanced techniques you can learn to create even more complex pieces. Here are just a few examples:

5 Places Where You Can Learn Metal Fabrication

Metal fabrication is a skill that involves cutting, shaping, and assembling metal parts to create various objects. It is a field that is constantly evolving, with new techniques and technologies being developed all the time. Learning metal fabrication is a valuable skill that can lead to a fulfilling career in various industries, such as construction, automotive, aerospace, and manufacturing. If you are interested in learning metal fabrication, there are several places where you can acquire the necessary skills and knowledge. In this article, we will explore some of the most common places where you can learn metal fabrication. In conclusion, metal fabrication is a valuable skill that can lead to a rewarding career in various industries. Whether you prefer in-person classes or online courses, there are many options available for learning metal fabrication. By choosing the right training program for your needs, you can gain the knowledge and skills necessary to succeed in this exciting field.

What is Precision Metal Fabrication? What You Need to Know

Precision metal fabrication is the process of creating metal components with precise and accurate measurements using a variety of techniques such as cutting, welding, bending, forming and machining. This process is often used to create complex metal parts that require high levels of accuracy and consistency, and is essential in many industries, including aerospace, automotive, medical, and electronics. Precision metal fabrication involves a range of specialized equipment, such as CNC machines, laser cutters, and water jets, which are used to cut and shape metal into specific designs and shapes. These machines allow for a high level of precision and accuracy, ensuring that each component is made to exact specifications. One of the key benefits of precision metal fabrication is that it allows for a high degree of customization. With the ability to create parts in different sizes, shapes, and materials, precision metal fabrication can meet the specific needs of a wide range of industries and applications. Another benefit of precision metal fabrication is its ability to produce parts with consistent quality and reliability. By using advanced technology and techniques, precision metal fabrication ensures that each component is made to exact specifications, reducing the risk of errors and ensuring that parts fit together seamlessly. There are many applications for precision metal fabrication, including the creation of complex components for the aerospace and defense industries, medical devices such as implants and surgical instruments, and electronic components such as circuit boards and connectors. When choosing a precision metal fabrication service, it is important to look for a company with a proven track record of quality and reliability. The company should have experience working with a range of materials, including steel, aluminum, and titanium, and should have a team of skilled technicians who can work with advanced machinery and tools. If true precision is what you are looking for, understand what tolerances the company is able to achieve. Too high of a tolerance and your precision part may not work. If you are having something made to fit along with another item, that item will need to be made available and one of final measures is to ensure fitment is a desired at completion of fabrication. Overall, precision metal fabrication is an essential process for many industries, providing a high degree of accuracy, customization, and reliability. By working with a trusted and experienced metal fabrication service, businesses can ensure that their components are made to exact specifications and meet the highest standards of quality and performance.

How to Use an Angle Grinder to Cut Metal: Complete Guide

how to cut metal with an angle grinder

An angle grinder is a versatile and powerful tool that can be used to cut metal with ease. However, it’s important to note that using an angle grinder can be dangerous and requires proper safety precautions to avoid injury. In this article, we will discuss the steps to safely use an angle grinder to cut metal, as well as the risks involved and safety tips to keep in mind. Step 1: Choose the Right Disc The first step to using an angle grinder to cut metal is to select the right type of disc. There are several different types of discs available, including cutting discs, grinding discs, and flap discs. For cutting metal, you’ll want to use a cutting disc, which is specifically designed for cutting through metal. Be sure to choose a disc that is the appropriate size for your angle grinder and material you are working with. Step 2: Prepare Your Workspace and Wear Appropriate Safety Gear Before you begin cutting, it’s important to prepare your workspace. Clear any debris or clutter from the area, and make sure that there is enough space for you to move freely. It’s also a good idea to wear protective gear, including safety face shield, earplugs, and gloves. Ensure there are no loose items hanging (such as a pull strap) on your clothing and safety gear that would get entangled in the grinder. Step 3: Secure the Metal Next, you’ll need to secure the metal that you’ll be cutting. Depending on the size and shape of the metal, you may need to use clamps or a vise to hold it securely in place. This will prevent the metal from shifting or moving while you’re cutting, which could be dangerous. If you notice your metal move at any time, turn off your grinder and re-secure your metal. Step 4: Position the Angle Grinder Once your workspace and metal are prepared, it’s time to position the angle grinder. Hold the grinder with both hands, and make sure that the disc is perpendicular to the metal. It’s important to keep a firm grip on the grinder at all times, and to maintain a steady and even pressure while cutting. There are 2 places to hold the grinder. The main body of the grinder and the 90 degree handle that can be attached to either side of the grinder. Ensure this handles is securely tightened to the grinder. Step 5: Begin Cutting With the angle grinder positioned correctly, it’s time to begin cutting. Turn on the grinder, and slowly lower the disc onto the metal. Move the grinder back and forth along the line that you want to cut, using a steady and even pressure. It is always best to mark you metal with a line of either a marker or scribe to help with accurate grinding. Avoid applying too much pressure or forcing the disc, as this can cause it to break or shatter. Risks and Safety Tips Using an angle grinder to cut metal can be dangerous if proper safety precautions are not taken. Here are some of the risks involved, as well as safety tips to keep in mind: Safety Tip: Wear protective gear, including safety face shield, earplugs, and gloves. Make sure that your workspace is clear and free of clutter, and keep a firm grip on the grinder at all times. Safety Tip: Make sure that your angle grinder is plugged into a grounded outlet. Avoid using extension cords, and never touch the grinder with wet hands or while standing on a wet surface. Safety Tip: Keep flammable materials away from your workspace, and make sure that you’re cutting in a well-ventilated area. Use a fire extinguisher or water to put out any fires that may occur. Safety Tip: Use a disc that is specifically designed for cutting metal, and make sure that it’s the appropriate size for your grinder. Check the disc for cracks or damage before using it, and replace it immediately if you notice any issues. Avoid applying too much pressure or forcing the disc, as this can cause it to break or shatter. Safety Tip: Maintain a firm grip on the grinder at all times, and keep a steady and even pressure while cutting. Avoid using excessive force or making sudden movements. Lastly, once you have completed you grinding, make sure you allow the grinding wheel to stop spinning before placing it on the table. The spinning wheel still has enough force if it were to touch the table to send the grinder flying across the room. In conclusion, using an angle grinder to cut metal can be a quick and efficient way to get the job done, but it’s important to take proper safety precautions to avoid injury. Make sure that you have the right type of disc for your grinder, and that your workspace is clear and free of clutter. Wear protective gear, keep a firm grip on the grinder at all times, and use a steady and even pressure while cutting. By following these safety tips, you can safely and effectively use an angle grinder to cut metal.

Is Sheet Metal Fabrication Expensive? The Costs Explained

is sheetmetal fabrication expensive

Sheet metal fabrication is the process of transforming flat sheets of metal into useful and complex parts or structures. This manufacturing process is popular in a wide range of industries, including aerospace, automotive, construction, and many others. However, one question that often arises is whether sheet metal fabrication is expensive. The answer to this question is not straightforward, as there are various factors that determine the costs involved in sheet metal fabrication. In this article, we will discuss the costs associated with sheet metal fabrication and explain the various factors that can affect these costs. Material Costs The first and most obvious factor that influences the cost of sheet metal fabrication is the cost of the materials themselves. The cost of sheet metal varies widely depending on the type of metal used and its thickness. For example, stainless steel is generally more expensive than carbon steel. Additionally, the thickness of the sheet metal can also affect the cost, as thicker sheets are generally more expensive than thinner ones. Labor Costs Another significant factor that affects the cost of sheet metal fabrication is labor costs. The cost of labor can vary depending on several factors, such as the location of the manufacturer and the skill level of the workers. In general, labor costs in developed countries like the United States and Europe are higher than those in developing countries like China and India. Equipment and Tooling Costs Equipment, by far, drives the cost of sheet metal fabrication. Sheet metal fabrication requires specialized equipment and tooling, such as shears, punches, and press brakes. As more complex needs are required or the ability to produce at a higher volume, CNC machines may be needed. For example a CNC Plasma machine is very expensive but can produce a large quantity of volume in a much shorter time than manual labor. The cost of this equipment and tooling can be significant and can vary depending on the manufacturer and the specific equipment required. Additionally, the cost of maintaining and repairing this equipment can also add to the overall cost of sheet metal fabrication. Design Complexity The complexity of the design is another factor that can affect the cost of sheet metal fabrication. Simple designs that require minimal cutting and bending are generally less expensive than more complex designs that require multiple operations and specialized tooling. Additionally, the use of custom tooling or dies to produce specific shapes or features can also increase the overall cost of the fabrication process. Quantity and Order Size The quantity and order size also play a role in determining the cost of sheet metal fabrication. In general, larger orders or bulk orders are less expensive per unit than smaller orders. This is because larger orders allow manufacturers to optimize their production processes and reduce the setup and tooling costs associated with smaller orders. Shipping and Transportation Costs Finally, shipping and transportation costs can also contribute to the overall cost of sheet metal fabrication. The cost of shipping can vary depending on the distance between the manufacturer and the customer, as well as the weight and size of the finished products. In conclusion, the cost of sheet metal fabrication can vary widely depending on several factors, including material costs, labor costs, equipment and tooling costs, design complexity, quantity and order size, and shipping.

Is Metal Fabrication Hard? Here are the Facts

metal fabrication

Metal fabrication is a complex process that involves cutting, shaping, and joining metal to create a finished product. While some may perceive it as a challenging task, the truth is that metal fabrication is not necessarily hard, but it does require skill, patience, and attention to detail. Here are some facts about metal fabrication that can help you understand the process and the level of difficulty involved. This article focuses more on metal fabrication as a profession than a home hobby. What is Metal Fabrication? Metal fabrication is the process of creating metal structures or components by cutting, bending, and assembling raw materials. The raw materials can include steel, aluminum, copper, and other metals. Metal fabrication involves a variety of techniques, including welding, casting, forging, shaping and machining. The process can be used to create anything from simple metal brackets to complex industrial machinery. The Skills Required for Metal Fabrication Metal fabrication requires a range of skills, including technical knowledge, precision, and manual dexterity. It also involves the use of specialized tools and equipment, such as metal lathes, milling machines, and plasma cutters just to name a few. Metal fabricators must be able to read blueprints and drawings, perform mathematical calculations, and understand the properties of different metals. While these skills may seem daunting, they can be learned through formal training programs or on-the-job experience as well as self paced learning through online tools. Many metal fabricators start as apprentices or assistants, learning from experienced professionals before taking on more complex tasks. The Challenges of Metal Fabrication One of the biggest challenges in metal fabrication is ensuring that the finished product meets the required specifications. This involves careful planning and attention to detail throughout the fabrication process. It also requires the use of high-quality materials and tools to ensure that the finished product is strong, durable, and meets safety standards. Another challenge in metal fabrication is managing the various stages of the process. Depending on the complexity of the project, there may be multiple stages of cutting, shaping, and assembling metal components. Each stage must be carefully managed to ensure that the finished product is accurate and precise. Finally, metal fabrication can be physically demanding work. It often involves long hours standing, lifting heavy materials, and operating machinery. Fabricators must be in good physical condition and follow proper safety procedures to avoid injury. Conclusion In summary, metal fabrication is not necessarily hard, but it does require a range of skills and careful attention to detail. While there are challenges involved, with proper training and experience, anyone can learn to be a skilled metal fabricator. Whether you are interested in a career in metal fabrication or simply want to learn more about the process, understanding these facts can help you appreciate the skill and craftsmanship that goes into creating metal structures and components.

How Can I Learn Metal Fabrication?

Metal fabrication is the process of cutting, bending, and assembling metal structures into different shapes and designs. This is a crucial skill in various industries, including construction, automotive, and aerospace. If you want to learn metal fabrication, there are several steps you can take to become proficient in this craft. Here are some tips on how to learn metal fabrication: One of the best ways to learn metal fabrication is by taking a course or training program. Many vocational schools and community colleges offer courses in metal fabrication, which cover the basics of welding, cutting, and forming metal. These courses typically provide hands-on training, allowing you to practice your skills under the guidance of an experienced instructor. Welding is a fundamental skill in metal fabrication. It involves joining two pieces of metal together by heating them to a high temperature and applying pressure. If you want to learn metal fabrication, you should start by learning the basics of welding. There are several types of welding, including MIG, TIG, and Stick welding, and each one requires specific techniques and equipment. To become proficient in metal fabrication, you must become familiar with the different types of metalworking tools and equipment. These include cutting tools like saws and plasma cutters, bending tools like brakes and rollers, and forming tools like hammers and presses. Learning how to use these tools properly is essential to creating high-quality metal structures. Like any skill, metal fabrication takes practice to master. After learning the basics of welding and becoming familiar with metalworking tools and equipment, you should practice your skills regularly. You can do this by working on small projects at home, such as building a metal box or a simple frame. As you gain more experience, you can take on more complex projects. Learning from experienced metal fabricators is a great way to gain valuable insights into the craft. You can do this by joining a local metalworking group or attending metal fabrication workshops. These events provide opportunities to network with other metal fabricators and learn new techniques from experienced professionals. The metal fabrication industry is constantly evolving, with new technologies and techniques being developed all the time. For the home enthusiasts who wants to enter this arena as a hobby or potentially produce products, the internet is your #1 Source. YouTube, social media groups (such as Facebook) as well as other video and written content platforms, will be your fastest and least expensive gateway to the knowledge needed. Going slow, staying safe and learn at your own speed within your capabilities is a fun way to become “hobby skilled” in this art form. There are endless instruction videos on line and paired with social media groups of other enthusiasts will get you off the ground and running in not time. To stay ahead of the curve, you should keep up with the latest trends and technologies. This can be done by attending industry conferences, reading trade publications, and following industry experts on social media. In conclusion, learning metal fabrication requires a combination of theoretical knowledge and practical skills. By taking a course or training program, learning the basics of welding, becoming familiar with metalworking tools and equipment, practicing regularly, learning from experienced metal fabricators, and keeping up with the latest trends and technologies, you can become proficient in this craft. With dedication and hard work, you can develop the skills to create high-quality metal structures and excel in the metal fabrication industry.

The 4 Types of Sheet Metal Brakes Explained (Plus a Bonus Review!)

Sheet metal brakes are an essential tool for metalworkers and fabricators. They are used to bend and shape sheet metal into various configurations, such as boxes, trays, and ducts. There are different types of sheet metal brakes available, each with its unique features and benefits. In this article, we will discuss the different types of sheet metal brakes and their applications. Manual sheet metal brakes are the simplest and most affordable type of brake. They are operated manually, meaning that the user applies force to the brake lever to bend the metal. These brakes are ideal for small shops or hobbyists who work with thin sheets of metal. They are available in different sizes, with widths ranging from 12 to 48 inches. Box and pan brakes are versatile machines that can bend sheet metal into various configurations, including boxes, trays, and pans. They have removable fingers that allow the user to bend the metal at different angles. Box and pan brakes are available in both manual and hydraulic versions. They are ideal for fabricating HVAC ductwork, electrical enclosures, and other custom sheet metal products. Hydraulic sheet metal brakes use hydraulic pressure to bend the metal, making them more powerful and precise than manual brakes. They are available in both box and pan and straight brake configurations, with widths ranging from 4 to 20 feet. Hydraulic brakes are ideal for high-volume production shops and can handle thicker sheets of metal than manual brakes. CNC sheet metal brakes are the most advanced type of brake and are used for precision bending of complex shapes. They use computer numerical control (CNC) technology to program and execute precise bending sequences. CNC brakes are ideal for high-volume production shops that require consistent and accurate bending of complex shapes. They are also used in the aerospace and automotive industries, where precision and accuracy are critical. Bonus Sheet Metal Brake: Just like the box an pan brake, there is also a combination machine. Typically called a 3-in-1 machine. These typically have a brake, shear and slip roll combined in one unit. The brake will include the removable fingers as described above in the box and pan machine, however it will also include a shear that allows you to cut metal to size. The slip roll allows you to roll the metal sheet into a round shape (as an example) and in most cases also allows you to roll small round bar stock into either a round bend or even shrink softer rod material. This is a great multi-purpose machine for home enthusiasts. In conclusion, choosing the right type of sheet metal brake depends on the user’s specific needs and requirements. Manual brakes are ideal for hobbyists and small shops that work with thin sheets of metal. Box and pan brakes are versatile machines that can handle a range of bending applications. Hydraulic brakes are more powerful and precise than manual brakes and can handle thicker sheets of metal. CNC brakes are the most advanced type of brake and are used for precision bending of complex shapes. No matter what type of sheet metal brake you choose, it is essential to ensure that it is the right fit for your application and that you receive proper training on its safe and effective use.

Planishing Hammer vs English Wheel: Which is Right for You?

Metalworking is a time-honored craft that has been around for centuries. As technology has advanced, so too have the tools and techniques used to shape metal into various forms. Two of the most popular tools in a metalworker’s arsenal are the planishing hammer and the English wheel. Both tools are used to shape metal, but they do so in different ways. In this article, we will explore the differences between these two tools and help you determine which is right for you. Planishing Hammer A planishing hammer is a tool used to shape metal by striking it with a series of small blows. The hammer’s head is typically made of a hardened steel ball, which is attached to a handle. The metal being shaped is placed on an anvil, and the hammer is used to strike it repeatedly until it takes on the desired shape. Planishing hammers come in a variety of sizes, with some designed for use with hand-held, air-powered or hydraulic power. They are commonly used to shape small metal parts like fenders, hoods, or motorcycle tanks, and can also be used to smooth out welds or other irregularities. This short video from Eastwood shows a planishing hammer in action: English Wheel An English wheel is a tool used to shape metal by rolling it between two wheels. The wheels are typically made of steel and are shaped to form the desired curve or contour. The metal being shaped is placed between 2 wheels, while the piece of metal being shaped is moved back and forth over the dies, applying pressure to shape it. English wheels are capable of creating a much smoother finish than a planishing hammer and are often used for larger projects like car bodies or aircraft wings. Here’s another video from Eastwood showing how you can use an English wheel to form sheetmetal: Which is right for you? Choosing between a planishing hammer and an English wheel depends on several factors, including the type of metalworking project you are working on, the size of the metal parts you are shaping, and the level of precision you require. If you are working on small projects and require a high degree of precision, a planishing hammer may be the right tool for you. It is relatively easy to use and can quickly shape small parts with a high degree of accuracy. On the other hand, if you are working on larger projects and need a smoother finish, an English wheel may be the better choice. English wheels require a bit more skill and practice to use, but they are capable of shaping larger parts with a smoother finish. Ultimately, the choice between a planishing hammer and an English wheel comes down to personal preference and the specific requirements of your project. If you are new to metalworking, it may be worth investing in both tools to see which works best for you.

Mario Kart 8 Racing Cabinet (Old Cabinet Conversion to Nintendo Switch)

mario kart 8 racing cabinet

This is a project I had been looking into for a few months. New sit-down racing arcade cabinets such as Mario Kart DX can be quite pricey, coming in around $13K USD for a single cabinet. You’re also typically limited to just one game. I wanted to setup a 2 player racing arcade cabinet at our cabin for the game loft, and started exploring various options. We had temporarily setup an OpenWheeler racing wheel cockpit, but it just didn’t seem to delivery the experience I was looking for. I then started looking at building my own cabinet or possibly converting an old cabinet. In case you hadn’t figured it out, I opted to convert an old cabinet. Sega Rally Arcade Cabinets For this project, I started with an old Sega Rally racing game which was made in 1995. I found it for sale on my local Craigslist for $600. Being over 25 years old, it had certainly seen better days, but felt it would give me a solid starting point. Other Cabinet Considerations Ridge Racer and Rush 2049 have some intriguing design qualities to their cabinets. I was trying to find a pair of these, but did not have any luck. I looked into buying another pair of cabinets out of state, but with shipping wasn’t cheap. One seller advised I go through uShip.com, I was receiving quotes for over $2600. That wasn’t going to happen. I’ve seen pinball machines shipped last year across country for around $500. Even with 2 cabinets, the prices I was receiving seemed extremely high so I continued to see if I could find anything locally. Shipping these doesn’t seem like the most budget-friendly approach. I would certainly recommended trying to find something local. In all honestly, I think you typically need to be flexible, these games aren’t readily available. The Original Sega Rally Racing Cabinets I ended up picking these up just under an hour away from our house. The seller was able to confirm dimensions for me and I quickly realized I wasn’t going to fit two of these in the SylvanSport trailer. My neighbor was actually borrowing our 6’x12′ enclosed cargo trailer and so I was without it for about a week. Fortunately, the seller was willing to hold them for me. To Keep Original or Modernize I’m sure this build will not sit well with some who may feel cabinets such as these should be restored to their original condition. Others may be against a Nintendo system in a Sega cabinet. This cabinet had multiple issues. The screen for player 1 had a distorted image and the accelerator did not work. The previous owner thought it could be a ROM or board issue for the screen and a potentiometer with the pedal. Cabinet 2 had audio issues. Both screens had significant “burn in”. The kids got a chance to play them, but seemed to agree they would prefer to have the option of playing multiple, modern games. The decision was then made to do a full conversion. Sega Rally Billboard / Topper The Race Leader section of plexi did have a crack, this might help convince me to have custom graphics printed sooner than later. If I do go with new graphics, I’ll think of something else to use than “Race Leader” since it won’t be functional. With the original Sega Rally game, it did show which player was leading, so this is functionality I will lose in my Nintendo Switch conversion. Gutting and Cleaning After getting the cabinets home, I unloaded them into the shop. I connected everything and powered them to see the original functionality. It was also quite dirty. Steering Wheels The original wheel is quite a bit heavier and robust then PC-based racing wheels. Unfortunately, from what I’ve ready, they are extremely difficult to try and get re-wired, especially if being using for multiple games. A lot of times controls need to be remapped for each individual game. To keep things simple and easy, I went the plug-and-play route. I purchased a pair of the Hori Racing Wheel Mario Kart Pro Deluxe. These racing wheels are USB and simply plug into the Nintendo Switch docking station. Unfortunately, they do not include haptic feedback. Transporting (again) and Setting Up in the Cabin Loft I’m not sure the total of weight of these cabinets, but they’re certainly not light. After getting them hauled over to our cabin, I decided to remove the seat, and unbolt the main cabinet from the base. These made it much more doable for getting up to the loft with the help of my brother-in-law and nephew. Modernizing and Simplifying This was a big factor in the decision to update to a newer system. Trying to troubleshoot and get 25 year old hardware working again for an older, single game didn’t seem like the approach I wanted to take. Here’s a look at the under seat hardware: Gameplay – 2 Player Action Without the Split Screen Going back even to the original Mario Kart on the Super Nintendo I found it annoying having a split screen for two players. Back then, I don’t believe it was possible to setup two separate screens. Today, however, WiFi makes it a lot easier! While you do have the option of using the Online Play mode, we’ve been using the Wireless Play. In this mode, one player will create a lobby, then others can join. I’ll add some images for this later. Having to go in and setup the Wireless Play is a few more steps than just sitting down to a Mario Kart DX (or other racing game) and inserting some tokens, but I feel the tradeoff going to modern technology was well worth it. We’ve had extended family who have thoroughly enjoyed it, even though things were only temporarily setup. Requirements With this type of configuration, you do need to have a Nintendo Switch and game for each setup. For two cabinets, you need two Nintendo