
Over the last couple of years my previous GE EVSE has had some intermittent problems. I had been eyeing the ChargePoint EVSE’s for a while now as a possible replacement. That time has come, follow along as I swap out my existing EVSE with a brand new ChargePoint Home Flex.
Using the existing wiring from my previous EVSE, the installation was fairly quick and straight forward. A Wi-Fi connection does appear to be a requirement though. My Wi-Fi signal outside isn’t that great, but it was enough. This charging station will be primarily used for our 2012 Nissan LEAF, but we may occasionally use it for my daughter’s Tesla Model 3 with the use of the Tesla J1772 adapter.
ChargePoint Home Flex – The Specs
Here we’ll take a quick look at some of the specifications on the ChargePoint Home Flex.
- Can be installed indoors or outside
- 23 foot long J1772 charging cable
- Level 2, 240 volt charging – Up to 9 times faster than a normal wall outlet
- Flexible amperage settings, 16amps to 50amps as a plug-in install
- 60-80 amp circuits can be used in hardwired installations
- Works with all electric cars that use a J1772 connection (or with adapter such as with Tesla). Tested on leading EV models: Chevrolet Volt and Bolt EV, Hyundai Kona and Ioniq, Kia NIRO, Nissan LEAF, Tesla Models, Toyota Prius Prime, BMW i3, Honda Clarity, Chrysler Pacifica, Jaguar I-PACE, and many more
- UL listed for electrical safety
- ENERGY STAR certified for efficiency
- Smart Wi-Fi features: Schedule charging times, set reminders, and compatible with Amazon Alexa
Note: This is only intended as a reference, always be sure to read the manufacturer’s instructions. You can view an electronic copy of the English version of the ChargePoint Home Flex Installation Guide. If you’re not comfortable working with electricity, be sure to higher a reputable and licensed electrician. Be familiar with your local codes – if you’re not, ask or once again, contact an electrician.
If you’re interested in buying a ChargePoint Home Flex, they’re available here on Amazon.
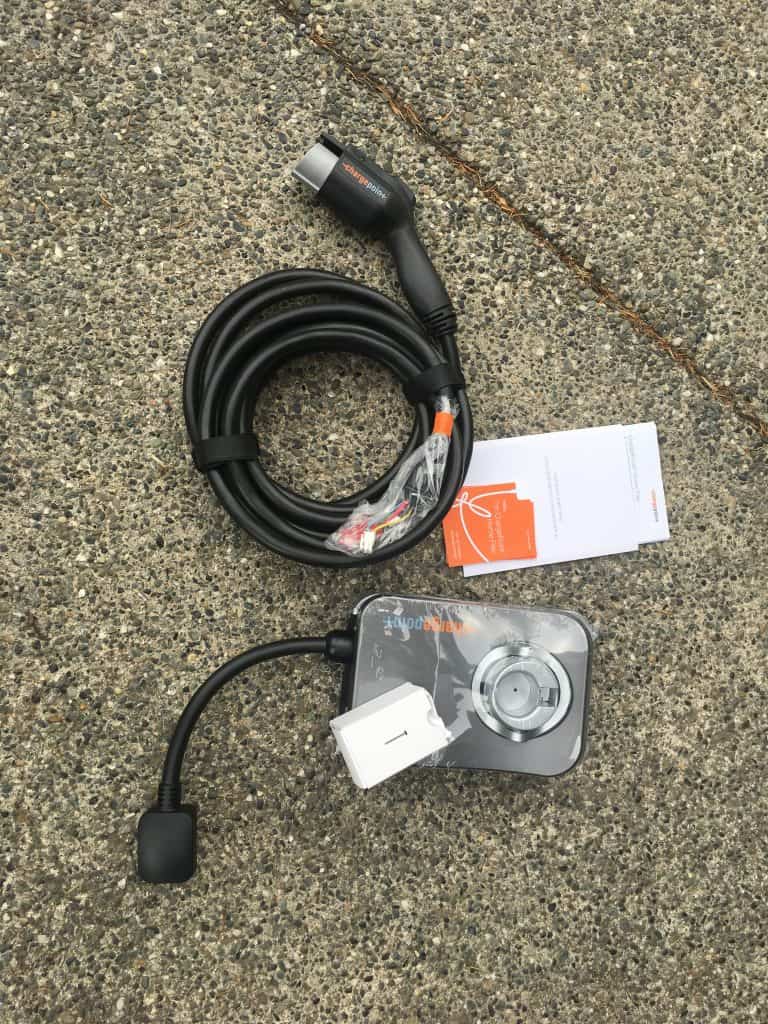
Unboxing the ChargePoint Home Flex
Here’s what the ChargePoint Home Flex comes with:
a. Charging station (with attached input power cable)
b. Faceplate (pre-installed on charging station)
c. Installation template
d. Charging cable with cable clip
e. Wire cover (pre-installed on charging station)
f. 10 mm (3/8 in) driver bit
g. 4 mm (3/16 in) drill bit
h. Three 6 mm (1/4 in) x 51 mm (2 in) lag screws

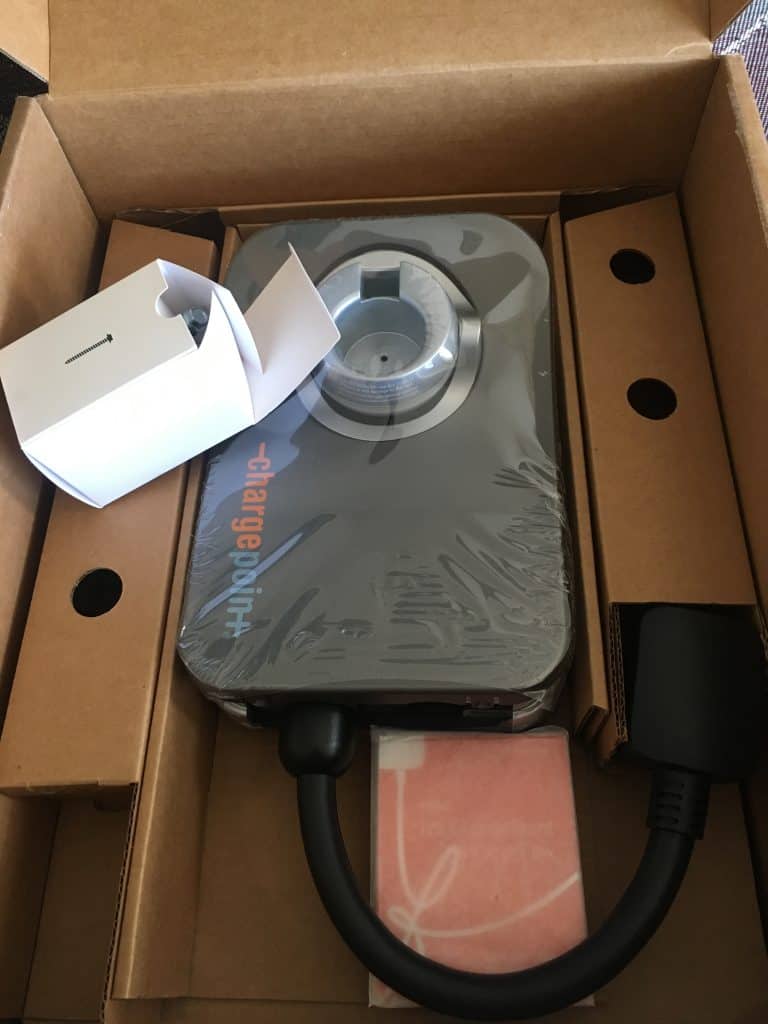
I don’t quite understand why, but the charging cable is shipped disconnected from the unit. It’s fairly quick to install, but this could be a very fast plug in and go installation for those using an existing NEMA 14-50 or 6-50 outlet.

Installation of the ChargePoint Home Flex
Tools Needed
- One NEMA 6-50 outlet, NEMA 14-50 outlet, or supplies to install a hardwired circuit
- Tape (I didn’t need any for my install, but it will come in handy if you use the mounting template)
- Pencil
- Stud finder
- Level
- Drill
- Coin
The first step is pretty straight forward, simply install one of the supplied screws into your mounting location (assuming you’re not installing into cinderblock, brick, or any other masonry type surface). You want to make sure you can locate a stud for a solid installation.

To determine my mounting location, I had to go inside the garage to locate some studs, then go back outside to measure from the corner of the garage. Be sure to also also account for the wall thickness of an adjacent wall if you go with this approach. The instructions say to leave 3mm gap for the screw head to the mounting surface.
Installing on Hardie Plank Lap Siding
This is stating what should be fairly obvious, but installing on lap siding isn’t ideal from a fit and finish standpoint. A flat surface would give a cleaner install. I considered recessing the unit or cutting out a rectangular shape out of the siding and installing a flat surface (similar to how faucets are typically done on lap siding). Ultimately, I decided not to. My previous EVSE lasted nearly 5 years before I decided it was time to replace it. I’m optimistic this ChargePoint unit will last much longer, but I also didn’t want to commit to cutting up my siding for something that might be removed later.
Deciding the Location: Height and Fitment
I wanted to locate this unit slightly closer to the driveway compared to where I installed the GE unit. For a new installation, you’ll want to make sure you choose a location that allows the cable to easily reach where a vehicle will be parked and that it still provides slack on the cable when plugged into the vehicle.
To determine the height I wanted to mount the EVSE at, I placed it over the lap siding to see where the 3 lag screws would roughly be located along with the back opening for the power wire. I also wanted to make sure it wouldn’t be at too awkward of an angle. My goal was to minimize gaps and keep it level.
To locate my next screws, I placed the charger onto the screw I just installed. A paper template is also included, but it didn’t seem practical for an installation on lap siding. It should work perfectly fine for a flat installation location.
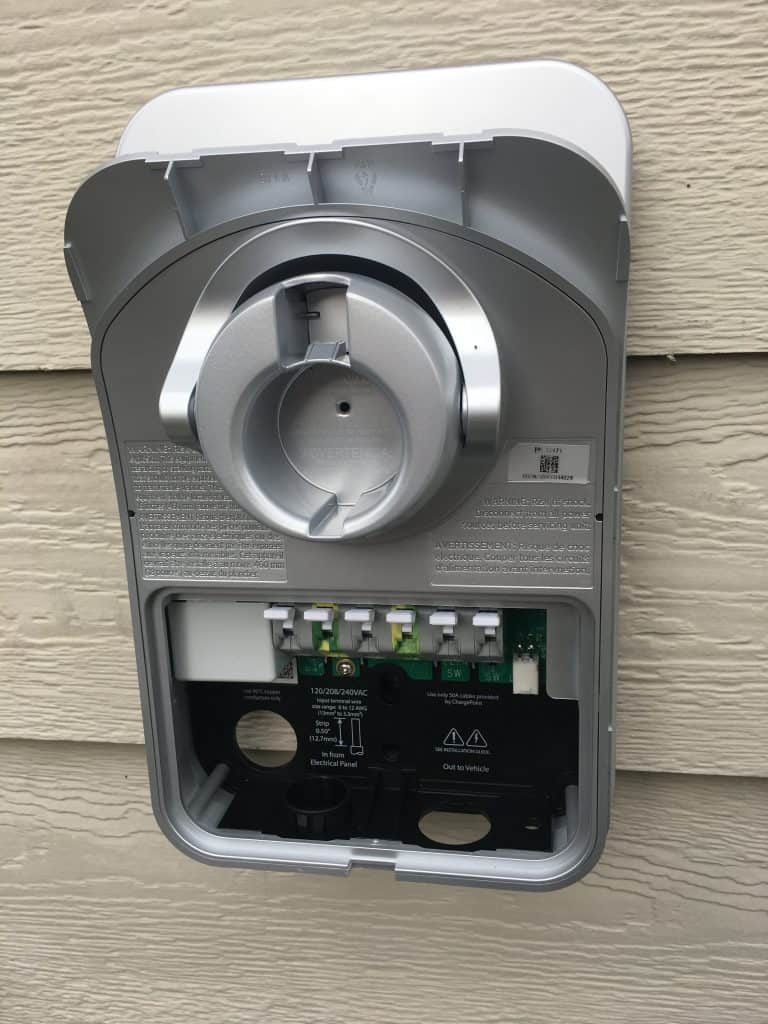
The next step was to locate where to pre-drill for the final two mounting screws. I also marked where I was going to run my wires from, since this was a slightly different location from the GE EVSE install.
Here I’ve pulled my wires through, completed the connections, and installed the last 2 mounting screws.
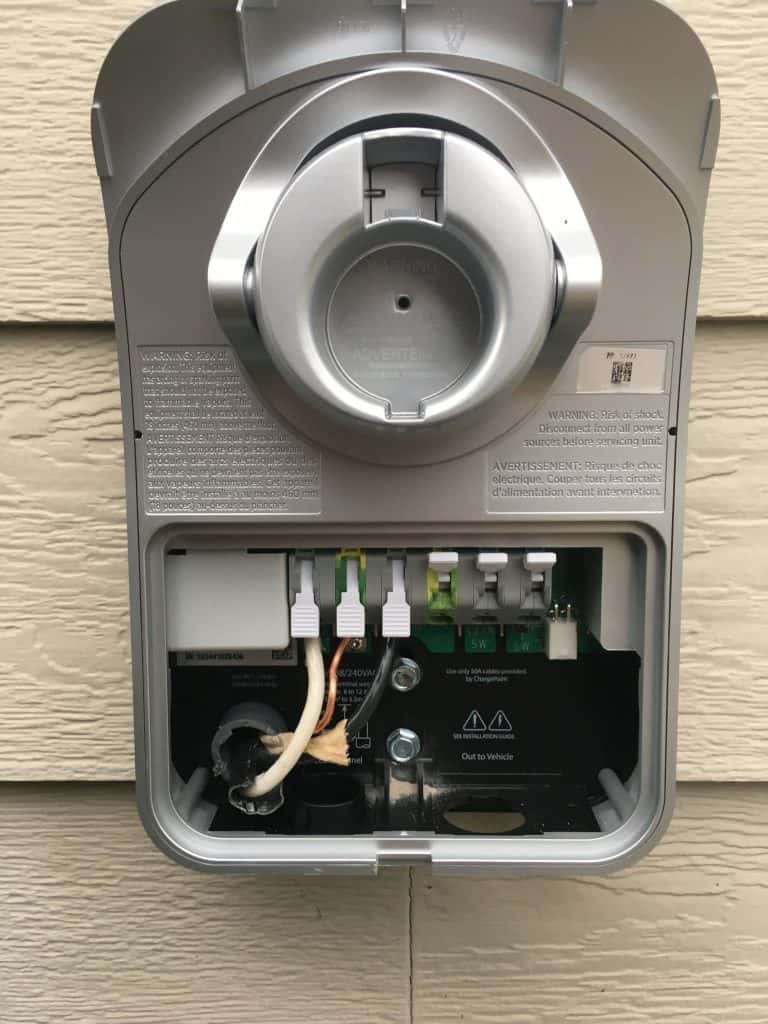
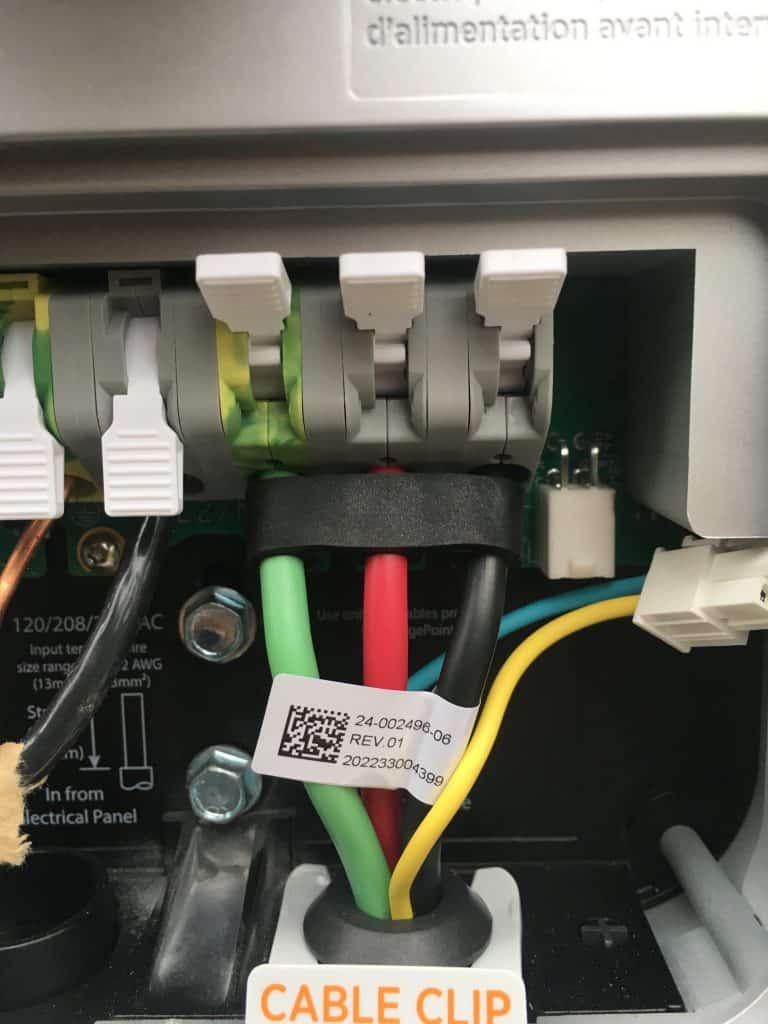
Here’s the charger power cables placed into position. Be sure to also install the Cable Clip. Last step was to press down on the white levers to secure the cables.
After all your connections are made and the mounting screws are installed, it’s time to install the panel cover. Be sure to look at which position is locked and unlocked. The instructions recommend using a coin to prevent damage.
Re-install the cover plate, turn on the power at the breaker, and you’re ready to go complete setup in the app. Once the breaker has been switched on, the indicator light should slowly light up white.
Setup Through the ChargePoint App
Once you have your ChargePoint Home Flex powered up, you should see the indicator light begin to blink white. It is now ready for setup through the ChargePoint App which can be downloaded from the App Store or Google Play.
Installation Type
Note: These screenshots were taken during my own installation, the steps and other images may change with updates to the ChargePoint App, I’m merely sharing these as reference.
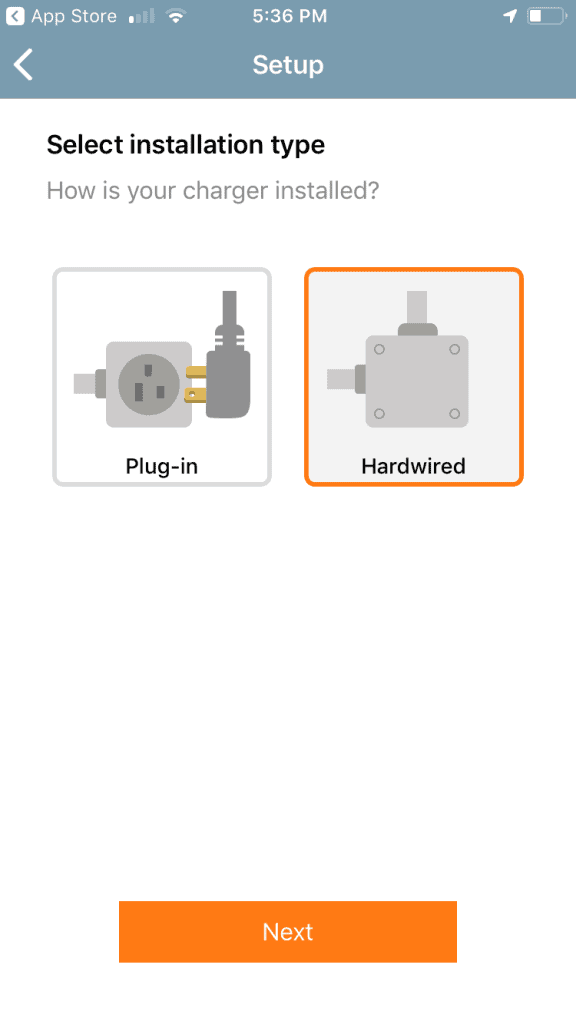
The first step is to select your installation type, whether it was hardwired or a plug-in. Since I hardwired mine, this is the selection I made.
Breaker Amperage
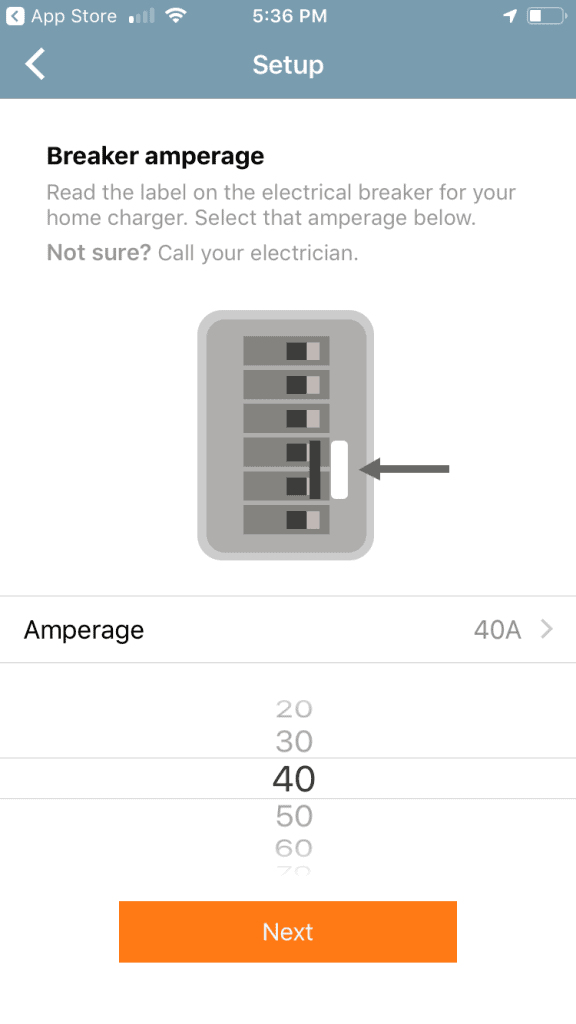
On this next screen, you’ll select your breaker amperage. For my installation, I have a 40 amp circuit. As the screen mentions, if you’re not sure, you might want to call your electrician. Otherwise, if you know where your circuit panel is, you could check there as well. Note that you need to select the breaker amperage and not the max output rating which will be less than the breaker amount.
Location
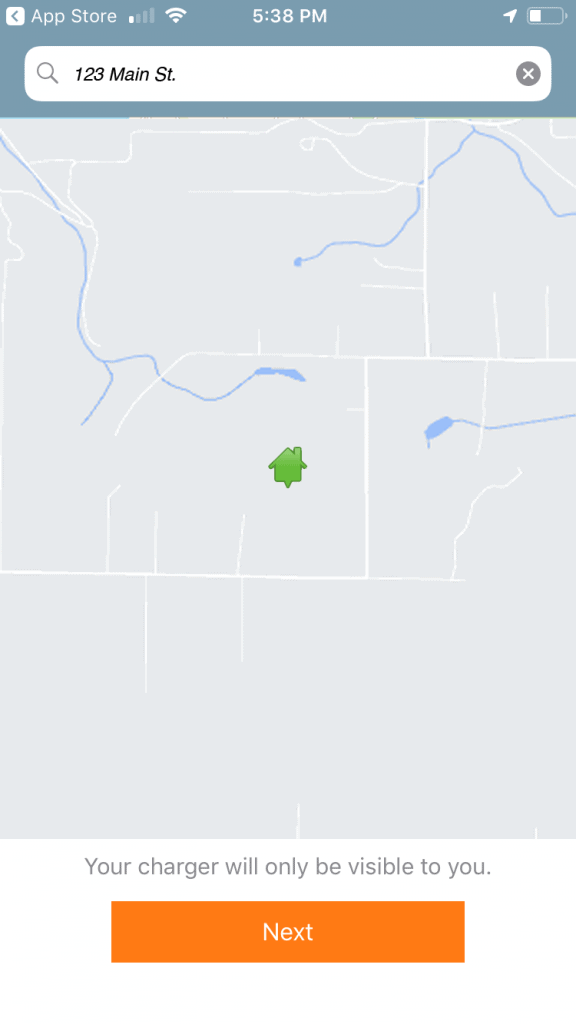
I modified this screenshot to hide my actual address, but on this screen it should automatically detect your location. If for some reason it doesn’t, you can manually type in your address. Click Next to continue to the next screen.
Benefits
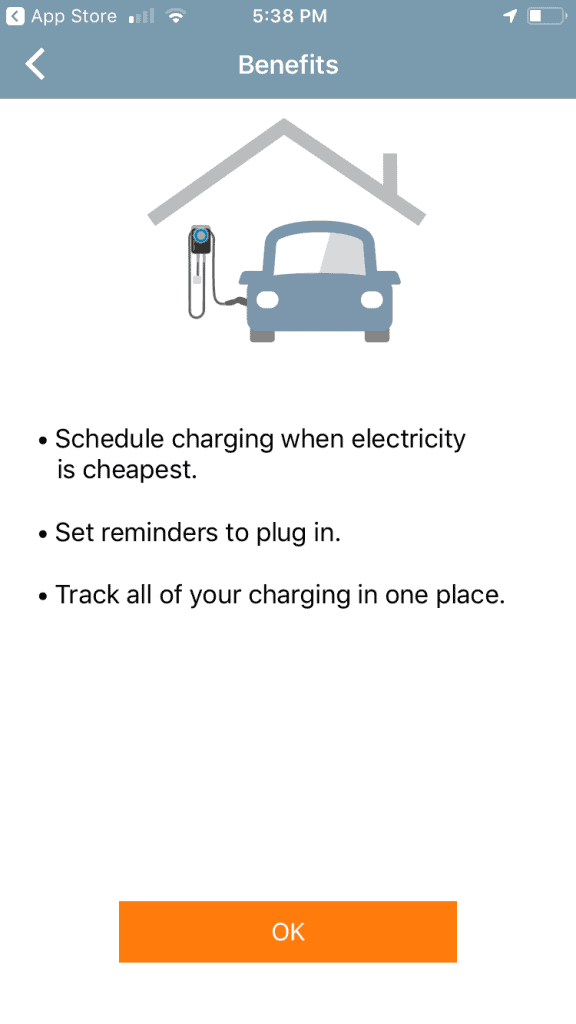
This is merely a confirmation screen, click OK once you’re ready to go to the last screen. As it states here, through the app you have a few features you can control. Through your settings, you can scheduling charging times if you have off-peak rates. My utility company does not offer off-peak rates, so it’s irrelevant to me. Nice feature if you have off-peak rates though. If you forget to plug in every now and then, the reminder feature could be handy. You can also see various metrics for tracking your charging.
Ready to Charge
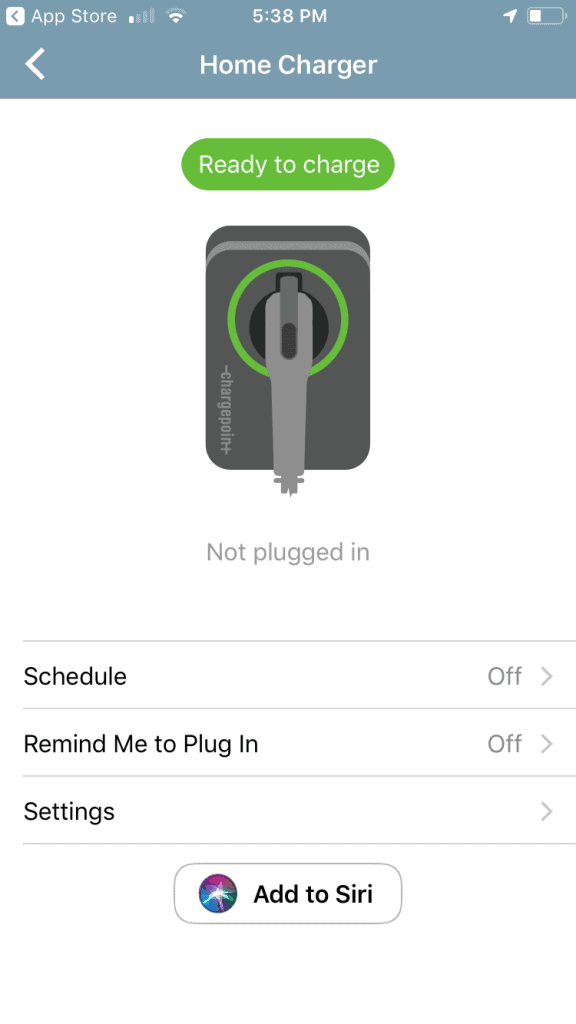
And that’s it. You’re now ready to charge. The indicator light on the ChargePoint Home Flex should now have a slow flashing green color.
For iPhone iOS users, you can add ChargePoint to Siri. If you ever want to change any of your settings or preferences, you can always go back into the app to make any necessary changes.
About ChargePoint
Prior to buying the ChargePoint Home Flex, I already had a ChargePoint account for their public charging network. Here’s a quick quote from ChargePoint:
EV charging is all we do, and we do it all—home, public and fast charging are super easy with a ChargePoint account. We’ve delivered more than 62.5 million charges to all kinds of cars at over 100,000 charging spots worldwide, and we’re always working to make EV charging even easier.
What I’d Like to See Different
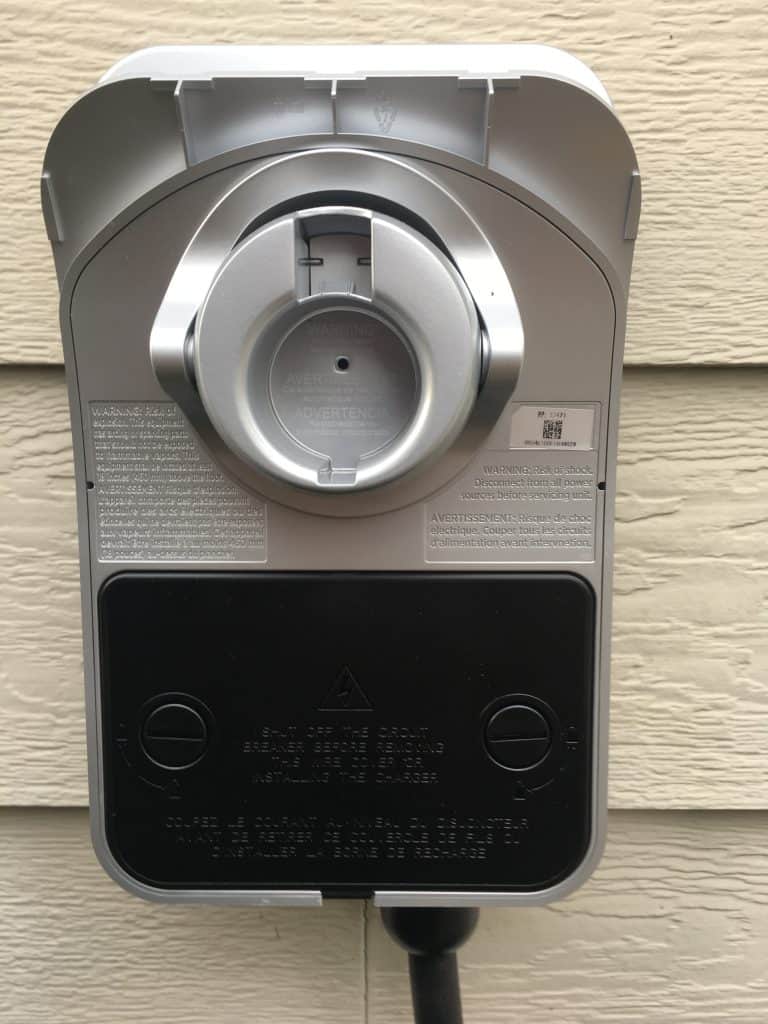
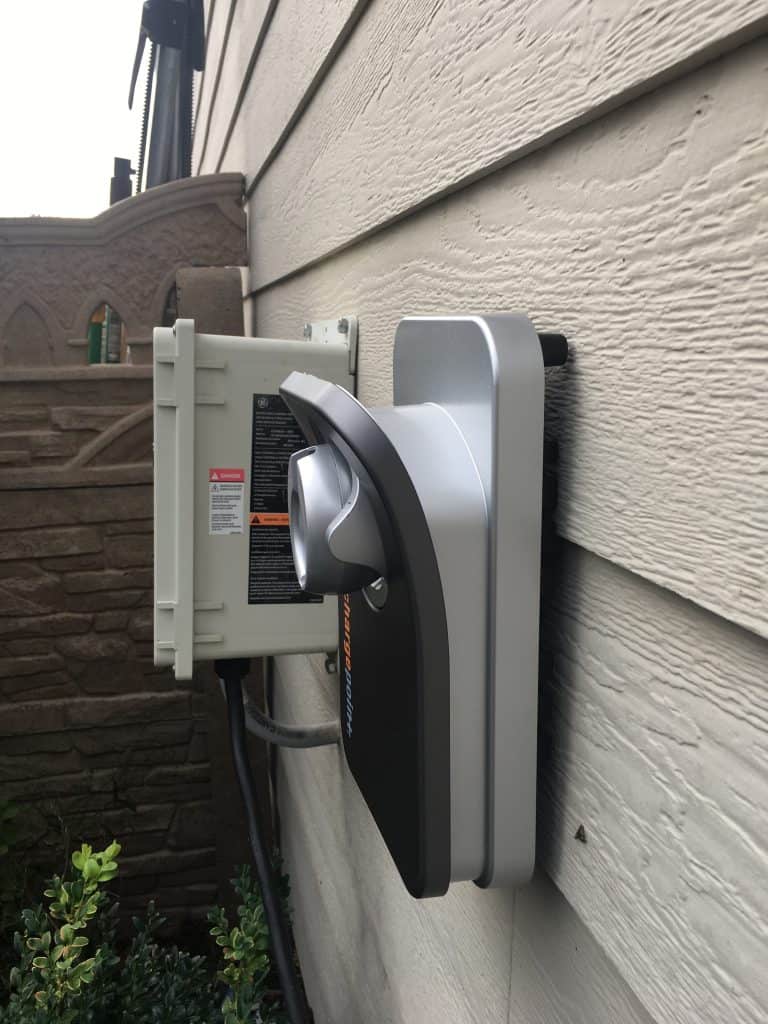
All in all I’m quite pleased with the overall design and easy installation of the ChargePoint Home Flex. As you can see from the side profile shot above though, it could use a bit of weatherstripping or a more flush design for a cleaner installation. The design has multiple gaps in the black portion. I don’t believe this design helps with cooling or anything else, but I could be wrong.
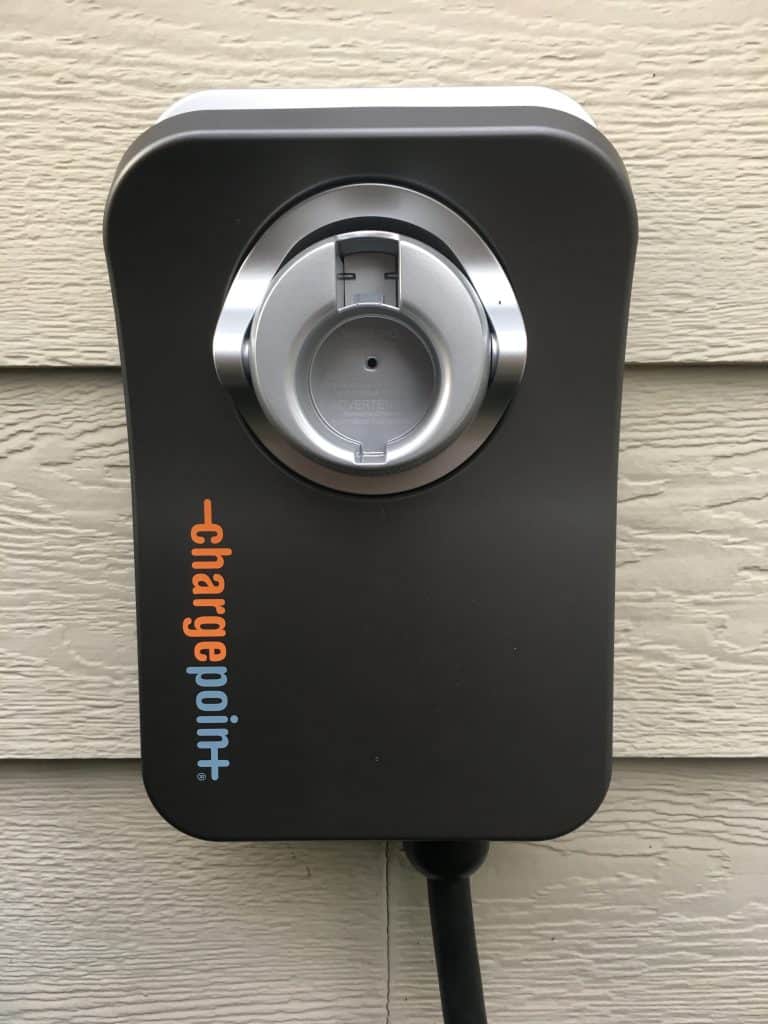
What I Like About the ChargePoint Home Flex
The style in my opinion looks great. The EVSE also has a wide range of amperage options. With the quick connect levers for the power supply and connecting the charging cable, installation is quicker and easier compared to other connection types that might use screws, etc. I was definitely impressed with these “quick connect” levers. I used the existing 8 gauge wire for my application, but the fact it can securely connect a range of wire sizes is impressive. My ground wire was quite a bit smaller and there was no problems getting a secure connection.
I’ll add more to this article as I get a chance to use the EVSE more, but so far, everything is working great!
GE vs. ChargePoint EVSE
These are just some random images of the GE EVSE and my new ChargePoint Home Flex. The GE unit really was just an ugly, industrial box with a circuit board inside. The ChargePoint unit actually has some design thought put into it and comes in a much more compact form.
It adds additional functionality with the Wi-Fi capabilities. There’s also great flexibility with the ability to install with various amperage.

The Problems with the GE EVSE
I still can’t pinpoint what the cause is, but we noticed there were times when we would plug our LEAF in to charge and we would get nothing.
The times this would happen tended to be on colder days and/or after it had rained. This EVSE was advertised for outdoor use. I opened the panel a couple times and everything was dry inside.
When we plugged the cord into the car, it wouldn’t start to charge. No confirmation indicating the vehicle was starting to charge with the blue indicator lights on the dash. Occasionally, if we left it plugged in, we would notice it started charging (usually several hours later).
The green light on the EVSE continued to flash as if everything working as intended. I’ve tried resetting the breaker to no avail. I may try troubleshooting it some more when I have some spare time. It could very well end up installed in our shop in the backyard once I get power ran to it.
More Electric Vehicle Articles
Looking for more? Check out our other posts on Electric Vehicles.
Buy ChargePoint Home Flex
The ChargePoint Home Flex is available on Amazon here. Be sure to select if you want the NEMA 14-50 or NEMA 6-50 plug. For hardwired installations, quickly and easily remove the NEMA cord.