
This article covers how to install a backyard zip line. It started with a 250′ 1/4″ cable line, cable clamps, turnbuckles, and chain.
WARNING: Serious injury or death could result in a zip line. You are responsible for your own actions and installations.
Hardware Used (Your Own Zip Line Install Will Certainly Vary)
- A 250 Foot Roll of 1/4″ Cable
- 2 Turnbuckles
- 8 Cable Clamps (make sure they are sized to match the cable)
- Approximately 9 Feet of Chain
Step 1 – Identify and Prep (if Required) Your Zip Line Installation Location
Before installing a backyard zipline, you need to know where you’re going to install it. This isn’t always an easy decision and several considerations need to be explored. If you plan to mount to trees, you’ll certainly want to make sure they are strong enough. Other backyard zip lines have been mounted to posts or other objects. You’ll also want to make sure the location you’ve chosen is strong enough. Smaller trees could bend or snap. Any tree may show signs of rotting or other health issues.
Originally, I was planning on installing this in a different area of our property. That location would have used a Douglas fir on one end while the other end would have been a post concreted into the ground. We only had about 70 feet we could have ran for this one, so I opted to go for a longer distance in a different location to take advantage of the 250′ of cable we bought.
You may find you have to cut down some trees, branches, bushes, or other vegetation for a clear path which can increase your preparation time. I had to do all of the above. For a run of over 200 feet, it certainly took a while.
I’ll have to buy some more cable if I go forth with a suspension bridge though. So much for having extra cable leftover.
Step 2 – Attaching the Cable to Your Mounting Locations
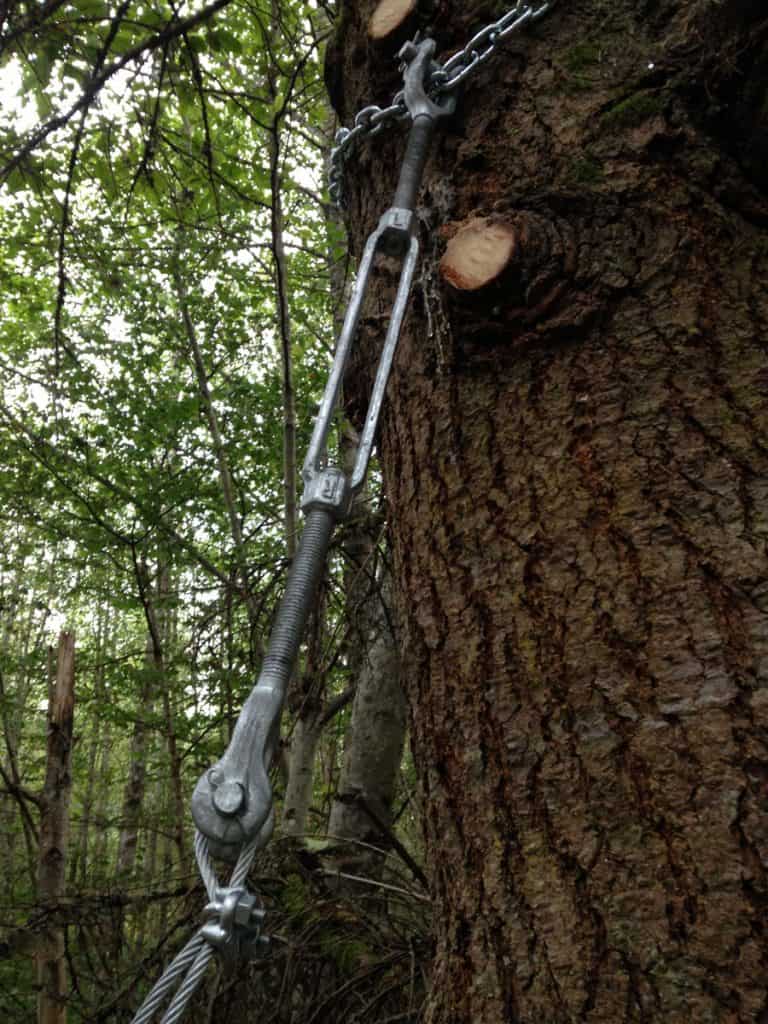
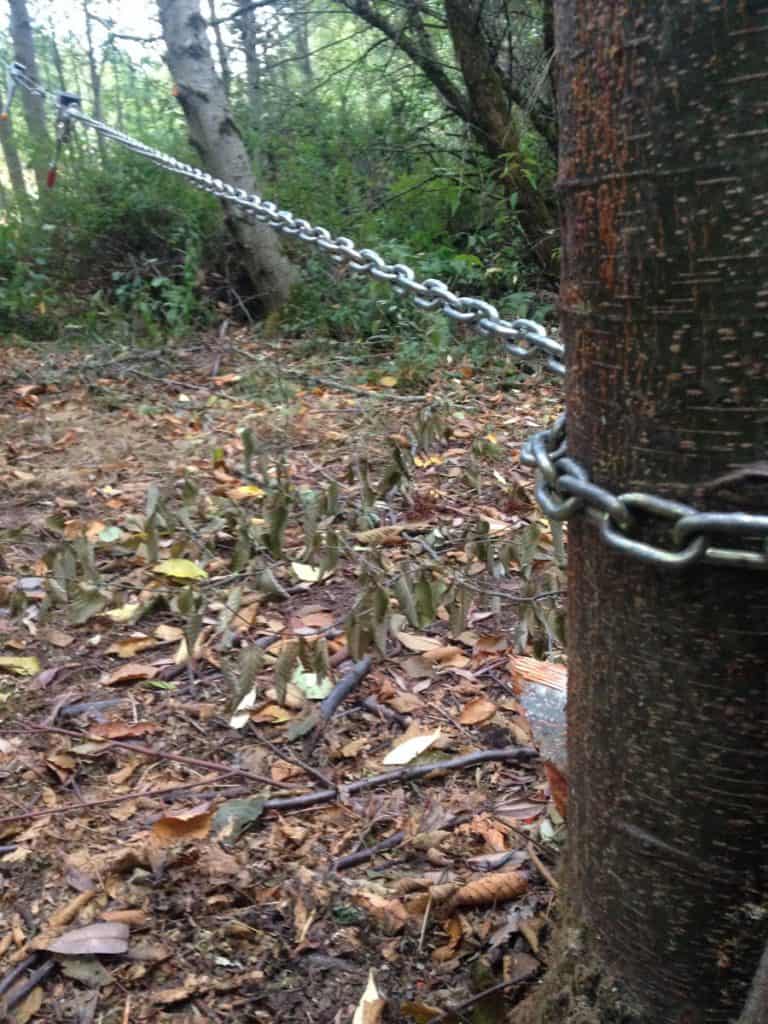
This is really multiple steps and will vary based on what hardware you choose to you use. Once the location was identified and prepped, it took some little trial and error to figure out just how high both ends should be. I ended up at 25 feet for the higher end, and the low end is approximately 9 feet – I may still change this later. I’ve read where most people will recommend a 6-8% in the line’s total length for a backyard zipline. To attach the cable to the trees, I used a chain around the trees. Using a hose or other material can help protect the tree.
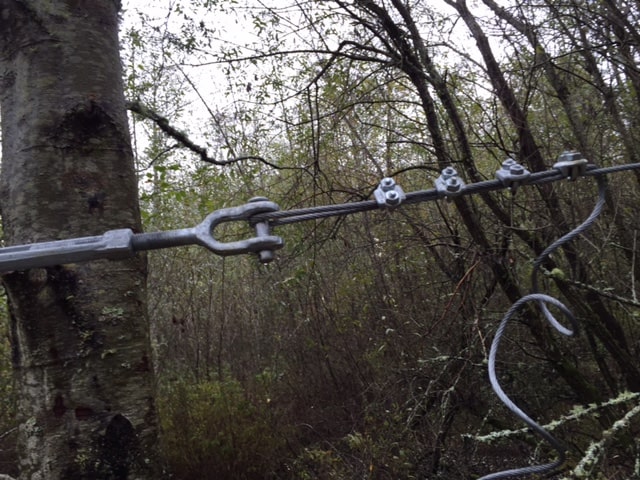
The turnbuckle was then attached to the chain. On the other end of the turnbuckle I attached the cable and clamped it down with 4 cable clamps. You could use less cable clamps, but I chose to add extra redundancy. Certainly don’t want the cable slipping through.
Install Photos for How to Install a Backyard Zip Line

A Better Cable Tensioning Approach
Perhaps a more practical tools to use over a cable puller is a Cable Grab or Tensioning Kit. I found these tools available at ZiplineGear.com, it looks as though they even have a loaner tool program where you can return them for a refund. The cable pulled worked okay for our backyard zip line. I likely would have used less turnbuckle turns if I had one of these tools instead. I had a fairly significant angle of pull using the cable puller, a straight on approach would have had resulted in a tighter pull with less effort.
“Brake”
To try and safely slow the kids down, I installed a wood block and bungee cord to act as a brake. This is a pressure treated for 4×4. On the block, I drilled a hole through the center. Then using a miter saw cut it the length of the hole. This allowed me to install the block on the zip line cable itself, using 4 screws to re-assemble it.
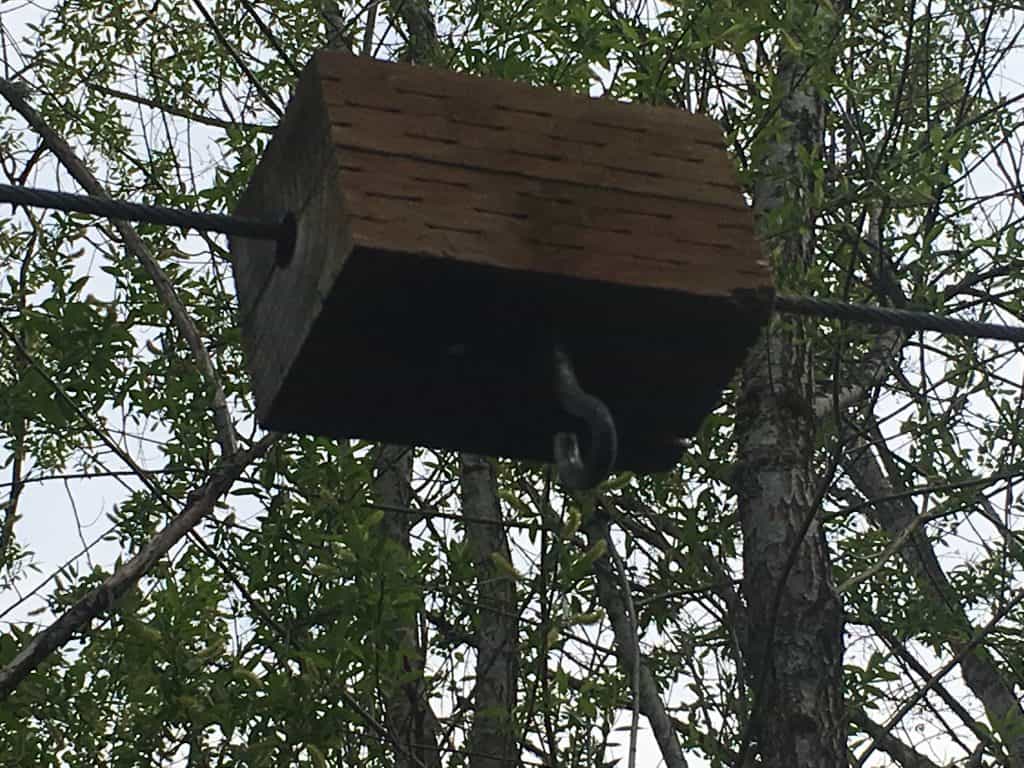
The eyelet is where the bungee cord will be attached. Some people will use a stage in the ground to attach the bungee, but I’ve ran it to an adjacent tree to keep the ground clear.
Safety Reminder
Again, you certainly don’t want to have any portion of your backyard zipline to fail as it could result in serious injury or death, plan carefully, build in some redundancy (extra cable clamps, etc).
Summary
Always plan safety for something like this. The pull system and safety harnesses are kept in our garage when not in use, the kids know to always ask us to come down and help them if they want to use the zip line.
We’re currently considering adding a shorter zip line to the treehouse, we’ll see how those plans pan out. Still plenty of other projects lined up right now. That covers the steps I took for how to install a backyard zip line. Leave a comment below if you have any questions. I’ll add some photos and videos later this season.