
This is another in-progress project I’m working on for the cabin. With the scrap wood left over from the Murphy bed cabinet I had enough to build a door. There’s a few kits available on the market for hidden doors, and specifically hidden doors with pool cue racks, but one’s I came across started out at $1200 USD and were made of particle board. With no particle board currently in the cabin, I didn’t want to start adding any. I’m still a novice with furniture woodworking, so I called upon my brother-in-law to give me a hand over at his shop.
Some of our rough sketch work to figure out what we were trying to build. Definitely don’t try to follow our chicken-scratch. Planning out for your own build certainly advised though, measure twice, cut once.

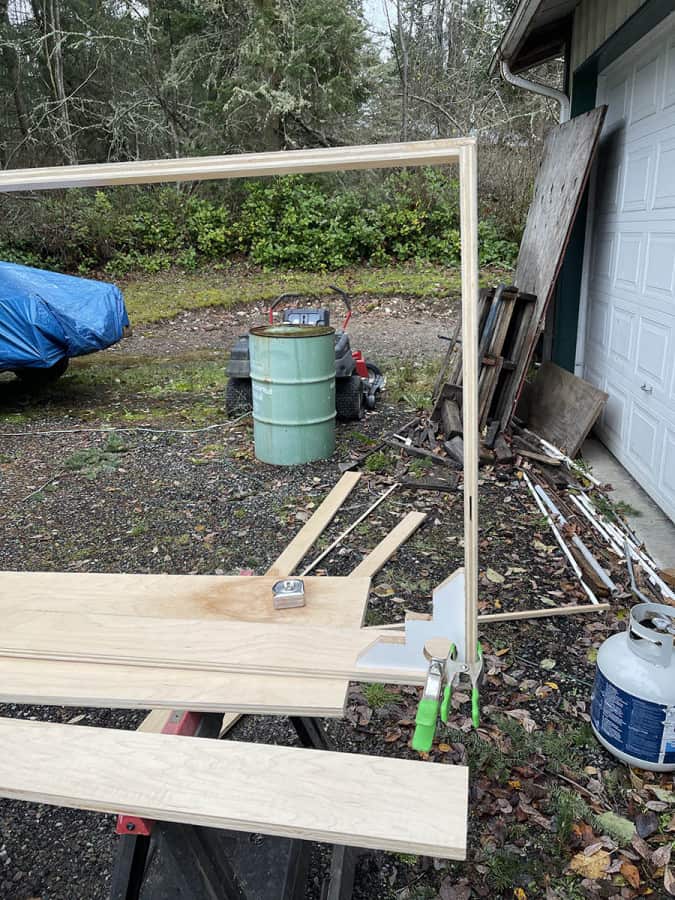
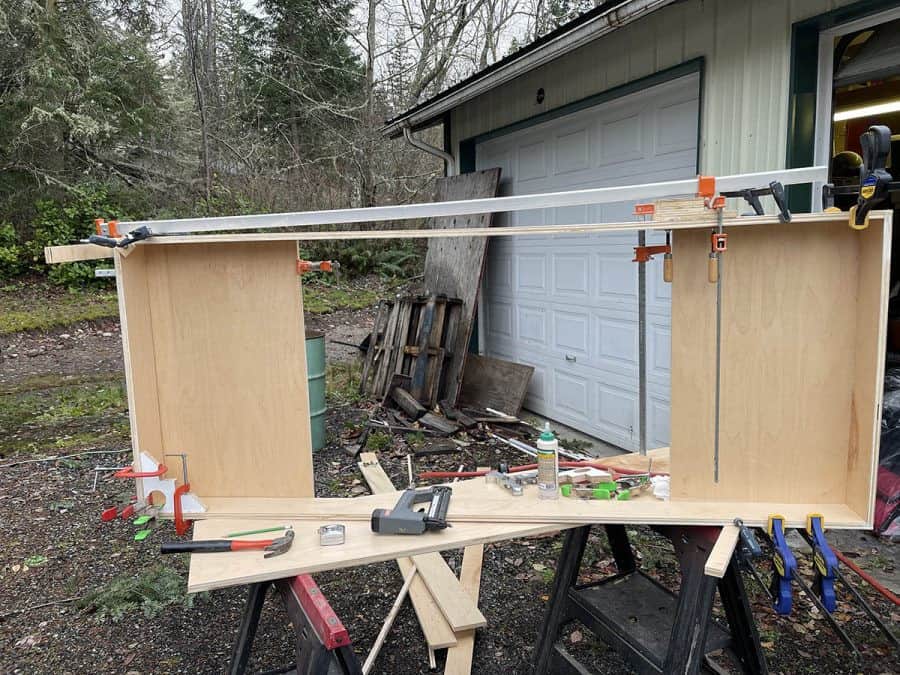
Building the Main Box of the Hidden Door
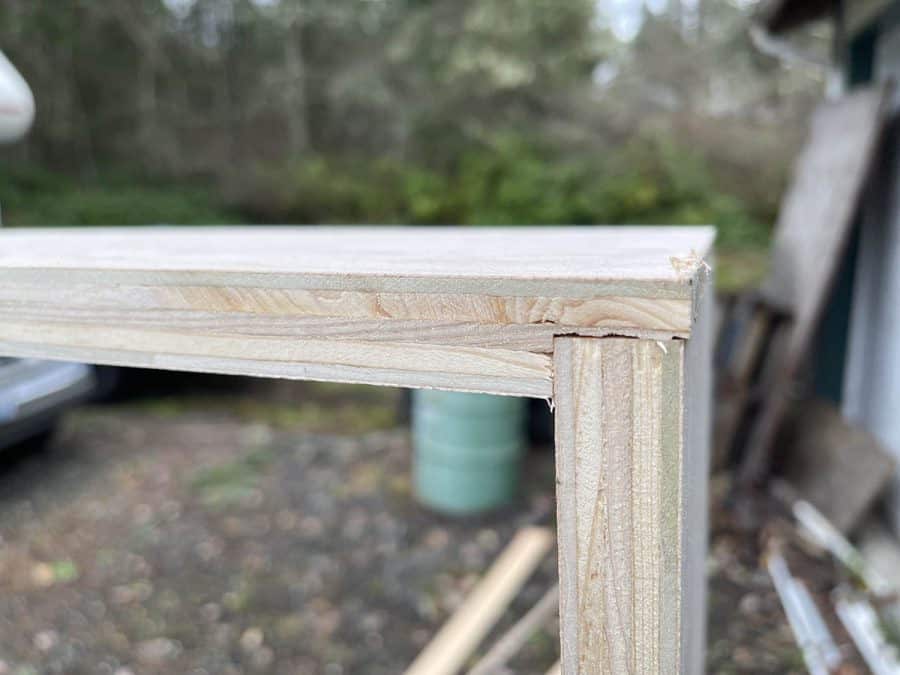
Some photos as we built the initial box structure of the door, I’ll add more descriptions later.
Several clamps keep everything in place for the glue to dry. In this photo, you see multiple sections for the back panel. I may have been able to get one single piece from the Murphy bed scrap wood cut differently, oh well. This ended up with 3 pieces. The upper shelf was positioned to hide the gap at the top. We also placed a trim piece to hide the lower section.
Shelves for the Hidden Door Pool Cue Rack
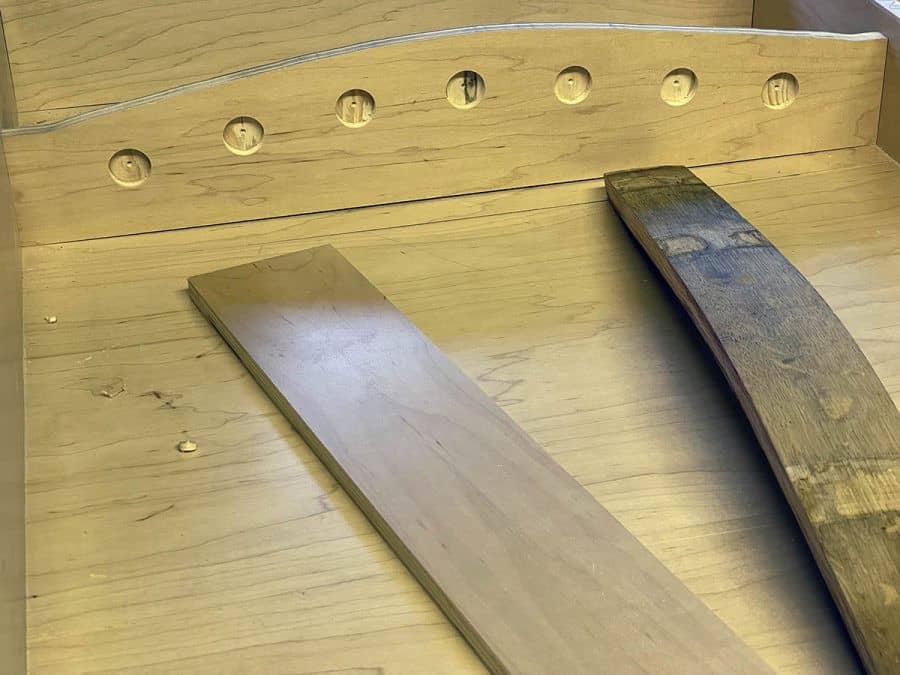
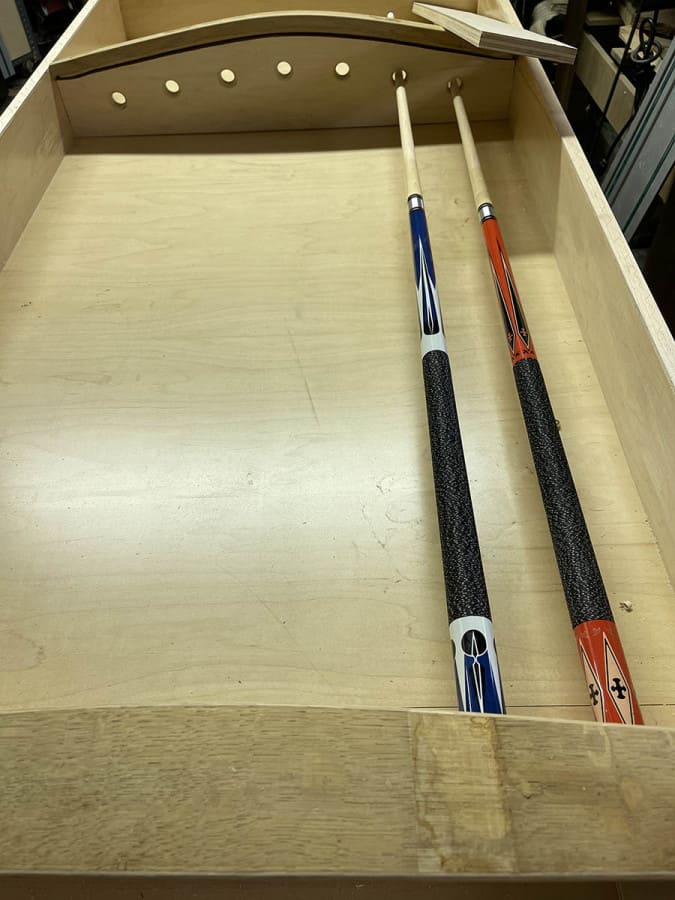
Originally we intended to have the barrel staves go flush to the edge of the door, however, re-thought our decision on this. The overall intent is to make the door as inconspicuous as possible and will have some fixed out trim. Based on this, the edge of the door will be hidden when closed. After spending a good amount of time figuring out how to notch the staves to fit flush, the idea was scratched. This image also shows a couple pool cues we used to determine rough placement of the shelves.

I didn’t snap a photo, but we had shelves cut to width and traced the contour once the staves were cut to size. A fairly quick cut on the bandsaw, one last dry fit, and the shelves were ready to be drilled.
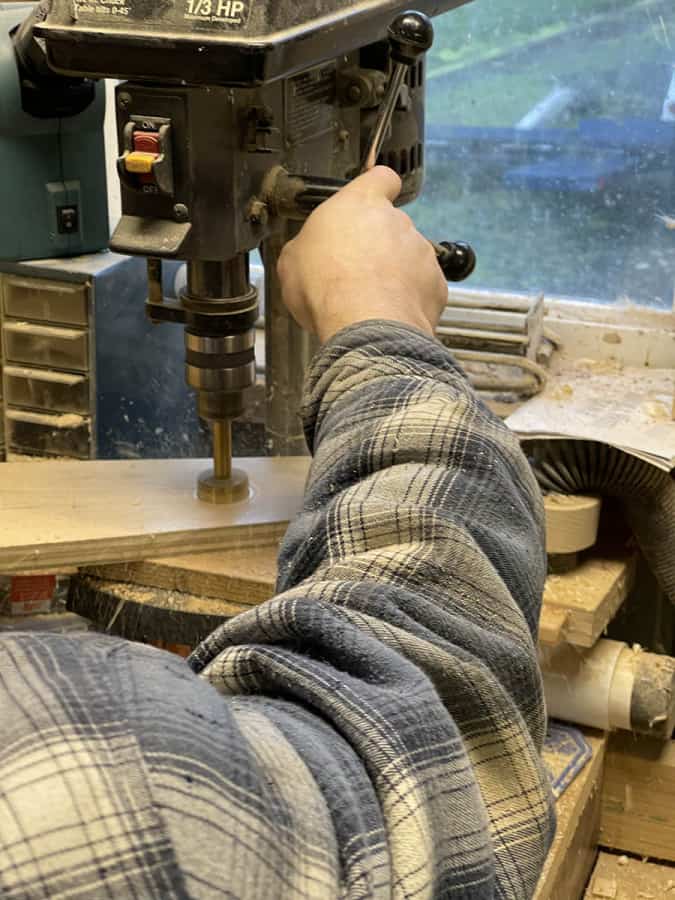
Drilling the Shelves
Forstner bits were used to drill the holes for the shelves. The lower shelf was drilled to a depth of 3/8″ an inch using the depth gauge on the drill press. The upper shelf was drilled all the way through.
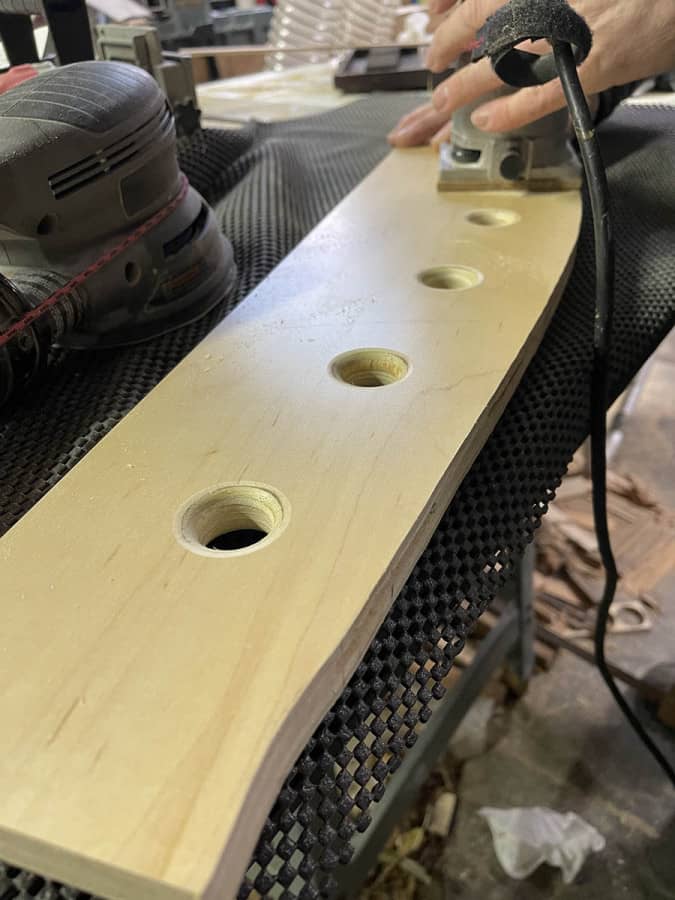
Routing the Edges
A router was used to give a softer edge to the holes, a bit of a chamfered edge.
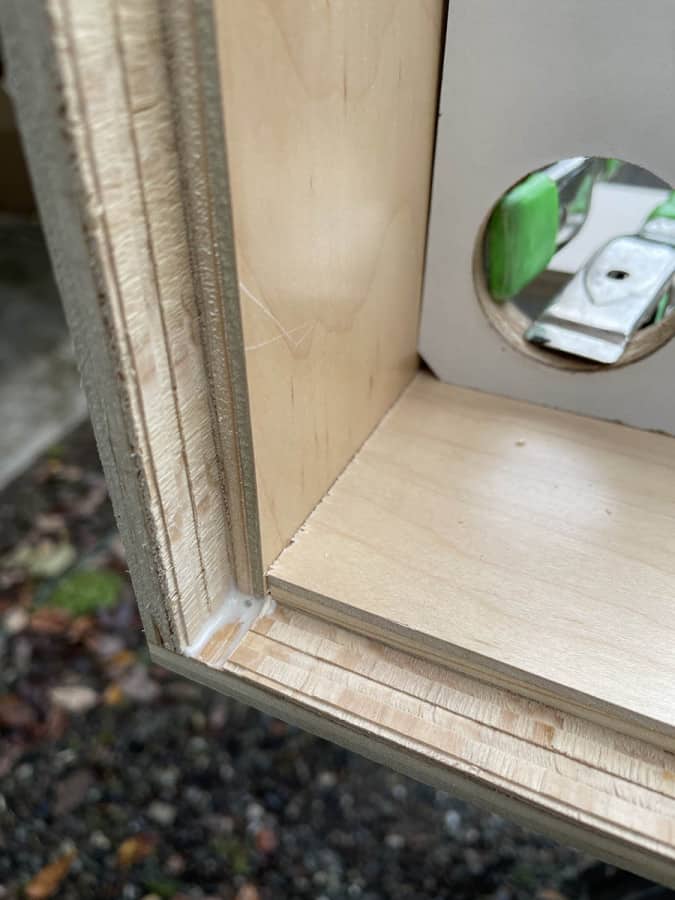
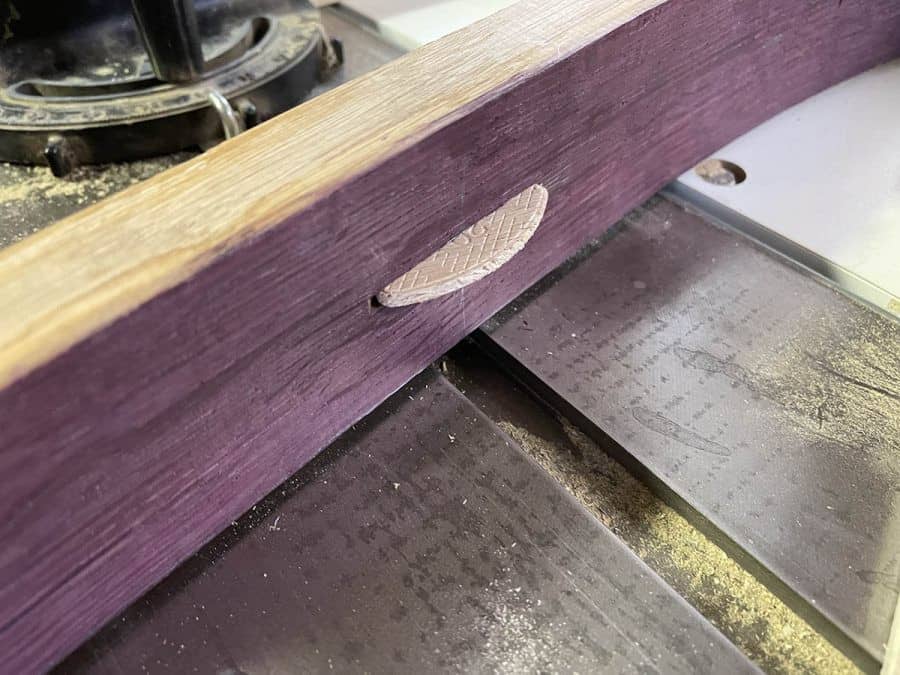
Barrel Stave Biscuit Joints
Here’s an image of a biscuit joint. Glue should be strong enough to hold the barrel staves in place, but I will also have screws from the door sides also holding them into place. The screws will be countersunk and plugged.
Here’s the “lower shelf” where the pool cues will rest. Using a Forstner bit always lives a detent in the middle, but I plan to glue in some felt pieces later.
Dry Fit Before Final Assembly of the Shelves
A quick dry fit before the shelves were screwed into place (from the side and back). The barrel staves will be stained and final assembly later.
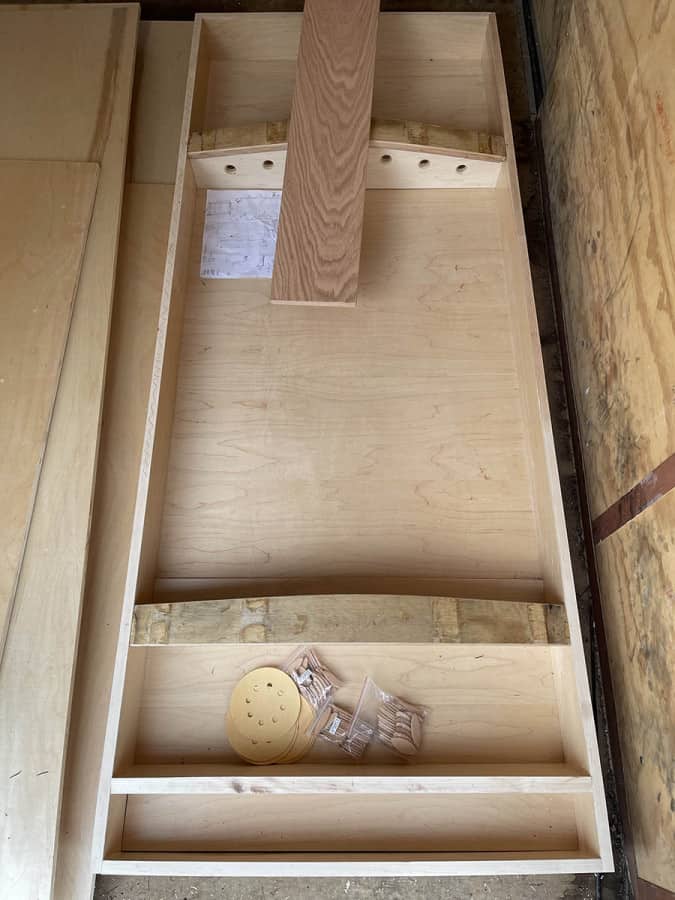
Primary Structure Complete
Here’s the end of our second day of work. The door was now ready to haul over to the cabin.

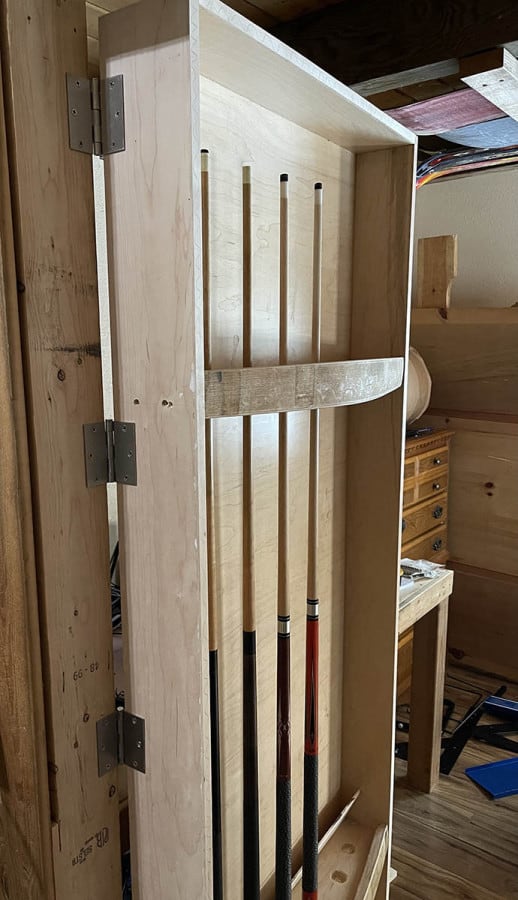
I brought it back over to my house in our enclosed trailer. The door, along with the Murphy bed cabinet plywood will be hauled over to the cabin soon. I’m planning to use five standard door hinges. If they don’t work, I’ll look at other hinge options.
At the Cabin and Hinged
I was surprised, but I was actually able to fit the hidden door, all but two pieces of the Murphy bed cabinet, laminate flooring, and a handful of other items into our Tesla Model X. Didn’t have to wait on my dad or neighbor to help haul it over in their truck after all.
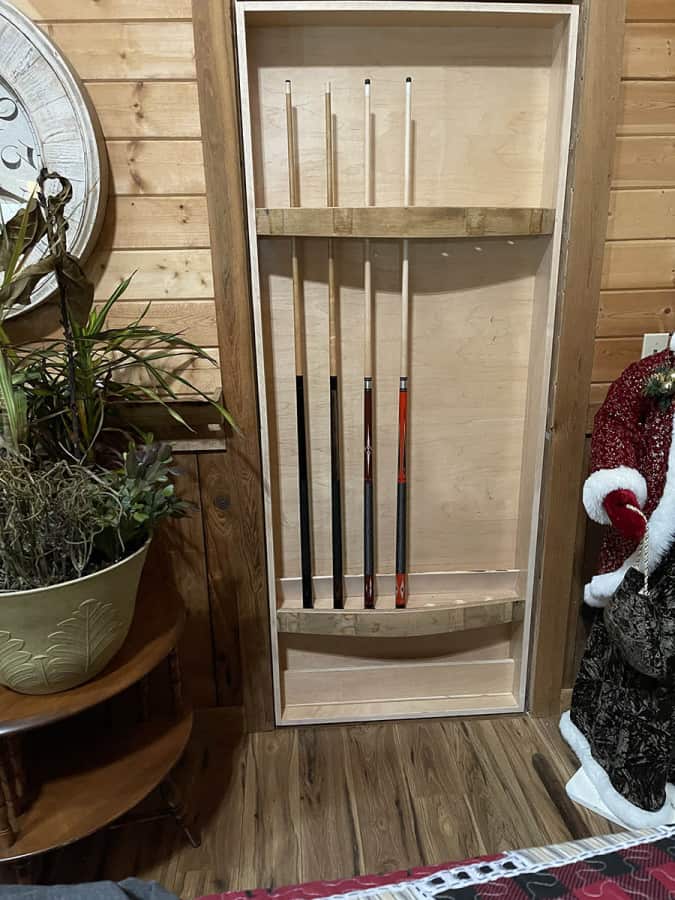
Here’s the initial install:
Hinges for the Pool Cue Hidden Door Rack
There are some “specialty” hinges for hidden doors. Some of the ones I saw didn’t seem they would give the right pivot point I was looking for. I ended up installing a total of 5 standard door hinges. The package stated 2 hinges were rated for up to 100 pounds, 3 hinges could handle 150 pounds. I’m sure this door is quite a bit lighter than 150 pounds, but figured I’d go with 5 hinges just to help prevent any sagging.
Re-Trimming the Doorway
I pulled the cedar trim and had to cut and/or re-position several pieces. I also cut down a wider piece for the top trim that would keep the original trim location at the top, but also was now tall enough to cover the top of the door. Notice the light color of the knotty pine where the trim used to be. The previous owner had several pictures and other items on the wall. Where these were located showed varying color depending on how long they were there for. He had mentioned give it a couple years and it will darken.
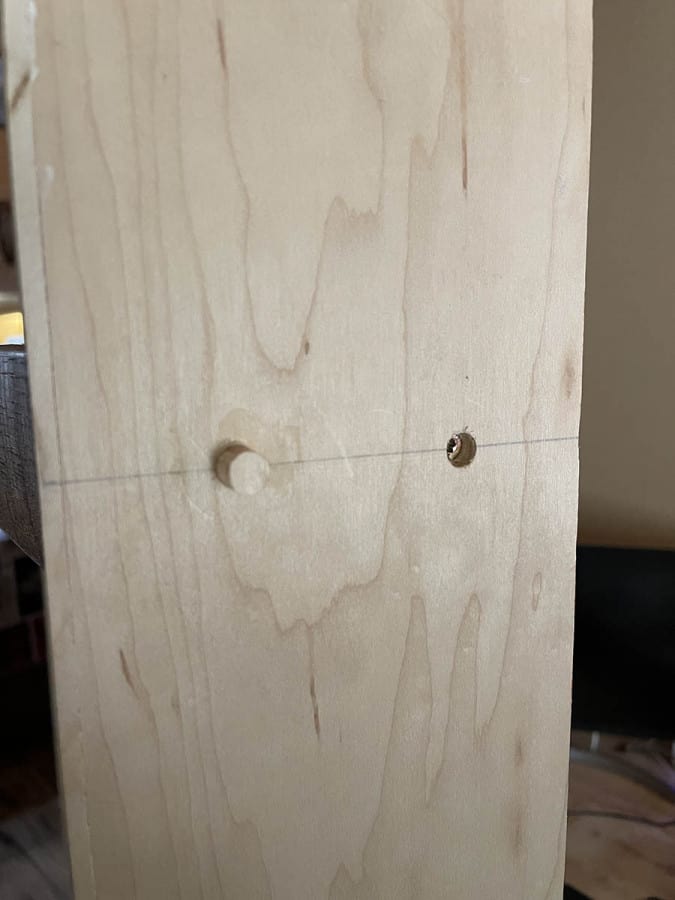
Wood Plugs
My brother-in-law made some wood plugs from some scrap wood from the same plywood. They have a slight taper and with a bit of wood glue, will permanently hide counter-sunk screws. I used a Japanese flush cut trim handsaw for this. As the name implies, it gives a nice, flush cut. More on this tool later.
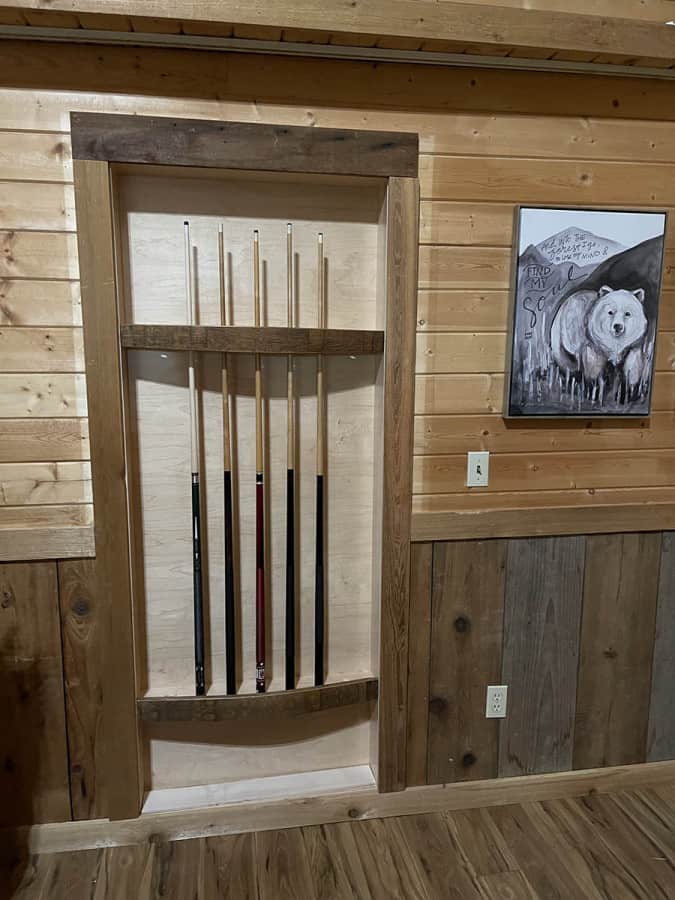
What’s Next?
I still have some sanding and staining on the door itself to finish up. Most of this work likely won’t happen until the spring when the weather starts to warm up. I’ll also work on a compartment for the bottom to store additional pool table items like the brush and extra chalk.
The door is also going to require some shimming, I have some gaps on the right side and a bit down below. Those adjustments will be made soon.
My wife wasn’t happy with the continuous trim piece at the bottom as it causes a trip hazard. I’ll have to cut that piece and attach it to the bottom of the door. It will lose some of the true hidden door elements, but will remove a trip hazard. I’ll need to make sure it doesn’t drag on the floor, which I know isn’t perfectly level. If all goes well, I won’t have to raise it too far above the floor. Definitely want to make sure no sunlight is able to come through.