One of the most talked about features in the latest Tesla software update is the new Tesla Boombox. The Tesla Boombox allows you to change the sound of your horn, driving sound, and also the sound your vehicle will make when it is “summoned”.
This feature is only going to be available on the Model 3 and Y vehicles that have the external speaker. You can find the Boombox in the Toy Box section of your Touchscreen. Once you open up the Boombox, you’ll find drop down menus where you can choose one of the default sounds that Tesla has included.
The external speaker is used for the Pedestrian Warning System (PWS) and was first added to the Model 3 some time in 2019. Most Model Y’s should have this speaker. So far, no Model S or X vehicles have an exterior speaker (as far as I know). At least our 2020 Tesla Model X with a 12/2019 build date doesn’t have one.
In this post, we’ll discuss how to tell if you have the Boombox feature including hardware and software requirements. We’ll also go through the steps to setup your own custom sounds for the Tesla Boombox on a USB drive. We will also discuss retrofit options for vehicles that do not have the external speaker.
Tesla Boombox Hardware and Software Requirements
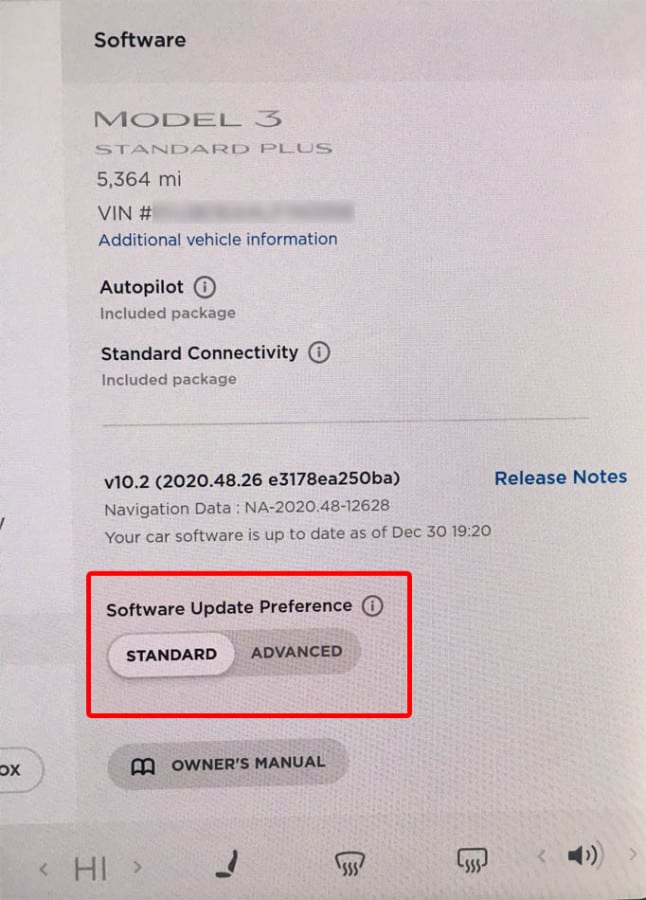
In order to receive the Tesla Boombox update, you’ll need the hardware for it. In this case, it’s an external speaker found near the lower front bumper. You’ll also need the latest software release, v2020.48 also referred to as v10.2. You can check which software version you have installed by going into Controls (which is the car icon near the lower left of the touchscreen).
[ADD PHOTO]
What If You Don’t Have the External Speaker?
Tesla Owners Silicon Valley asked Elon Musk on Twitter if a retrofit would be possible for older vehicles that don’t have the speaker. This was his response:
Ok, service might be able to do this. Will check.
— Elon Musk (@elonmusk) December 27, 2020
Some vehicles appear to have the wiring harness for the speaker and there are others that have the holes for where the speaker would go, but no speaker. Simply adding a speaker to the existing wiring harness likely wouldn’t be enough. Tesla would more than likely have to push out the software update that specifically includes the Boombox. When I had our previous 2018 Model X upgraded with the HEPA Air Filter, the Service Center installed it, but failed to make sure Biodefense was enabled. I ended up having to call support to get this taken care of – it would likely be the same with an external speaker retrofit where someone at Tesla, whether the SC or support line enables it.
Don’t Have the Latest Software Yet?
Tesla more often than not does phased rollouts of the software. If you’d like to try and receive updates sooner, go to Controls / Software and select “Advanced” rather than “Standard”.
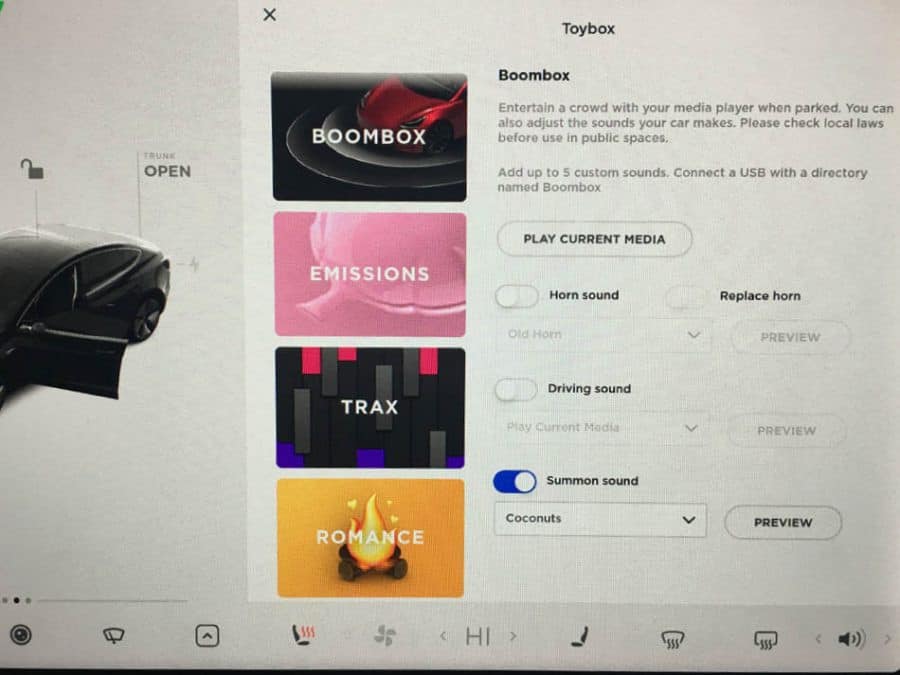
How to Access the Tesla Boombox
To access the Tesla Boombox, open up the Toybox. The Boombox should appear at the top (assuming you have it). From this screen, you’ll see built-in sound options for the Horn, Driving, and Summon.
These are the built-in sounds for the horn:
- Fart (just like Emissions, it has multiple variations, just press your horn again)
- Posh
- Toss a Coin
- GOAT!
- Old Horn
- Applause
- Tada
- Ba Dum Tss
- DJ
- La Cucaracha

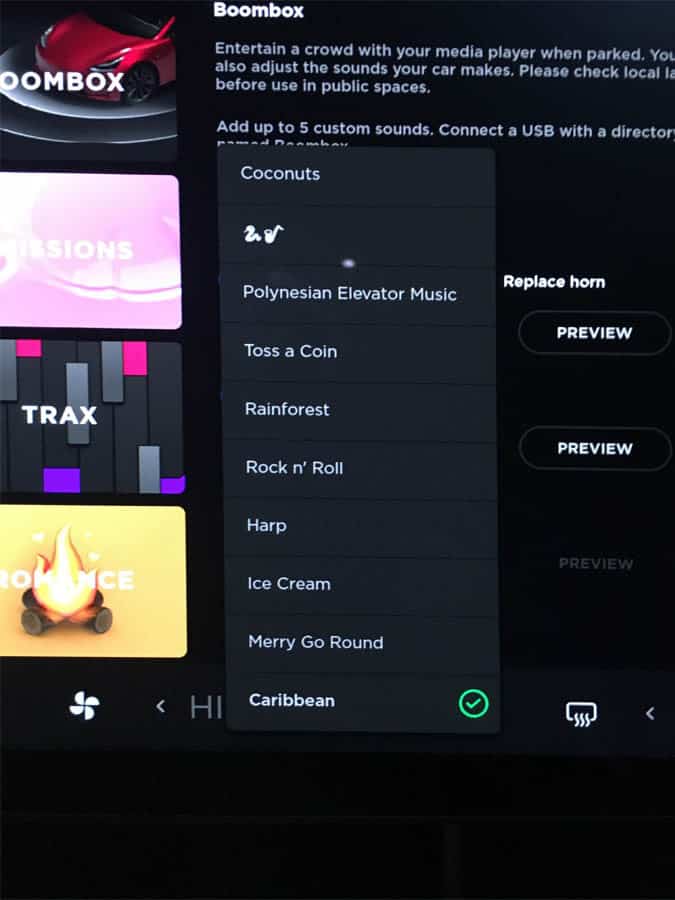
The Drive and Summon sounds have the same 10 options. They are as follows:
- Coconuts
- What appears to be a snake and saxaphone icon (not sure what this means, maybe slow jazz?)
- Polynesian Elevator Music
- Toss a Coin
- Rainforest
- Rock n’ Roll
- Harp
- Ice Cream (I was expecting this to sound more like an ice cream truck sound)
- Merry Go Round
- Caribbean
Play Current Media
By clicking on “Play Current Media”, the external speaker will play the same sound that you currently have playing inside.
Custom Sounds for Your Tesla Boombox
To play custom sounds, you can add files to a USB flash drive. It’s been recommended to use a separate flash drive from your Sentry Mode drive. The instructions from Tesla state that you can upload up to 5 custom sounds. To do this, you’ll need a properly formatted flash drive and create a new folder titled “Boombox”. Simply save your MP3 files into this folder.
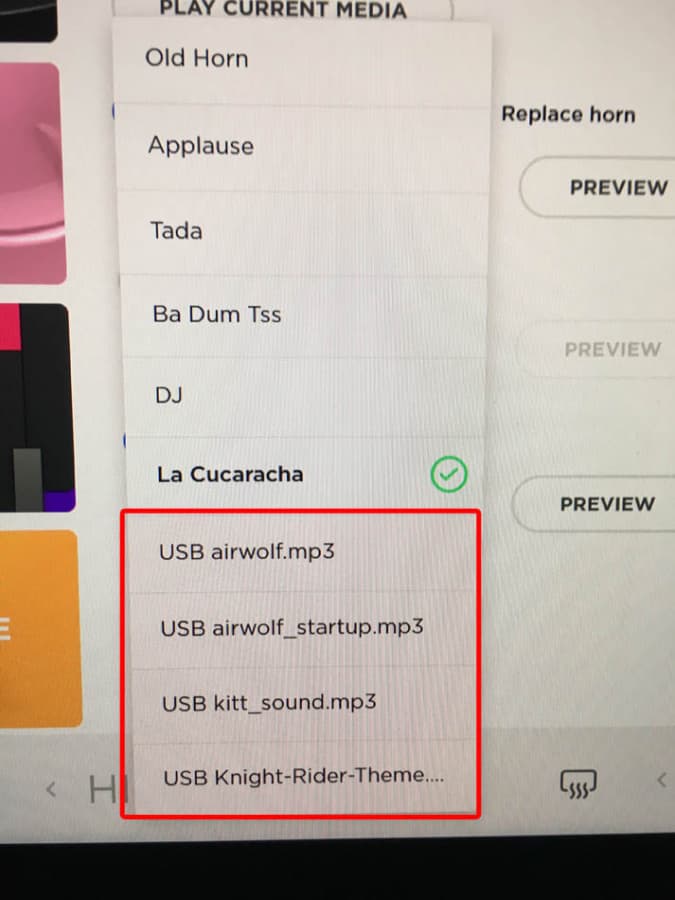
Once you have your flash drive ready with your MP3’s, simply plug it into a USB port. Now, when you go to the drop down menu’s you should see your custom MP3 files listed (in additional to the built-in Tesla ones).
If you need help on how to format your flash drive on a Mac, follow these steps:
- Insert your flash drive into a USB port on your computer
- Open Disk Utility
- Select your flash drive on the left (make sure you select the appropriate drive!) You don’t want to accidentally erase important data
- Once your drive is selected, click on Erase

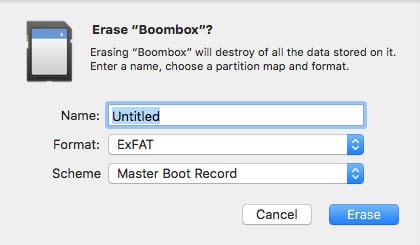
5. Choose a name for your Flash Drive (You should be able to choose anything here). Make sure to select ExFAT. I went with Master Boot Record for the scheme. Then click Erase
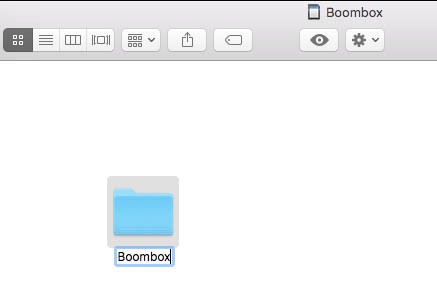
6. Now create a new folder titled “Boombox”. Add your MP3’s to this folder and you’ll be ready to plug your Flash drive into your Tesla’s USB port.
After you’ve inserted your Flash Drive, you should now see your custom sounds added to the drop down menus. Tesla will automatically put “USB” in front of your file name. I added some Knight Rider and Airwolf MP3 files.
Note On Changing Sounds
At least in this initial release, any time you turn your car off it will reset the horn, driving, and summon sounds back to default. It would be great if Tesla allows you to save some of these settings in a future release.
Is It Legal?
Tesla makes mention of checking your local laws regarding the use of this feature in public spaces. In the United States, individual states will have their own vehicle laws. Horn requirements and even the use of external speakers are likely buried in them somewhere.
Summary
This is a fun new feature Tesla has added. Kids (and adults alike) really seem to get a kick out of it. It makes me wonder what younger generations who experience these features will look for in vehicles when they’re old enough to drive. Will they want one that’s boring and never receives updates?
When owners first heard about a Pedestrian Warning System being added to the Model 3 a little over a year ago, many people wanted to know how it could be disabled or removed. Now, several people are wanting to know how they can retrofit one onto their older vehicles if it didn’t come with one.
More Tesla Posts on Fabville!
Looking for more Tesla articles? Check out more of our Tesla posts. We also have an article with more information on the Tesla v10.2 software release.
If you’re looking to purchase a new Tesla vehicle or Tesla Energy product, please consider using my referral code (link to Tesla with my code): https://ts.la/kevin82163