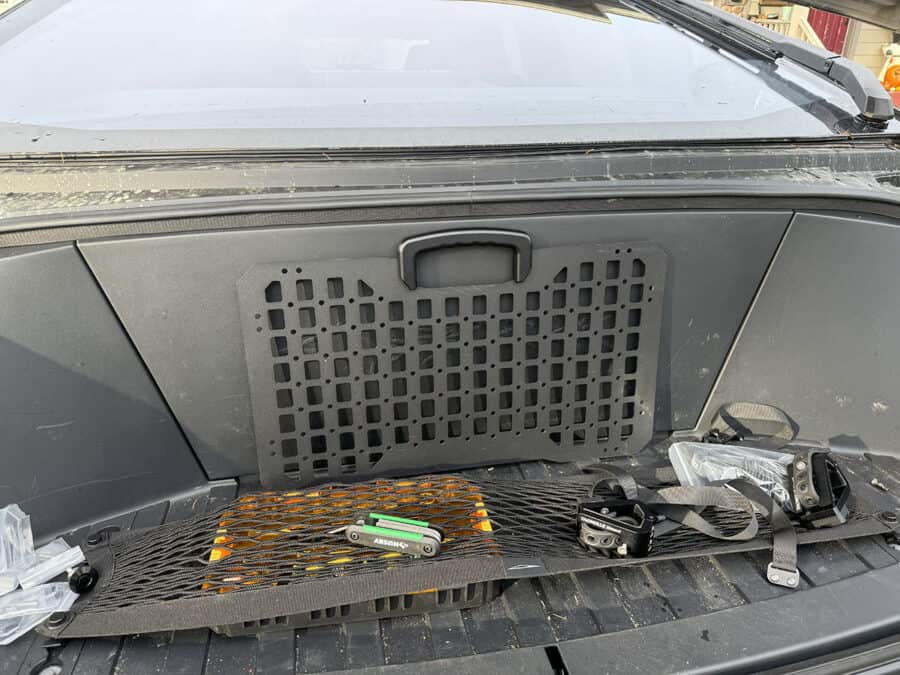
The frunk of the Tesla Cybertruck offers a unique storage space, and adding a MOLLE panel is a great way to keep your gear organized. This DIY project is straightforward and provides a custom solution to making the most of your Cybertruck’s storage. Here’s how I installed a MOLLE panel using quick disconnect fasteners, along with some tips to make the process easier. NOTE: This does require drilling into a factory panel.
Materials Used:
- Tactical MOLLE panel
- Quick disconnect fasteners
- Pencil
- Threadlocker
- Drill and drill bits
- Measuring tape
Step 1: Test fit where you want to install the MOLLE
You’ll want to make sure there was enough clearance for the frunk to close based on where you plan to mount the MOLLE panel. I also wanted to make sure there was enough space not to rub at the bottom of the frunk. I took some measurements, but also used small blocks to prop it up at one point to ensure the frunk would close without issue.

Step 2: Remove the Frunk Panel
The first step is to remove the plastic frunk panel. The panel merely snaps into place. There’s a couple slots at the bottom that can help give you a grip. This gives you full access to the space where the MOLLE panel will be installed. Optionally, you could use a trim removal tool.

Step 3: Test Fit the MOLLE Panel
Once the panel was removed, I test-fitted the MOLLE panel again to determine the ideal height and positioning. This helped me visualize how the panel would sit and made sure it wouldn’t interfere with the frunk’s operation.
Step 4: Mark the Mounting Points
I temporarily attached the quick disconnect bolts and used a pencil to mark the drill points on the plastic frunk panel. Taking this step ensures the panel will align perfectly when mounted and that my spacing is correct.

Step 5: Measure Twice, Drill Once
After marking the drill points, I double-checked all measurements. Once everything was confirmed, I drilled the mounting holes. Remember, accuracy here is key to avoid any alignment issues.
Step 6: Attaching the Quick Disconnect Hardware
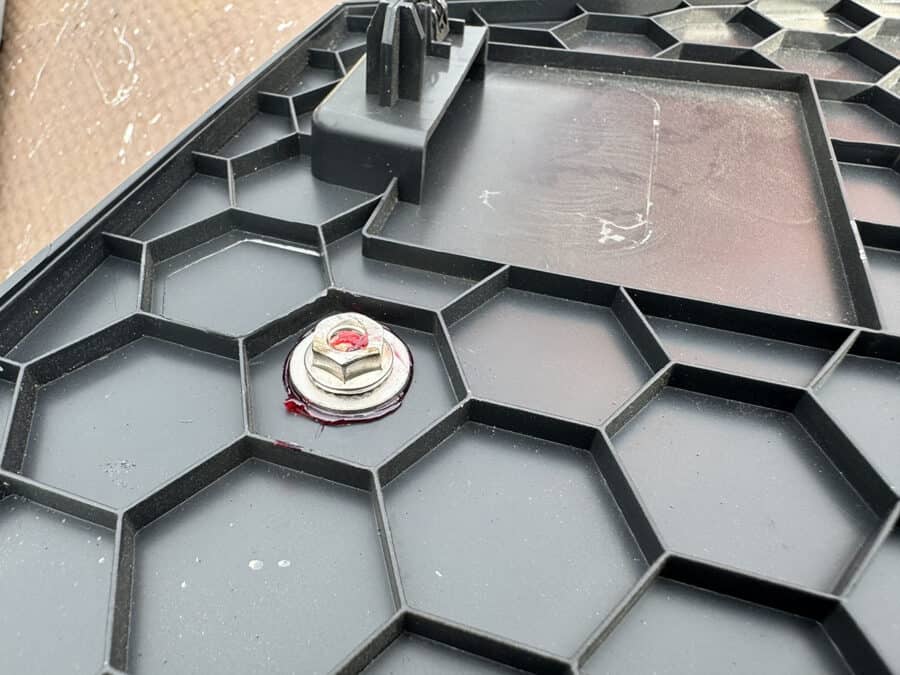
I had some excess threadlocker you’ll see in the picture that was later wiped off. I had some excess threadlocker you’ll see in the picture that was later wiped off.

NOTE: Depending on your hole locations, you may need to sand or grind down the honeycomb reinforcement pattern for your hardware to attach flush. A tool such as a Dremel or oscillating tool can work well.

In my case, the bolts were quite long and I ended up cutting them down with an angle grinder to the appropriate length.

Step 7: Attach the MOLLE Panel
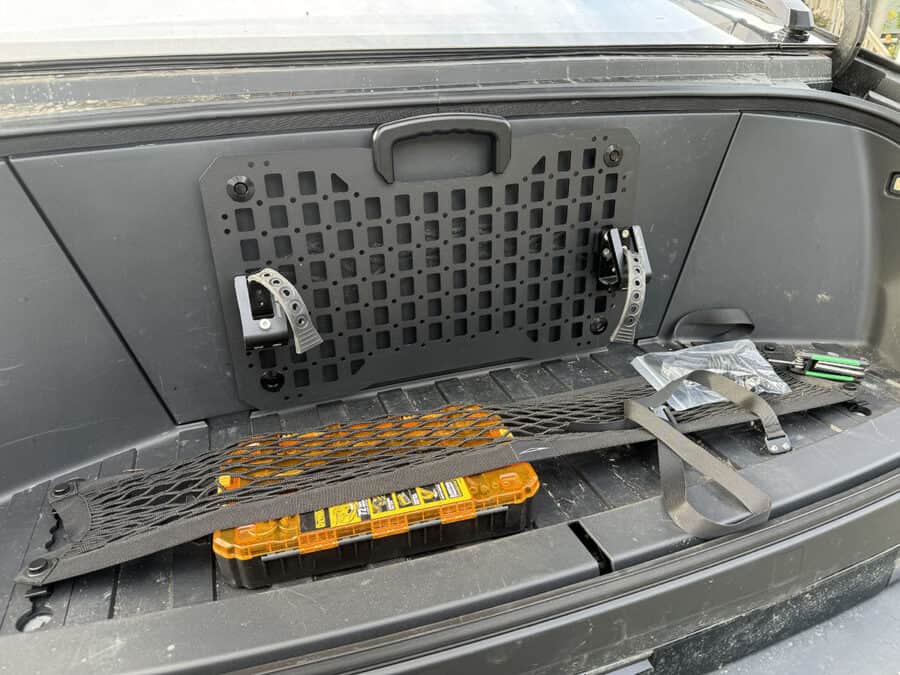
With the holes drilled, I installed the panel using the quick disconnect fasteners. To make sure the MOLLE panel stays firmly in place, I used threadlocker on the bolts. This added step ensures a secure hold, even with the Cybertruck’s rugged use.
I ended up mounting the quick disconnect fasteners in the corners. This particular fastener type would have required a large diameter hole to be drilled, so I ended up using an existing slot. With the serrated nut surface, it holds tight. If you plan on using a different style fastener including a simple bolt and nut setup, you could probably use one of the existing circular holes to mount.

I plan to mount a DIY Not-a-Flamethrower once I get it finished up. I plan to use it for starting camp fires.

Final Thoughts
This MOLLE panel installation is a simple yet effective way to keep the Cybertruck’s frunk organized. The quick disconnect fasteners make it easy to remove and reattach the panel if needed, providing flexibility for your storage needs. With this setup, I now have a solid, reliable way to secure essential items in the frunk.

