Concerned About Old Stock – Print Instead!
If you’ve ever owned military surplus equipment like an M1101 or M1102 trailer, you already know the struggle:
👉 Replacement parts aren’t always easy to find
👉 And when you do find them… they’re expensive or worn out
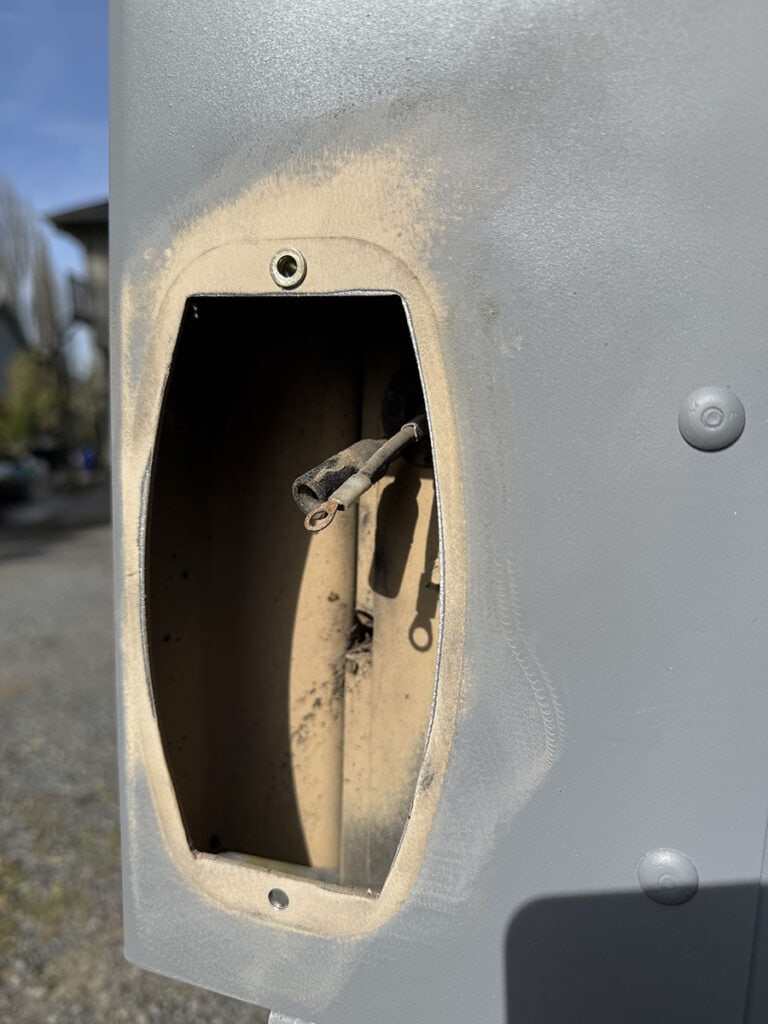
That’s exactly where I found myself with a broken Humvee side marker light housing. When I bought my M1101 trailer at auction, 2 of the 6 side marker light houses were already cracked. When I went to remove another for troubleshooting (2 lights weren’t lighting up after converted to a 12v harness), that housing cracked as well. It was obvious these housings were quite brittle after years of being in the elements.
Instead of taking a gamble on used or “New Old Stock (NOS)” I decided to see if ChatGPT could create 3d models for me to print. I still don’t have a 3d printer, but have a couple friends who did. Big thanks to B3D for printing multiple revisions for testing before we finalized the design.
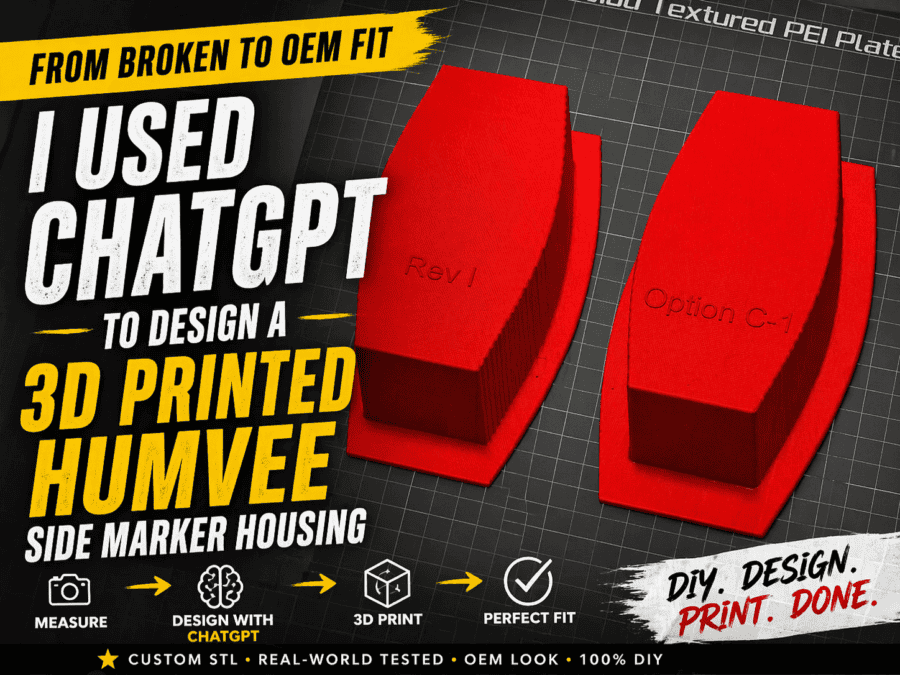
💡 I used ChatGPT to help design a fully custom 3D-printable replacement from scratch.
And it worked—better than expected.
The Goal: OEM Look, Modern Method
I didn’t just want “something that fits.”
I wanted:
- ✅ OEM-style appearance – I might try a custom look later
- ✅ Perfect fit in the original cutout
- ✅ Strong enough for real-world use
- ✅ Easily reproducible with a 3D printer
That meant designing a custom STL file—and that’s where ChatGPT came in.
Step 1: Starting With Reference Photos

I started by:
- Uploading a couple photos of the original housing
- Measuring the cutout opening in the trailer
- Capturing key dimensions like:
- height
- width (top, middle, bottom)
- depth
Then I fed all of that into ChatGPT.
Step 2: Iterating STL Designs With ChatGPT
Instead of traditional CAD software from scratch, I used ChatGPT to:
- Generate initial STL geometry
- Refine dimensions across multiple revisions
- Adjust design features like:
- wall thickness
- flange size
- mounting geometry
- corner radiuses
The revision process looked like this:
- Rev A → basic shape (wrong size)
- Rev B → better fit, but tapered walls
- Rev C–G → dialing in geometry and smoothness
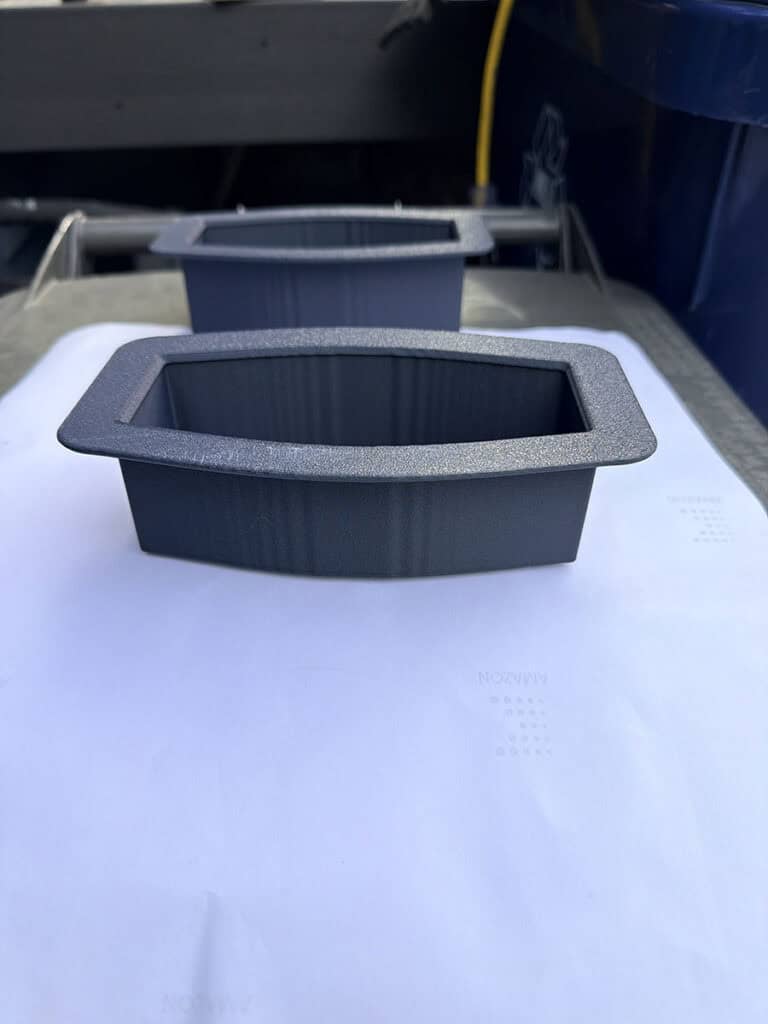
- Rev I → perfect fit
- Rev J/K → refining flange radius and OEM look
This wasn’t one-and-done—it was true iterative design, just like professional product development.
Step 3: Solving Real-World Fitment Problems
Once I started printing test versions, real-world issues showed up fast:
🔧 Problems I ran into:
- Walls were tapered instead of vertical
- Flange size didn’t match OEM proportions
- Corners looked too sharp or too square
- Surface curves had visible faceting
🧠 How ChatGPT helped fix them:
- Converted taper → true vertical walls
- Adjusted flange:
- 3/4” top & bottom
- 1/2” sides (OEM asymmetry)
- Added 1” corner radius
- Improved curvature transitions
This is where ChatGPT really shines:
It acts like a rapid prototyping partner, not just a tool.
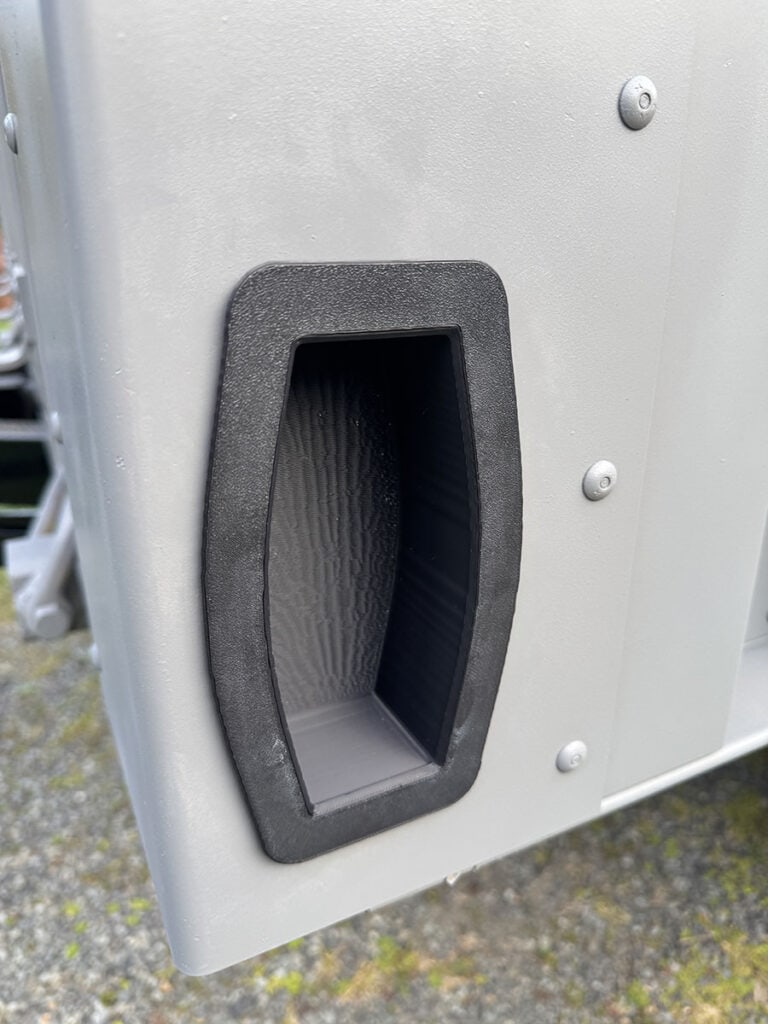
Step 4: Dialing in the OEM Look

Getting the part to fit was only half the battle.
Getting it to look right required:
- Matching OEM flange proportions
- Adding smooth corner radiuses
- Eliminating that “blocky 3D print look”
The final version:
- Fits perfectly
- Looks OEM
- Has clean, continuous curves
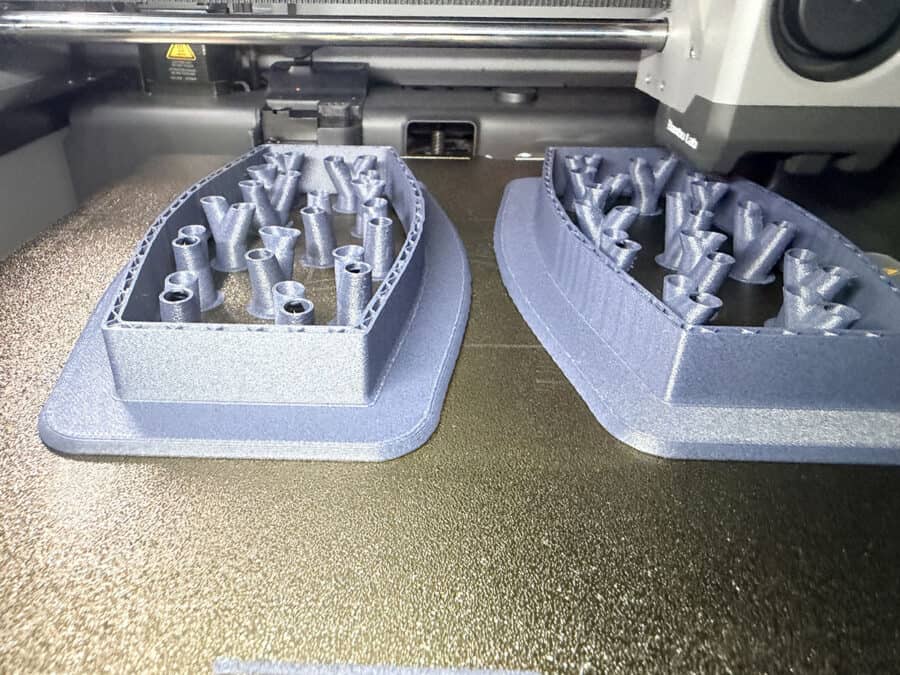
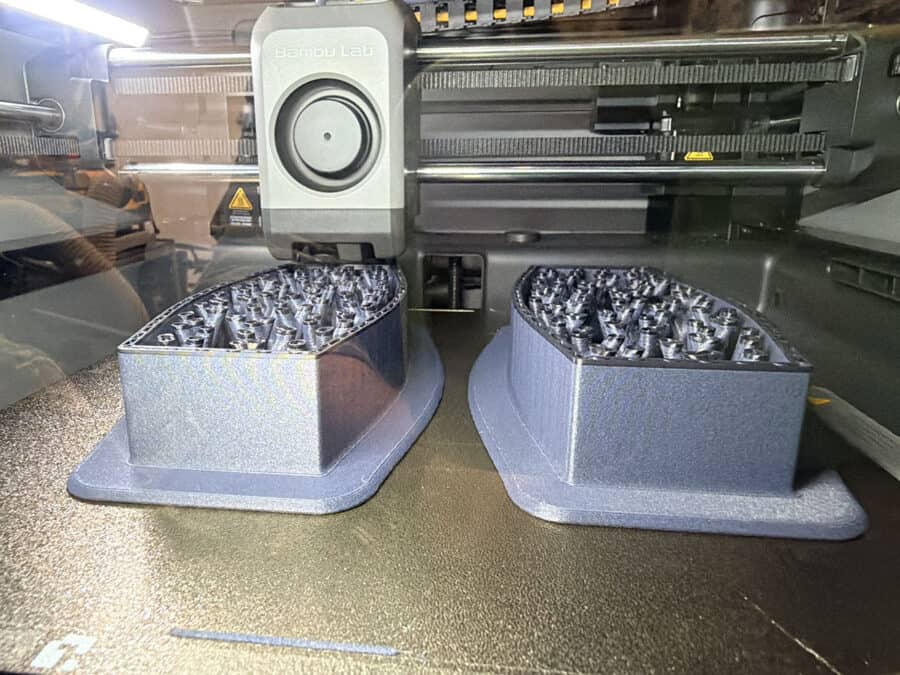
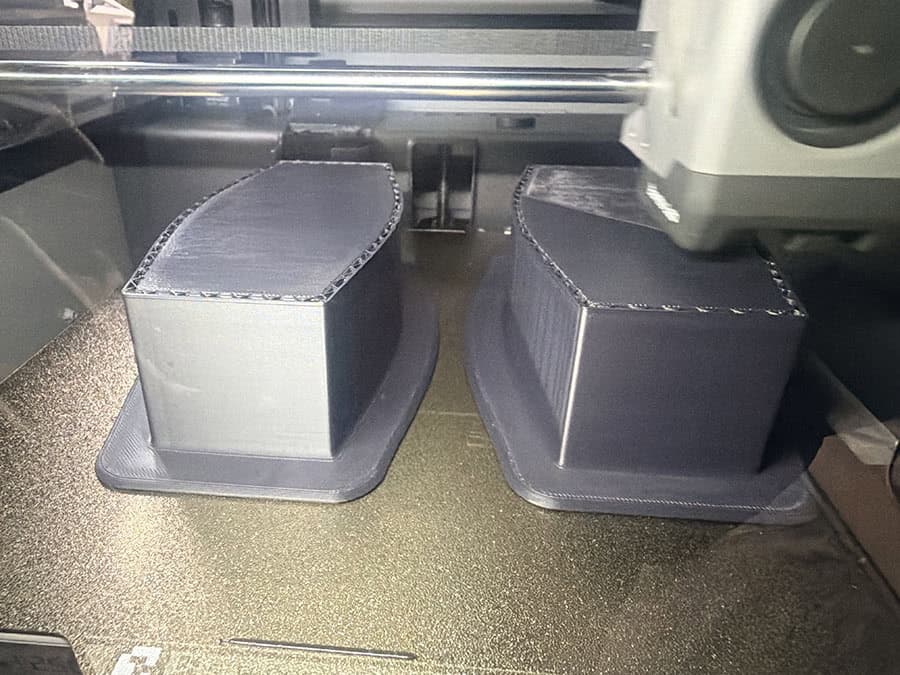
Step 5: Printing the Final Part
For the final prints, I recommend:
🧵 Filament
- ASA (best for outdoor durability)
- PETG as a backup option
⚙️ Settings
- Layer height: 0.16–0.2 mm
- Walls: 4–5 perimeters
- Infill: 20–30%
- Orientation: flange down
NOTE: You'll probably notice no holes in the housing for mounting the light or installing on the trailer. Earlier prototypes had some holes, but they weren't quite aligned properly. During the iterative process, and decided it would be easier to drill them out later. I'll set up the first bucket with holes properly drilled and use it as a jig for the other holes to be drilled out.
What I Learned Using ChatGPT for 3D Design
This project completely changed how I think about design workflows.
🚀 Biggest takeaways:
- You don’t need to be a CAD expert to build functional parts
- ChatGPT can accelerate iteration speed massively
- The best results come from:
- measurements + feedback + iteration
Why This Matters for DIY Builders
This isn’t just about one part.
This is about a new workflow:
🧠 Idea → ChatGPT → STL → Print → Refine → Done
For:
- automotive mods
- trailer upgrades
- custom storage solutions
- hard-to-find replacement parts
Final Thoughts
What started as a broken part turned into:
- A fully custom OEM-style replacement
- A repeatable STL design workflow
- And a glimpse into the future of DIY fabrication
Want the STL?
My friend who printed them for me uploaded the STL to his MakerWorld account, go here to download the M1101 Humvee Trailer Marker Light Housing.