Fresh Rattle Can Paint Job on My M1101 Trailer (Budget Build Update)

m1101 spray paint job coastal grey

Sometimes you don’t need a full spray booth setup to get a solid refresh—this time, I went the rattle can route on my M1101 trailer.

Why I Chose Spray Paint This Time

I wanted something:

  • Quick
  • Low cost
  • Easy to maintain

Using rattle cans means if (or when) it gets scratched on the trail, I can just grab another can and touch it up—no mixing, no equipment, no hassle.


Paint Setup

Here’s what I used:

  • Body: Rust-Oleum Satin Protective Enamel – Coastal Gray
  • Frame & Accessories: Rust-Oleum Gloss Protective Enamel – Black

The contrast between the satin gray and gloss black gave a nic contrast (in my opinion)—it gives the trailer a clean but rugged look.


Prep Work (Mostly…)

I kept prep fairly simple:

  • Pressure washed the entire trailer
  • Sanded down most surfaces (not all, if I’m being honest – time was factor with the weather and I wanted to get fresh paint down, we had also been dealing with a lot of pollen lately and I didn’t want to clean the trailer again).

This wasn’t meant to be a show-quality finish—it’s a functional, real-world build. I’ll be watching closely to see how well it holds up over time, especially in areas I didn’t fully sand.


First Impressions

  • Coverage was solid for rattle cans
  • Finish looks clean and uniform
  • Super easy to apply and control

The real test will be durability—trail use, weather, and time will tell.


What’s Next

The outside is done (for now), but I’ve got plans for the interior:

  • Spray-in liner like LINE-X, or a DIY liner such as Raptor or Herculiner
  • 3D printed covers to keep debris out of the tie down brackets.

That should add durability and make it more functional for hauling gear.


Final Thoughts

If you’re debating repainting your trailer, don’t overthink it. A rattle can job is:

  • Affordable
  • Easy to maintain
  • Surprisingly consistent if done right

And if it gets beat up? Just repaint it and keep going.


Focus Keyphrase:
Meta Description: Budget-friendly M1101 trailer repaint using Rust-Oleum spray paint. Coastal gray body with black frame—easy to touch up and perfect for off-road use.


If you want, I can also turn this into a Google Discover–optimized headline + thumbnail concept or tie it into your broader M1101 build series.

Please make sure it is optimized for Google Discover

Got it—here’s a Google Discover–optimized version of your post. This leans more visual, story-driven, and curiosity-based (which Discover favors), while still keeping SEO in place.


I Repainted My M1101 Trailer with Spray Cans… Here’s How It Turned Out

https://images.openai.com/static-rsc-4/0v4SvIssxJ-tfGmItM-DIRvoyiqnbplI9Ykh3p32HsenXVopMUM8Zn8VPpuWMUl40vKNrIk1EglL4df_S5GoGui9BgNgC9DK0qgUR72Oi_yq23N9lQyyvIA-8YTOmHCLWw1CbgqvTHWD6iMAJB-icdhkwy8p6YKEiSJ_RIkjKc5MpDWKlpJiC17ZOhBWLnKK?purpose=fullsize
https://images.openai.com/static-rsc-4/p2v9dtsraMhySjDUfcO9NLEeUoVP8WvugQUYG525bMH8hD9TKgPLPR49ZImb3FsrZl8tx-D9J5sEIwckqXsE-vmyp5AjIVoFjoSTJDhmnfascQ_lpHyZuFMJjhyVWr01Rd4ZAd1PYQMYnTIh_kuPev2GROsYbs0wh2qe6gxybPW44F1PBVtMgw7gF9xP5rjL?purpose=fullsize

5

I decided to take a different approach with my M1101 trailer this time—no spray gun, no compressor, no professional setup.

Just rattle cans.

And honestly? I’m pretty happy with how it turned out.


Why I Went the Rattle Can Route

This wasn’t about building a show trailer—it was about building something I can actually use and maintain.

With spray paint:

  • I can fix scratches anytime
  • No special tools required
  • Way cheaper than a full paint setup

If it gets beat up on the trail, I’ll just grab another can and touch it up. Done.


The Color Combo (Better Than Expected)

For this build, I used:

  • Body: Rust-Oleum Satin Protective Enamel – Coastal Gray
  • Frame, jack, and jerry can holder: Rust-Oleum Gloss Protective Enamel – Black

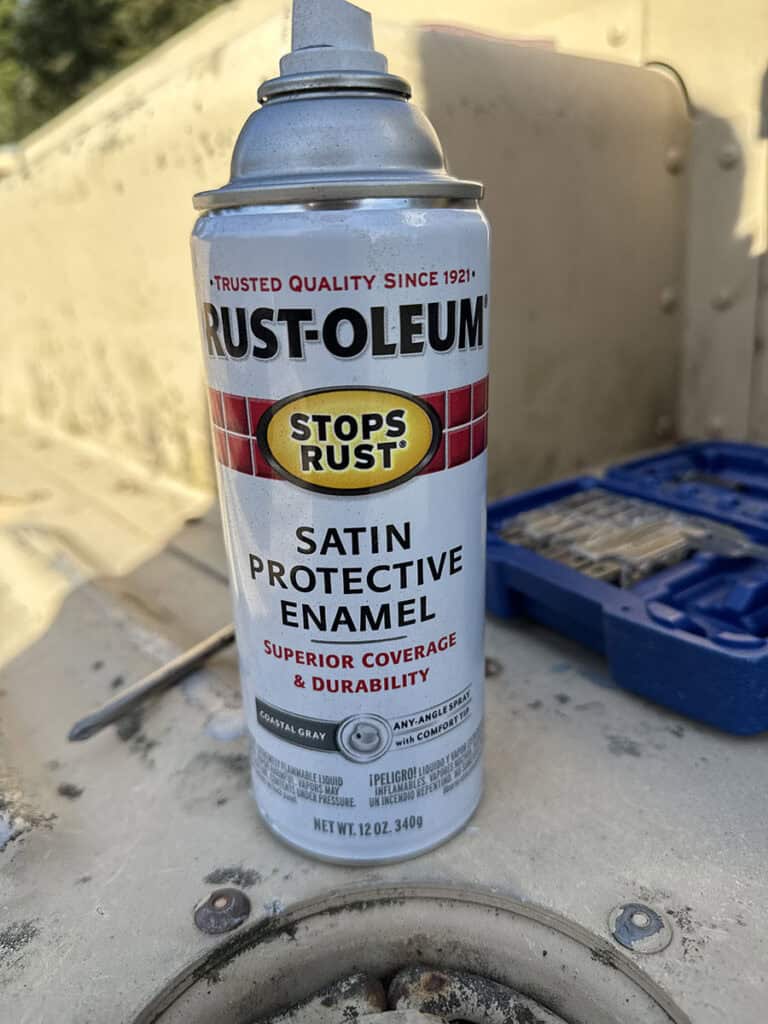
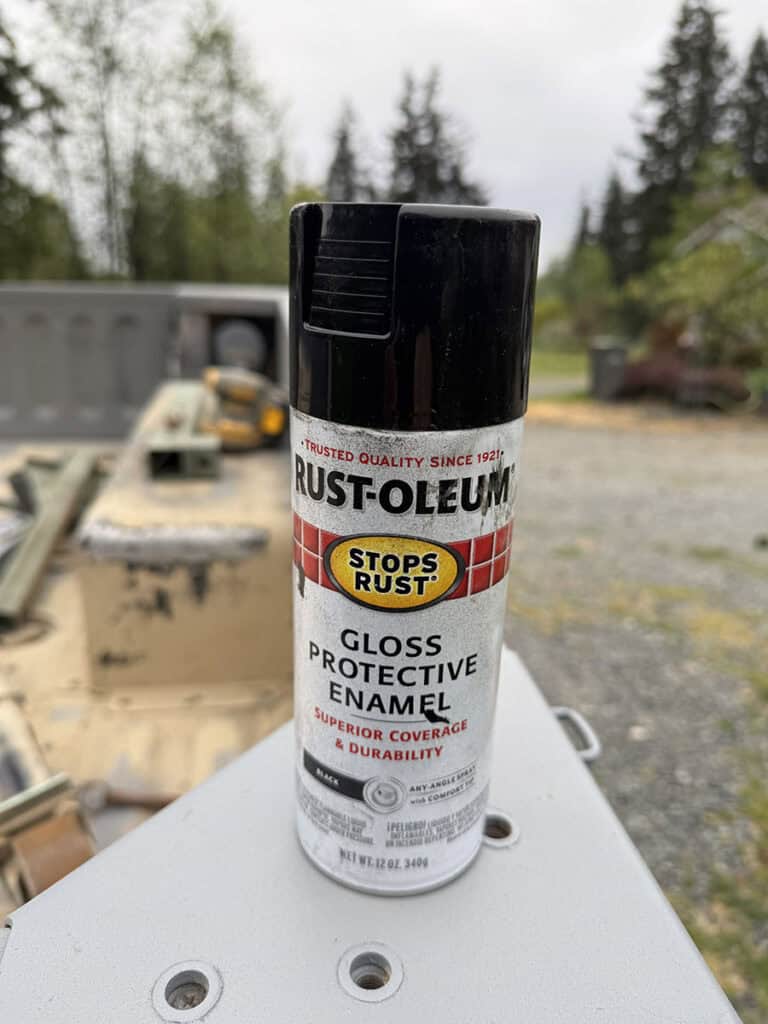
The satin gray gives it that clean, modern look, while the gloss black adds contrast and makes the hardware pop.
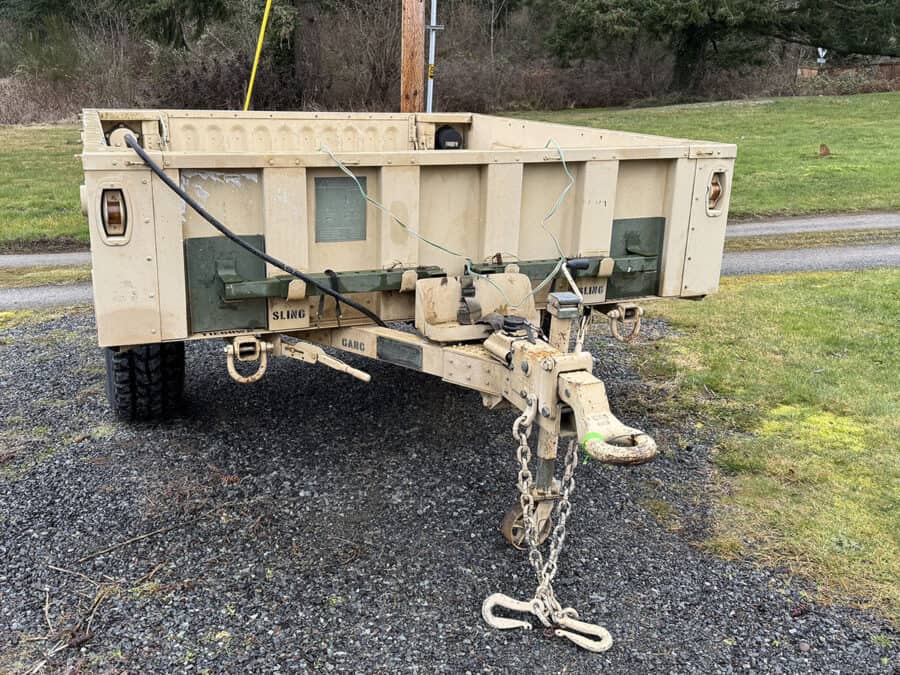

Prep Work (Real Talk)

I didn’t go overboard here:

  • Pressure washed everything
  • Sanded most surfaces

Not perfect. Not meticulous. Just enough to get paint to stick.

And that’s kind of the point—I want to see how well this holds up in the real world, not in a perfect garage scenario.
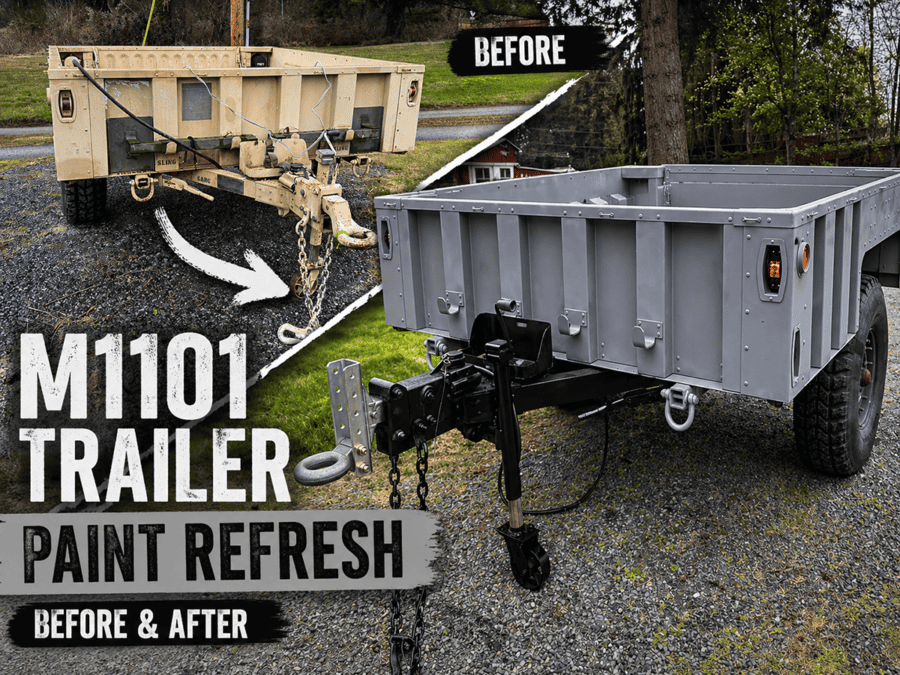

How It Looks So Far

Paint is a little thin on the front side, this was after just 2 fairly thin coats.

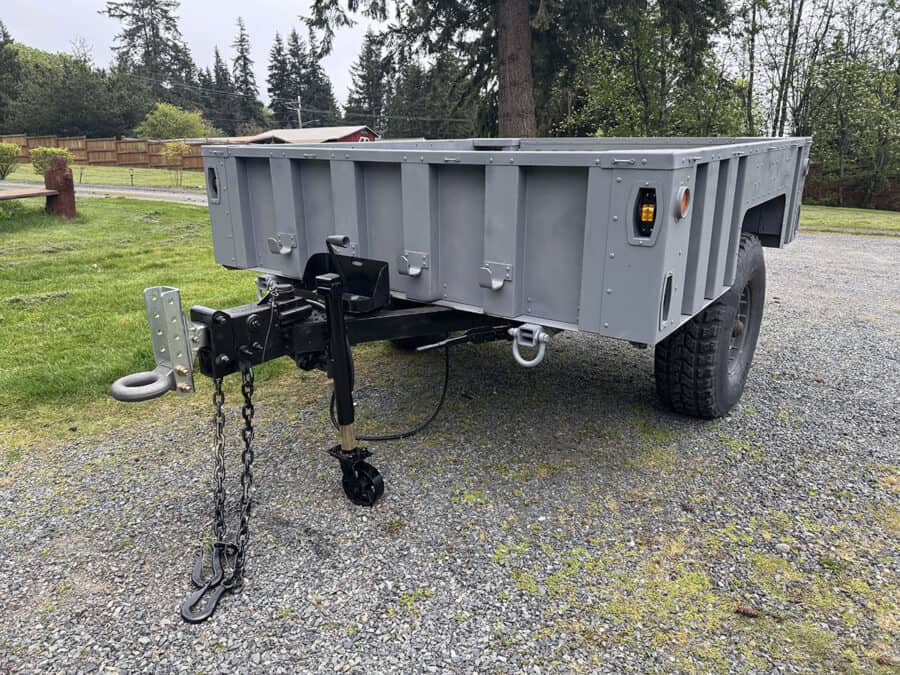
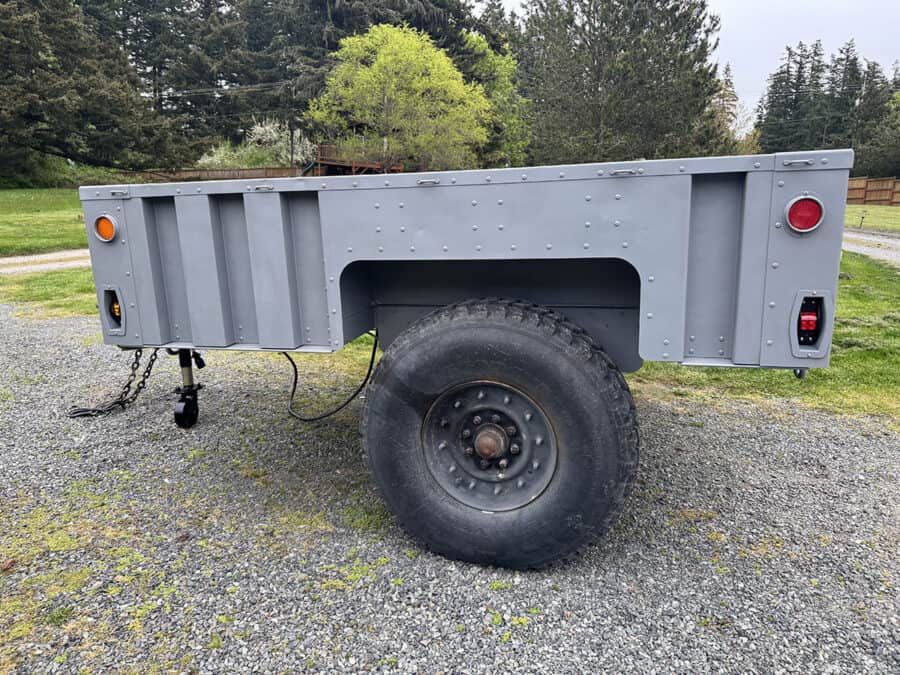
Even with just a couple coats so far, it looks clean, uniform, and way better than the worn military finish it had before. I do plan on adding an additional coat later.


The Real Test: Durability

This is where I’m most curious.

Since I didn’t fully sand everything, I’ll be keeping an eye on:

  • Paint adhesion
  • Chips and scratches
  • Wear from loading gear

The upside is, touch-ups are about as easy as it gets.


What I’m Planning Next

The outside is done (for now), but the inside of the trailer box is next.

I’m deciding between:

  • A professional spray-in liner like LINE-X or a DIY bedliner for a more budget-friendly option
  • I may also do some stencil work similar to the original

Either way, I want something that can take abuse hauling what ever I throw at it.
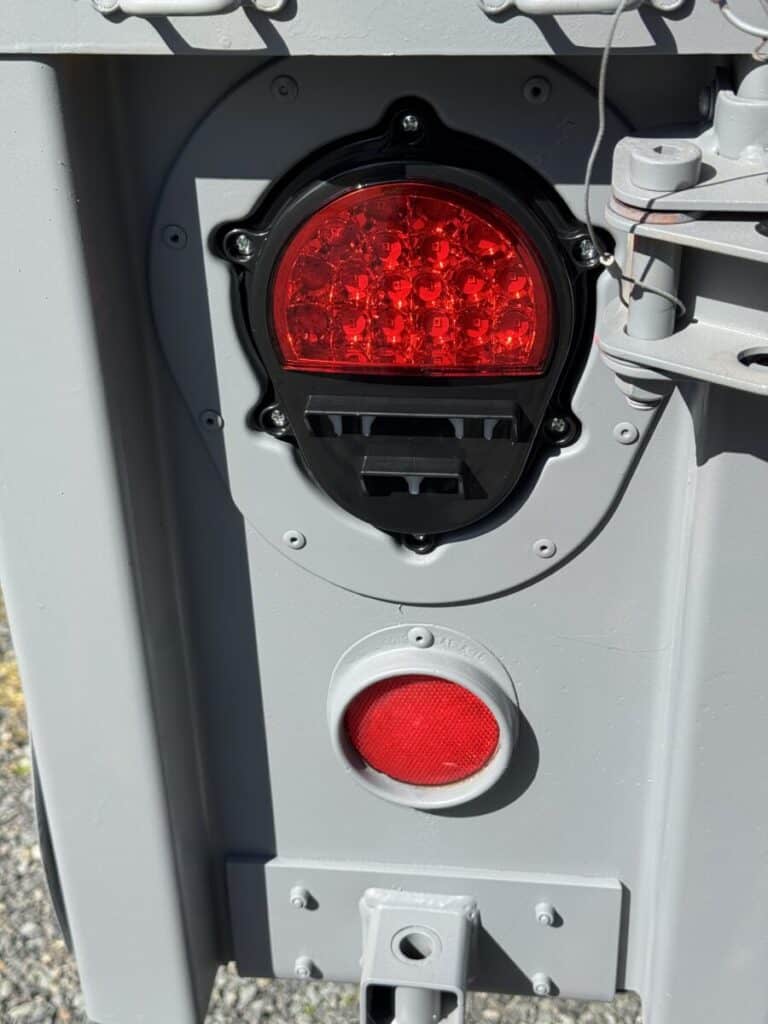
Next M1101 Upgrade

Here’s a preview of the aftermarket taillights:


Final Thoughts

If you’ve been putting off repainting your trailer because it feels like too big of a project—don’t.

This was:

  • Fast
  • Affordable
  • Easy to maintain

And most importantly, it fits how I actually use the trailer.

Sometimes “good enough” is exactly what you need.