As a Tesla owner, you have access to numerous features. Among these is Tesla Sentry Mode, an integrated surveillance system allowing you to use the vehicle’s Autopilot cameras to record potential incidents such as vandalism onto a USB device. This feature is incredibly useful, but how easy is it to set up?
With Tesla software update 2020.16, Tesla has built-in the option to format drives. Now, you can simply follow these steps:
- Insert your USB storage device into one of the USB Drives
- Go to Controls > Safety > Security
- Scroll down to Format USB Device and tap on it
- Confirm by tapping on Format
Before this software update, you would have to manually format a USB storage device on a computer. In case the built-in formatting fails, we’ve included the manual method for you as well. Read on for manual setup, recommended drives, and troubleshooting tips.
Tesla USB Ports
To use Tesla Sentry Mode, you will need to insert a USB device into your vehicle. Most Tesla vehicles have USB ports located in the central console. However, growing concerns regarding the theft of USB devices led Tesla to place an additional USB port in the glove box in later versions of the Tesla Model 3 and Model Y in 2021 year models.
Many Tesla vehicles have additional USB ports located in the rear of the vehicle. However, you should note you will not be able to use these USB ports for the Tesla Dashcam and Tesla Sentry Mode. Therefore, if you are looking to keep your USB device out of sight, your best bet is to use the USB port in the glovebox (if equipped).
Which USB Devices Require Formatting for Tesla Sentry Mode?
Any USB devices used to store data for Tesla Sentry Mode will need a file system format of FAT32 (Windows) or ext4 (Linux). Fortunately, getting a USB for your Tesla with the right format is not as difficult as it sounds. In fact, you might already have one.
The majority of USB devices up to 32GB are already formatted with FAT32, which means you will not have to do anything before using it in your Tesla. However, many drivers prefer having larger USB devices with more storage, and larger devices are most often sold with the NTFS format.
If formatting your USB still sounds like too much trouble, but you want the additional storage, there is still another option available to you. Pre-formatted USB devices can be purchased online in sizes upwards of 256GB. Choose a size that works for you, going larger or smaller depending on how much time you want to be able to store.
Formatting a USB for Tesla Sentry Mode on a Windows Computer
If you need to format your USB device and would rather do it on your computer, you can accomplish the task in just a few steps. Windows users should note they can only format devices up to 32GB, though third-party tools are available for formatting larger devices. One of these is a tool called Rufus. To format your USB device using Rufus:
- After starting the program, go to “Device” and choose your USB device.
- For “Boot Selection”, choose the “Non-Bootable” option.
- Choose the default “FAT32” under “File Selection.”
- Choose the default option with a label under “Cluster Size.”
After this, all you will need to do is start the program. When everything has been successfully formatted, you can close it, and voila! You are reformatted.
One final thing to remember is that you will need to create a folder on your device labeled “TeslaCam” before using it for your dashcam or Tesla Sentry Mode. Doing this allows it to interact properly with the Tesla vehicle and its software. Make sure to name this folder exactly as spelled here, TeslaCam with a capital T and C and no space.
Formatting a USB for Tesla Sentry Mode on a Mac
If you are a Mac user and need to format your USB device for your Tesla, you are in luck. The process is much simpler than when using a Windows PC.
All you need to do is use the disk utility on your Mac to delete the device using the MS-DOS setting. After that, rename the device as needed and create your TeslaCam folder on the USB device. Once you have done that, you are finished! Now you are ready to get started setting up Tesla Sentry Mode in your vehicle.
Which USB Device is Best?
Many people only think of the USB device as a basic tool for storing their items. However, using high-quality tools can make a tremendous amount of difference. With the right USB device, you can ensure you always have access to your information, and it will not become corrupted.
Typically, thumb drives or memory sticks are not the best options when choosing a USB device. This is because their technology is limited compared to other choices, as they may not be fast enough and are not designed for continuous rewriting. Not only that, but their storage sizes are nowhere near as large as the main alternative. They may not be able to handle the extreme temperatures of summer or winter, depending on where you live.
The better option is to choose a SD memory card with a USB adapter. Note that video grade SD memory cards are designed for photo and video storage, making them a particularly great choice for storing dashcam and Tesla Sentry Mode footage. Not only that, but their sizes are much greater than a USB device.
Setting Up Tesla Sentry Mode
You now have a properly formatted USB device, and you have inserted it into the appropriate USB port in your Tesla. Now comes the task of setting up Tesla Sentry Mode. It is important to note Tesla Sentry Mode is off by default, which means you will have to turn it on when you want to use it.
Fortunately, the process is not too difficult. Everything to turn Tesla Sentry Mode on and get it running is also accessible in your car settings menu. To do this, you can follow these steps:
- Park your vehicle.
- In your car settings, find and turn on Tesla Sentry Mode under the Security settings.
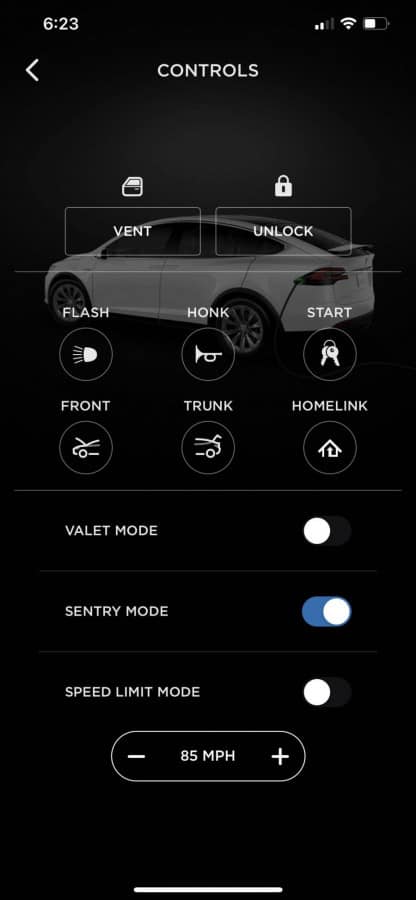
- Alternatively, use the pane marked Controls in your Tesla app to turn on Tesla Sentry Mode.
When Tesla Sentry Mode is activated, your vehicle will begin recording if it detects an excessive amount of force being used on your vehicle, such as attempts to break your vehicle’s glass. Tesla Sentry Mode also triggers an alarm that will play music and activate your vehicle’s horn and lights. An alert will also be sent to your phone.
Making Adjustments to Tesla Sentry Mode
One of the great benefits of Tesla Sentry Mode is the ability to customize it to suit your preferences. You can do a few key things to make Tesla Sentry Mode work the way you want it to.
You have the ability to make Tesla Sentry Mode come on by default every time you park your vehicle. You can toggle whether it is on or off by default in the “Safety & Security” menu.
If you want to save space on your USB device, you can turn Tesla Sentry Mode off in specific locations, such as your home or workplace. This option is also available in the “Safety & Security” menu.
Reviewing Footage from Your USB Device
After you receive a notification that Tesla Sentry Mode has been activated, you will have the ability to go back and review the footage taken during the incident. There are many different ways to do this, from viewing it directly on your Tesla to using a compatible device to load your USB.
Keep in mind that if you want to back up the data on your USB device, you will want to remove it from the vehicle and plug it into a computer. Doing this is particularly useful when you have a smaller device but still want to keep days worth of footage.
Using the Dashcam Viewer to Review Tesla Sentry Mode Footage
One of the easiest ways to review any footage taken when Tesla Sentry Mode is activated is to use the Tesla Dashcam Viewer. To do this:
- Press the Dashcam icon on the control panel.
- Choose “Launch Viewer” from the drop-down menu.
- Use the menu in the upper right corner to choose the event you would like to view.
Using the Tesla Dashcam Viewer, it is easy to cycle through your Tesla’s front camera and the cameras on the four corners of the vehicle. This makes it quick and easy to see everything that happened during an event.
Using a Windows PC to Review Tesla Sentry Mode Footage
If you would prefer to review your footage on your PC, you can easily remove your USB device and insert it into your computer to do so. Once you have inserted your USB device into your computer:
- Head to Windows File Explorer and choose the TeslaCam folder.
- Open the folder titled Sentry Clips and choose the event folder you would like to view.
- In this folder, you will find video clips from all of your vehicle’s cameras for the event.
- Right-click on the TeslaCam folder and click eject before removing your USB drive.
When searching for footage, you should remember events are saved with the date and UTC, or Universal Time Code. If searching for a particular event, you may need to convert from UTC to the time of the event in your time zone to find it.
Using a Mac to Review Tesla Sentry Mode Footage
The process for reviewing Tesla Sentry mode footage on a Mac is similar to reviewing footage on a PC. Once you have inserted your USB device into your computer:
- Click on the TeslaCam folder in the right-hand corner of your screen.
- Alternatively, find the TeslaCam folder using the Finder window.
- Open the Sentry Clips folder and find the event you would like to view.
- To save an event on your computer, create a new folder, and then drag the event folder to the new folder. This will create a copy of the existing folder.
Alternatively, Mac users have the ability to download the Sentry Viewer app from the Apple Store. This third party paid app allows you to easily review any footage from a USB device inserted into your Mac. Unlike the standard method, the Sentry Viewer allows you to view all footage of an event taken from all of your Tesla’s cameras at the same time.
Deleting Footage from Your USB Device
One of the benefits of using either a PC or Mac to review your footage is the ability to erase footage you no longer need on your USB device. This will ensure you have the storage space you require to hold all of your dashcam and Tesla Sentry Mode footage.
To delete footage, simply follow the standard procedure for erasing files. However, remember to empty your Recycle Bin before removing your USB device. If you do not do this, you could end up with temporary files. This can corrupt your USB device, making it impossible to use for Tesla Sentry Mode until the problem is resolved.
Using iOS to Review Tesla Sentry Mode Footage
If you are an iPhone or iPad user, a third-party app called SentryView you can use to review Tesla Sentry Mode footage. To use the app, you will need an adapter compatible with your iPhone or iPad to hook up your USB device. To review footage using the app:
- Open the SentryView app.
- Click on the TeslaCam folder.
- If the TeslaCam folder is not available yet, head to settings and choose “Adapter.” After this, you will be able to select the TeslaCam folder.
- Select Sentry Clips and then select the event you would like to review.
Currently, there is no similar app available for Android users.
Removing the USB Device from Your Tesla
It can be tempting to simply pull out your USB device and head to your computer to review footage. However, when removing your USB device, you should treat it the same way you would if removing it from a computer. Not following the proper procedure can lead to corrupted files.
Tesla remedies this issue by storing these files outside of the TeslaCam folder. These corrupted and recovered files are labeled FSCK. However, corrupted files can sometimes lead to USB issues. This is why it is still a good idea to turn off the Tesla Dashcam before removing the USB.
If the camera icon has a red dot, it is currently recording, and you may need to turn it off before removing your USB device. To do this, simply tap and hold the icon until you see a white pulse.
When the camera icon on your control panel is gray, this means it is not recording. At this time, you can safely remove the USB device from your Tesla without any fear of corrupting your files.
Troubleshooting Issues with Tesla Sentry Mode
Tesla Sentry Mode and the Tesla Dashcam are both incredibly useful. However, with technology this sophisticated, it is not surprising many different issues can arise. Often these issues arise after updates. These issues are usually temporary, as updates are released in Beta mode, and any issues are fixed over time.
If there has not been a recent update, various other factors can lead to issues. Though it does not often happen, occasionally, your Tesla Dashcam may fail to work properly. When this happens, you will also be unable to use Tesla Sentry Mode. You may see a small gray “X” next to the Dashcam icon, indicating it is not working.
Many Tesla owners experience issues when trying to use a new USB device, which usually means you will need to format your USB device before using it. However, there are many other common issues you may experience related to your USB device.
Identifying Issues with Your USB Device
You may experience issues if you are using your USB to store music in addition to files from your Dashcam and Tesla Sentry Mode. It is important to note you will need separate USB devices for your music and your dashcam.
Your USB device may also contain corrupted files in the TeslaCam folder. As mentioned, this can happen if you do not remove your USB device from your computer properly. In this case, simply delete the current TeslaCam drive and start over with a new one.
You should also remember you will need enough storage space on your USB for the Tesla Dashcam and Tesla Sentry Mode to work properly. Be sure you are deleting video files you do not need on a regular basis to prevent this issue.
Additionally, you may need to delete the FSCK files on your USB device, as these can take up a lot of storage space. Because they are created so often, they can build up quickly. It is always a good idea to delete these files regularly.