I recently purchased a Rockler I-Semble Murphy bed kit. This kit comes with all of the hardware needed to build a Murphy wall bed, minus the wood to build the cabinet. It also comes with dimensions for the plywood cuts to build the cabinet. I took advantage of using the cutting service at our local home improvement store rather than leaving with full sheets of plywood to have to cut myself. The associate let me know the upper headboard is below the minimum cut size. More than likely, I could have had it cut off first. Instead, I left with just one piece that still needed to be cut.
With the left over “scrap” plywood, I had enough to build a hidden door. More to come on this build as well.
Rockler I-Semble Murphy Bed Kits
The I-Semble Murphy Bed Hardware Kits are available for vertical and horizontal configuration. They offer kits for twin, full, and queen size beds. Based on the room I’ll be installing our Murphy bed in, vertical was the only option for us. We also opted for the queen size.
The Hardware
Here’s everything that comes with the kit (minus the packs of bolts, nuts, and screws). Again, you have to purchase your own plywood for the cabinet. It also does not include #8 x 2″ screws, dowels, or wood glue. Also not listed in the instructions was an 8mm Allen wrench, more on that later.
Tools Required (Not Included)
Per the instructions (the copy I received was last revised December 2018), these are the required tools that are not included:
| Drill | |
| Saw | Circular Saw or Table Saw |
| Stud Finder | |
| Tape Measure | |
| Pencil | |
| 3/8″ Nut Driver or Socket Wrench | I lightly used an impact driver for the bed frame |
| Phillips Screwdriver | |
| Doweling Jig | |
| Drill Bits | 13/64″, 5/16″, 3/16″, 5/32″, 3/8″, and 27/64″ |
| #8 Countersink Bit | |
| 8mm Allen Wrench | This was not listed in the instructions |
Quality Control Issue
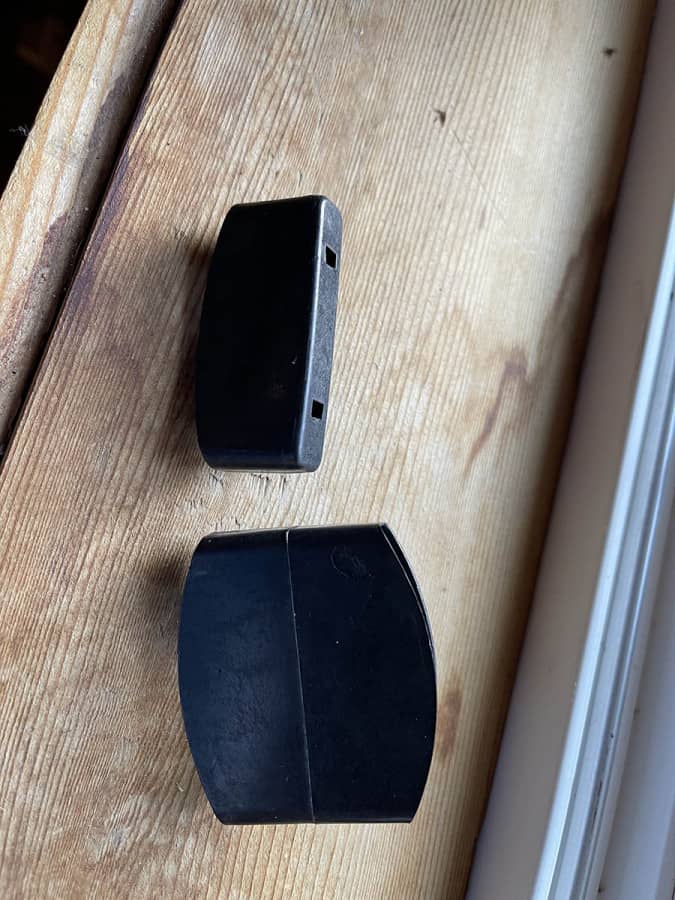
When I picked up the Long Center Frame Support, I could hear something rattling inside. I certainly didn’t want to have this sound occur every time the bed was raised or lowered, so I tried getting whatever it was out. I assumed it was either a piece of welding wiring or a piece of metal that was punched out. With a flashlight looking inside of one of the holes, it appeared to be a round piece of metal. It also sounded as though there were multiple. I tried getting it out through the center hole, but it wasn’t going to be easy. Next, I double-checked the instructions to confirm the center hole on the end bracket wasn’t used for anything, which it wasn’t. I then drilled a larger hole into the bracket to make getting these pieces out much easier.
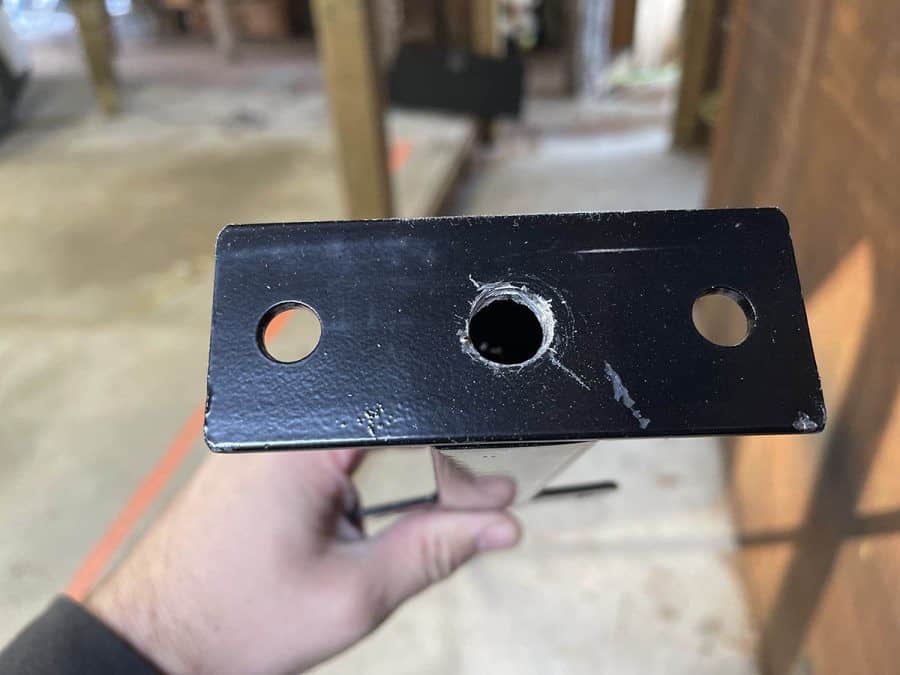
After widening the hole, these pieces came out fairly easily. I assume a stamping machine was used to punch the holes out on this piece and it wasn’t fully cleared when the end brackets were welded on.

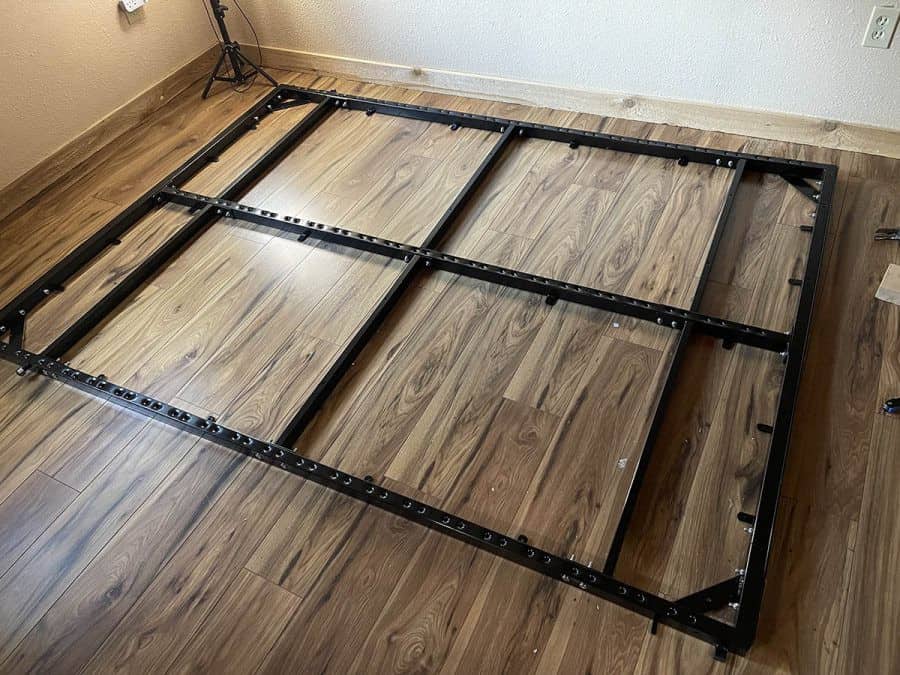
With that out of the way, it was time to start assembling the bed frame.
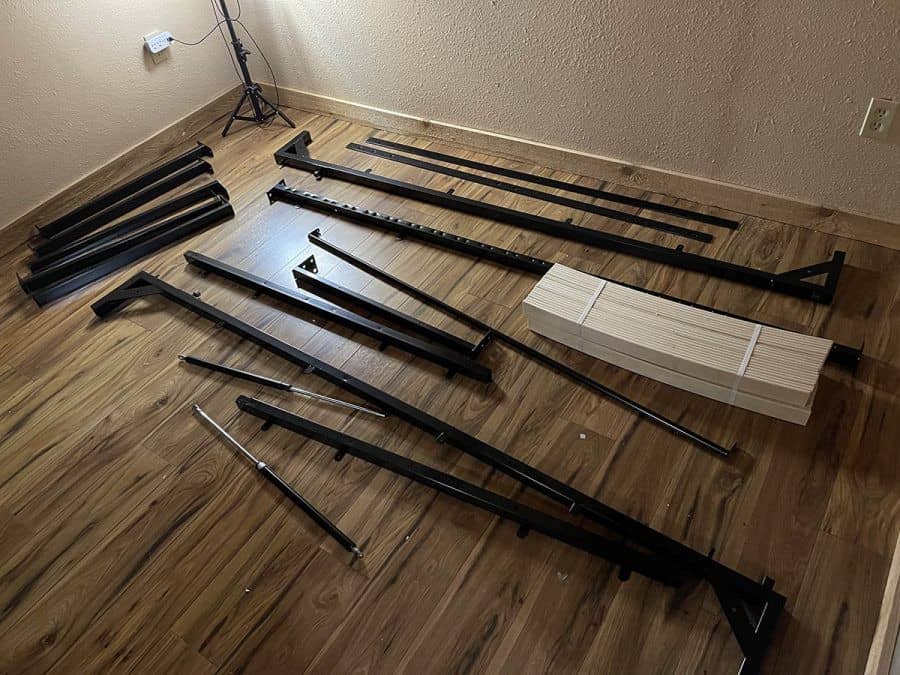
Murphy Bed Frame Assembly
Following the I-Semble instructions, everything is fairly straight forward. There are several bolts, nuts, and washers however, so it can be a bit time consuming. I laid out all the parts and began assembly. To speed things up, I did use an impact driver, but made sure not to apply any torque and used a socket and ratchet to get everything “hand tight”. Here’s the frame fully assembled:
Slat Assembly
I missed this at first, but there are actually two different slat caps. The double slat caps are intended to be used on the middle. I used them on the outside as well and ended up having to use a flat screwdriver to pry them back up and re-do the slats I had already completed.
Per the instructions, you want to leave Row 8 and Row 20 open. This is to allow room to later install other pieces. Also, on queen size beds you’ll leave Row 11 open as well. I missed the queen size call out and had to remove Row 11. My inspectors calling out that I should not have installed Row 11 yet:

Tip: I found it easiest to install the left and right slat caps, then push the middle cap into place. The instructions do you mention you may need to use a mallet, but I didn’t find this necessary. Your results may very.

Cabinet Build
The instructions call for the cabinet build to be done first, but I knew it was going to be a while before I was going to pick up the plywood. So, I assembled the bed frame first. For the queen size Murphy bed, you’ll need 5 sheets of 4’x8′ plywood. Wood prices have skyrocketed in the last year or two, but have started coming down a bit. I spent $71.58 USD for each sheet in November 2021. I went with a finished maple plywood, it has a veneer on one side. The veneer side will be used for the inner portion of my cabinet and I will either stain or add slats to the exterior. My goal is to get it assembled, then I’ll focus on some aesthetics later.

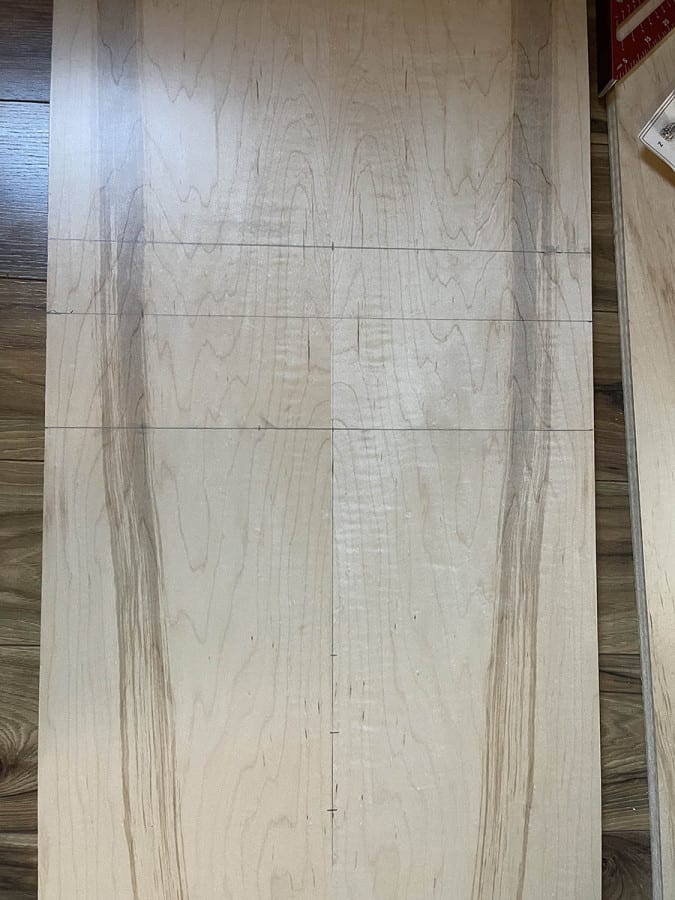
Plywood Cuts
This is as far as my build has gone. I have the sheets cut, but need to haul them over to our cabin and then begin assembly. The instructions do not include a cut diagram, so I mapped out what I thought would be the best cut layout for our queen size bed. Feel free to use these for your own reference, but I’m not liable. Be sure to verify your required measurements. Again, this is for the queen size Murphy bed.

And here’s the cut layout I went with, once again, for a queen size bed:


Assembling the Cabinet
Here we go, cabinet time! At first I thought I’d have to bring most of the plywood for the cabinet over in a trailer when the weather through the mountain pass improved. Surprisingly, I was able to fit all the sheets of plywood into our Model X, but did take two trips to get everything as I had other items I was hauling over as well.
Cabinet Assembly
Here’s some photos during the assembly process, they say to measure twice, cut once. I probably measured three time before drilling.
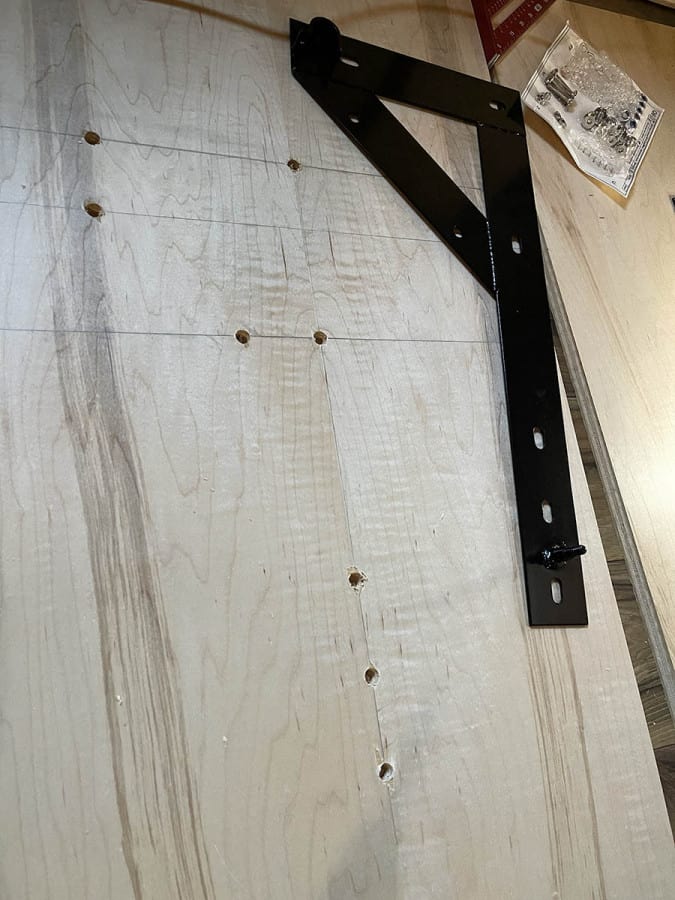
For installing the brackets on the side pieces, the mounting holes land on one of three horizontal lines and one vertical, so I figured it’d be easier to start by drawing those lines at the appropriate measurements. From there, I measured in (based on the numbers in the manual).
After making marks, I wanted to double-check that where I was going to drill did in fact line up with the holes of the bracket.
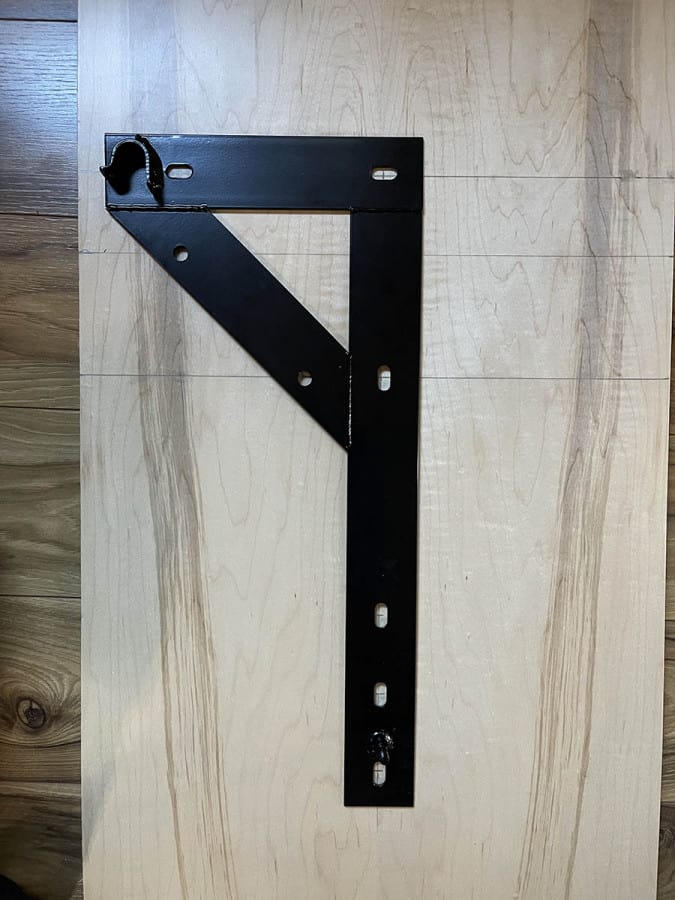
Drilling Mounting Holes for the Side Brackets
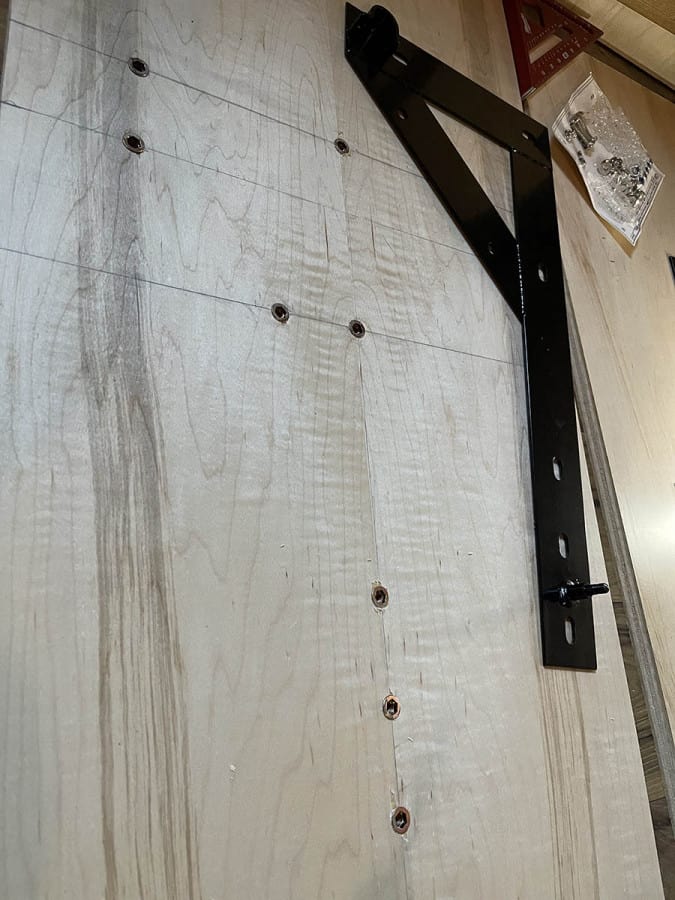
This is where the fairly uncommon 27/64″ drill bit was used. I previously marked with tape my depth on the drill bit for the holes and began to drill them out.
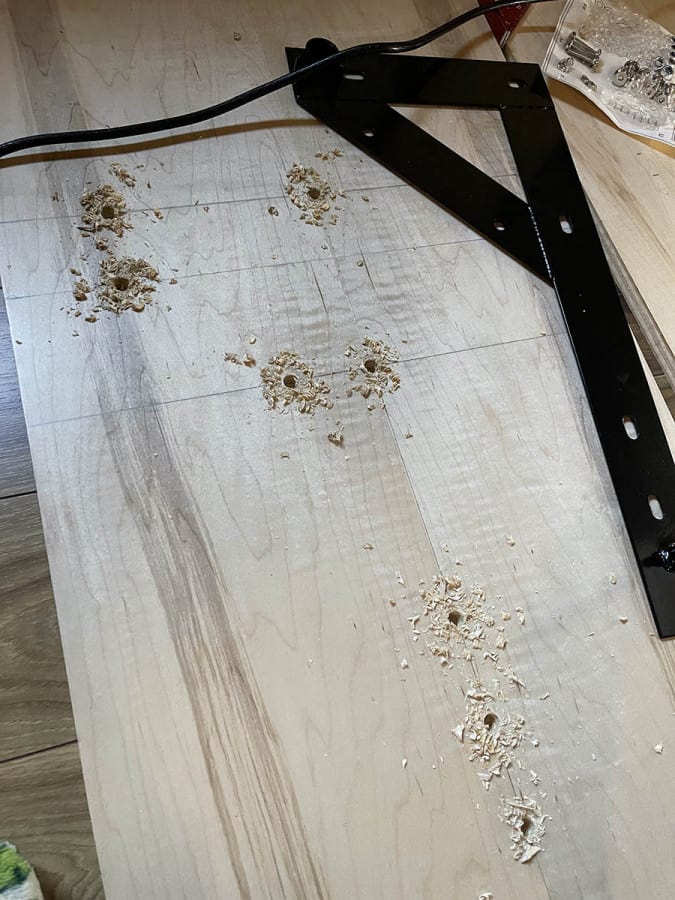
Used a shop vac to clean things up. Don’t want the depth of the holes off because of saw dust debris.
Installing the Threaded Inserts
This is the 8mm Allen wrench that wasn’t including in the required tools. I didn’t have one that large at the cabin, so I had to run into town to the small, local hardware store. They only had sets (I would have preferred a socket), but $15 later and I was ready to install the threaded inserts. One the inserts were in, the mounting plates were ready to be bolted into place. Rinse and repeat for the other side and the cabinet was ready to start coming together.
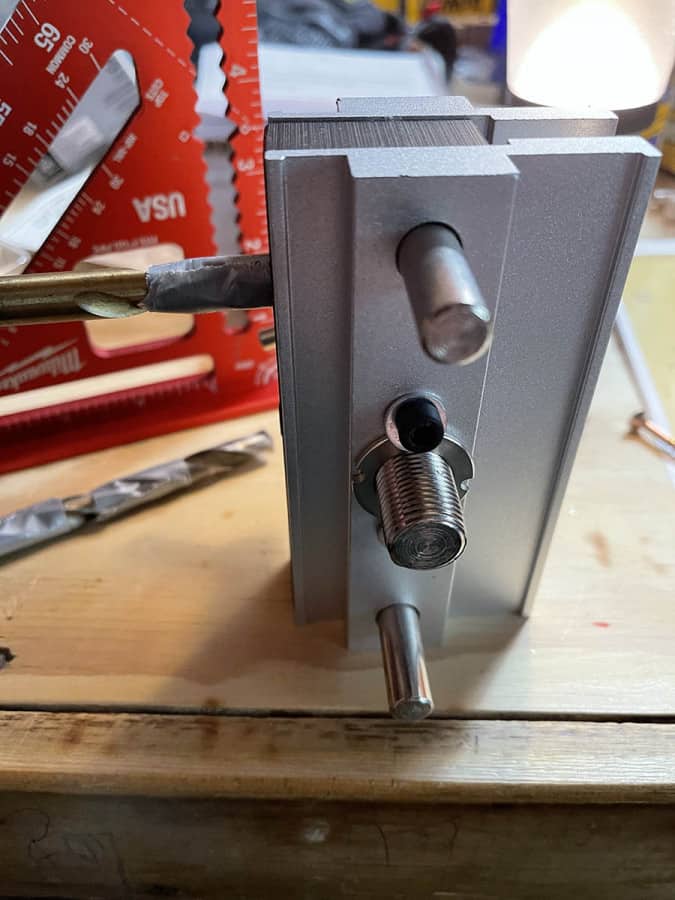
Self-Centering Doweling Jig
I’ve never used a self-centering doweling jig, let alone owned one. I bought this one by AutoToolHome on Amazon. A self-centering doweling jig was listed on the required tools, I certainly wouldn’t have felt comfort able drilling straight for the required depth without one. You’ll see next to the arrow in the photo below there’s lines for the corresponding bit sizes. For these dowels, a 3/8″ drill bit was required.

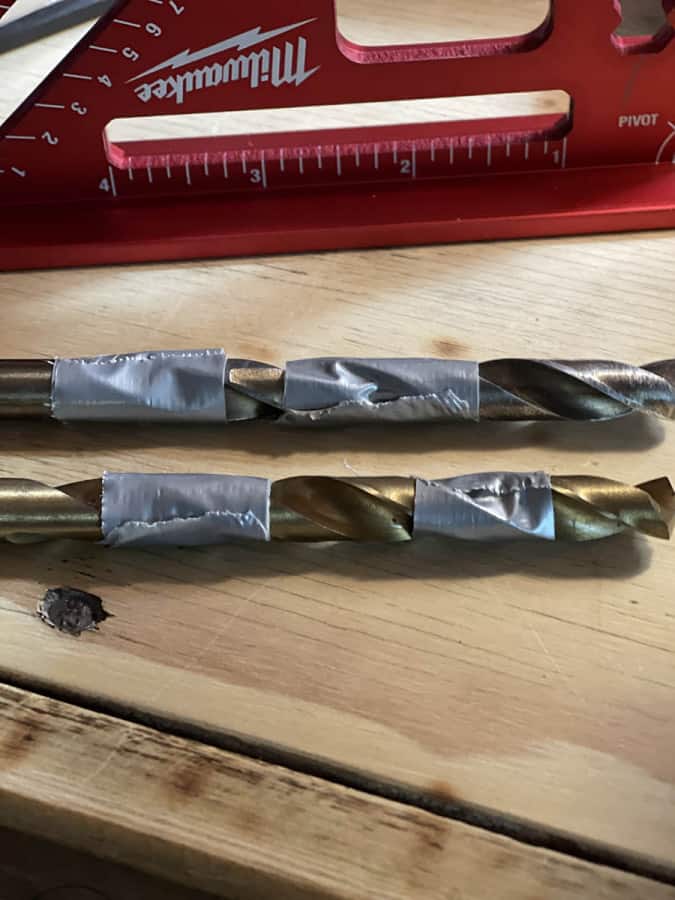
Using tape to mark my drill depth. I used two separate drill bits so I could have one marked for each required depth.
Initial Assembly of the Murphy Bed Cabinet | Electrical Work
After a lot of measuring and drilling the cabinet took shape. Also notice a light switch I need contend with. It actually doesn’t control lights, rather a single outlet in the wall. The cabinet left cabinet side will block this outlet, so I’ll need to relocate it. Rather than a lamp in this room, I’ll like running farmhouse style ceiling light. Rather than relocating the light switch, I may just go with a smart switch to have it voice controlled when the bed is closed.
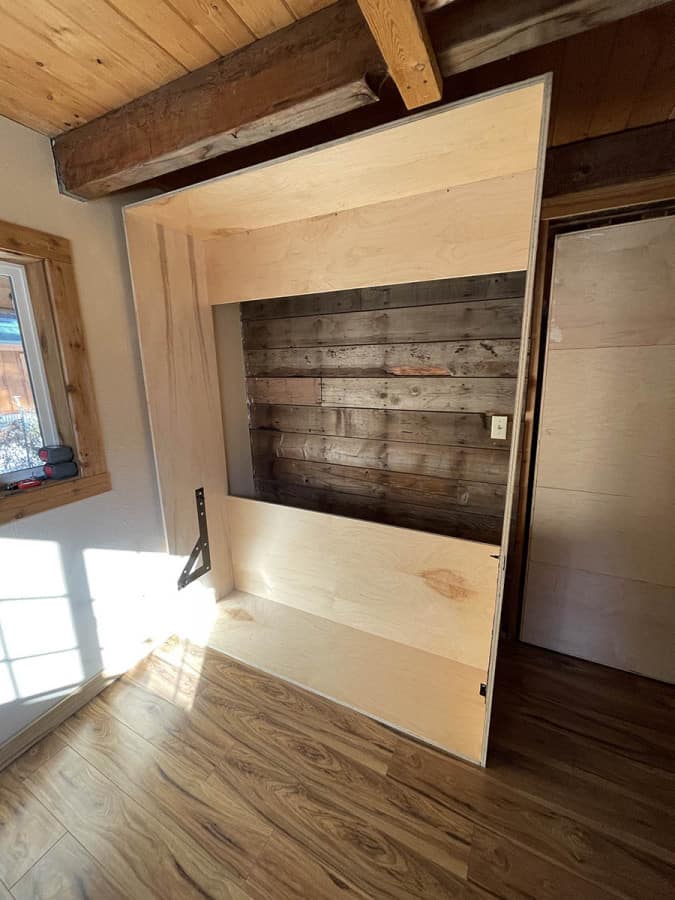
Murphy Bed with an Uneven Floor
Once I put the frame into the cabinet, I noticed an alignment issue. It’s difficult to tell in the photo, but the second tab down from the right was rubbing on the cabinet. After pulling out the level and checking a few things, I found that the floor was not level. I’m having to shim up the right side by at least 3/4″ to level it. A temporary shim improved things, but I’m going to have to do some fine tuning before I’m ready for final assembly. I wanted to verify fit, function, and clearance, so I haven’t applied any wood glue yet.
In the picture above you’ll see the beam I was concerned about, but everything had clearance. The Murphy bed cabinet is nearly as wide as the wall there, with only a couple inches clearance to the doorway. So the mattress frame doesn’t run against the adjacent window trim, I’m going to shift it to the right a bit more.

Disassembly
The plan from the beginning was to disassemble the entire cabinet. I need to do some sanding on the outer portion, stain it, and then I’ll re-assemble with wood glue. This is where I’m currently at on the project, should have things wrapped up in the next couple of weeks.
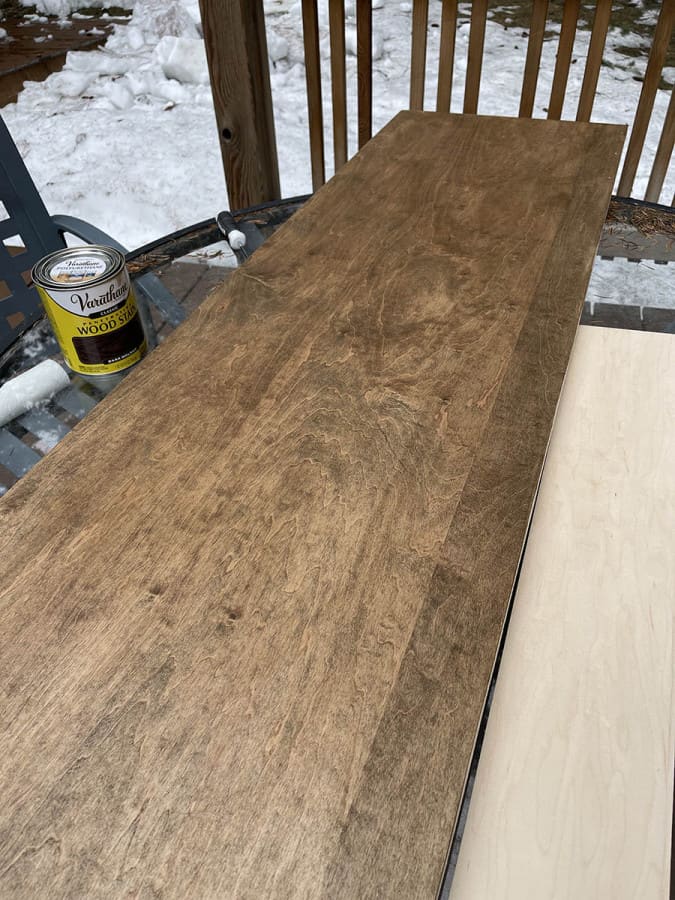
Staining
Here’s the first two coats of stain. Despite the snow in the background, it was in the mid-50’s. Shortly afterwards I did bring it inside to finish drying. I placed another unfinished piece of the raw maple finish to the right for comparison.
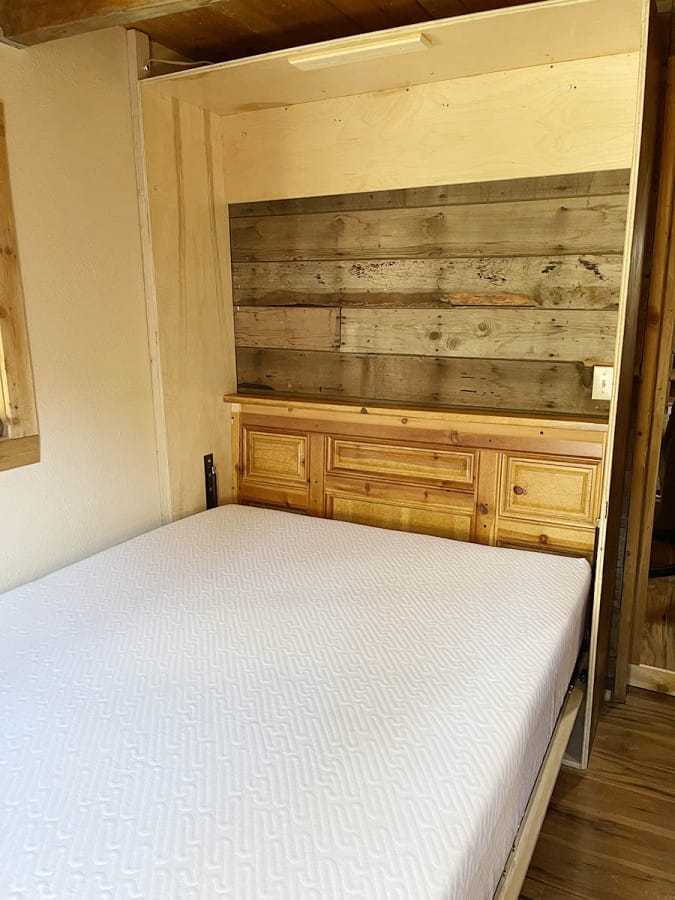
Murphy Bed Re-Assembly and Install
Getting everything installed proved problematic with an uneven floor. It was out of level and required to be shimmed about 3/4″ on the right side. I still need to figure out what I’m going to do for finishing touches of the front panels and trim, but for now it’s fully functional and ready to be used.
I ended up cutting a wooden headboard my wife picked up from a Goodwill store. I’m going to do similar with the footboard from the same frame set for the upper section. The plan is to sand those pieces down and re-stain them to match the outer panel.